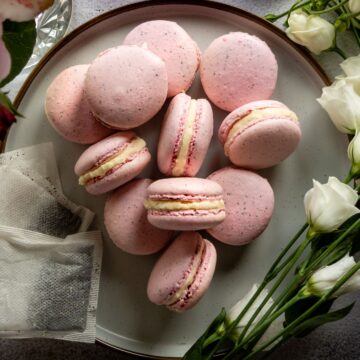
Earl Grey Macarons
Exquisitely flavoured with the fragrant tones of Earl Grey tea and a soft buttercream centre, these Earl Grey Macarons are a true indulgence.
Servings: 15 macarons
Calories:
Follow at @ellasbetterbakes or tag #ellasbetterbakes!
Alter quantities (metric only) 15 macarons
Here's what you'll need...
- Macaron mat or greaseproof paper
- Large, heavy gauge baking sheet
- 1 piping bag with a Wilton 1A round nozzle fitted
- 1 piping bag with a star nozzle fitted
Ingredients you'll need...
Earl Grey Macarons
- 80 g Almond flour (13½ tbsp)
- 100 g Icing (confectioner's) sugar (13 tbsp)
- Pinch of salt
- 80 g Egg whites (room temperature) (US = whites from 2 extra large eggs)
- ¼ teaspoon Cream of tartar
- 80 g Granulated white sugar (11 tbsp)
- Tea leaves from 1 Earl Grey teabag
- Gel food colouring (I used Sugarflair Claret)
- ½ teaspoon Vanilla extract
Earl Grey Macaron Filling
- 100 g Unsalted butter (7 tbsp)
- 200 g Icing (confectioner's) sugar sifted (US = 1 cup and 11 tbsp)
- 1 tablespoon Maple syrup
- 1 tablespoon Milk
Here's what we do...
Earl Grey Macarons
- Measure a piece of greaseproof (parchment) paper for your baking tray and then draw out 1½ inch circles onto it, leave a 1 cm gap between them.
- Sift your almond flour, salt and icing sugar together through a fine-mesh sieve. This can take a while if the flour is a bit coarse so you may need to use a metal spoon to push the mixture through the sieve.
- Ensure your metal or ceramic mixing bowl and whisk are clean, to be sure you can wipe them down with white wine vinegar.
- With the whisk attachment fitted, whisk your egg whites briefly until they become a little foamy and then add your cream of tartar.
- Whisk your egg whites again until they form soft, foamy peaks that bend over onto themselves.
- Leaving your stand mixer on low, gradually whisk in your granulated sugar, making sure each addition is fully mixed in before you add the next. I tend to count 10 seconds between each spoonful. Remember to wipe around the sides of the bowl with a clean spatula to be sure all of the sugar is mixed in.
- When you've added all of your sugar, turn your mixer up to medium-high and give the meringue mixture a good whisk until it forms soft peaks that bend back on themselves, rather than stand up straight.
- Next, add your Earl Grey tea leaves and your gel food colouring, then whisk on a high setting until your meringue forms stiff peaks that no longer fold back on themselves but remain rigid and upright, i.e. hey should be pointy peaks that do not collapse over.
- Add your vanilla extract and fold in just a few times to start to incorporate.
- Add ⅓ of your almond flour and icing sugar mixture and fold in with your spatula. Stop as soon as your flour mixture has disappeared then repeat twice more until it has all been mixed in.
- Keep folding your mixture (this is called macaronage - see main blog post for a description of the technique), until you can hold up your spatula and move it in the direction of a figure 8 and the batter falls into this shape like ribbon, without breaking. You don't want to risk over-mixing as this will ruin your macarons, so keep checking your batter for this magic moment and then immediately stop folding.
- Add the batter to your piping bag with a Wilton 1A circle piping tip added. You may find it easier to pop the piping bag into a pint glass, fold down the sides and then add the batter, so it doesn't get too messy!
- Turn your greaseproof paper over, so that the circles are facing down and therefore the outline does not transfer to the baked macarons and add blobs of meringue to the corners to secure it to the tray
- To pipe your Earl Grey Macarons, take your piping bag and hold it at a 90° angle, press to squeeze out a little mixture into a small circular blob in the centre of one of your drawn circles. Then pull back very slightly and squeeze again until you have nearly filled your circle. Stop piping just before you reach the edge of the circle as the macaron mixture will spread out a little whilst drying and baking.
- Bang the trays down 5 times to release any air bubbles and pop any air bubbles that rise to the surface of the macarons with a cocktail stick.
- Set aside to settle for about 45 minutes at room temperature. Once the macarons have a "skin" on them, i.e. you can drag your finger over the top and they are not wet, they are ready to be baked. Noted that if they do not dry easily you can heat your oven to the lowest setting and, leaving the door open, place them in the oven until dry.
- Set your oven to 130°C Fan/150°C/300°F/Gas Mark 2.
- Place the macarons on the bottom or middle shelf of your oven.
- Bake for 17 minutes. The macarons are ready when they have risen a little and developed "feet", they no longer feel tacky on the top and they are no longer stuck to the greaseproof paper. If you find one of these elements has not occurred, leave them to bake for another couple of minutes, but be careful as they will quickly overbake.
- Leave your macarons to dry in your tin for 10-15 minutes then remove them to a cooling rack.
Maple Syrup Buttercream
- Beat your butter until soft and smooth.
- Beat in one heaped dessert spoonful of sifted icing (confectioner's) sugar at a time until all of it has been mixed in.
- Add your maple syrup and milk and beat in.
- Fit your star nozzle to a clean piping bag and pipe a blob (about a teaspoonful) in the middle of the base of a macaron, then place another on top, pressing down very slightly to affix it and spread the filling to the edges.
- For best results, leave your macarons for 24 hours to mature before eating.
Supporting Notes
See blog post TOP TIPS for lots of additional guidance and tips.
- Macaronage correctly to do this:
- scrape your spatula anti-clockwise around the side of the Earl Grey Macaron mixture, when you return to your starting point, turn the spatula over onto itself, so that the mixture is folded over;
- then drag your spatula through the centre of the mixture from top to bottom;
- once at the bottom drag the spatula around for a circle and a half back to the top and fold the mixture back in on itself again;