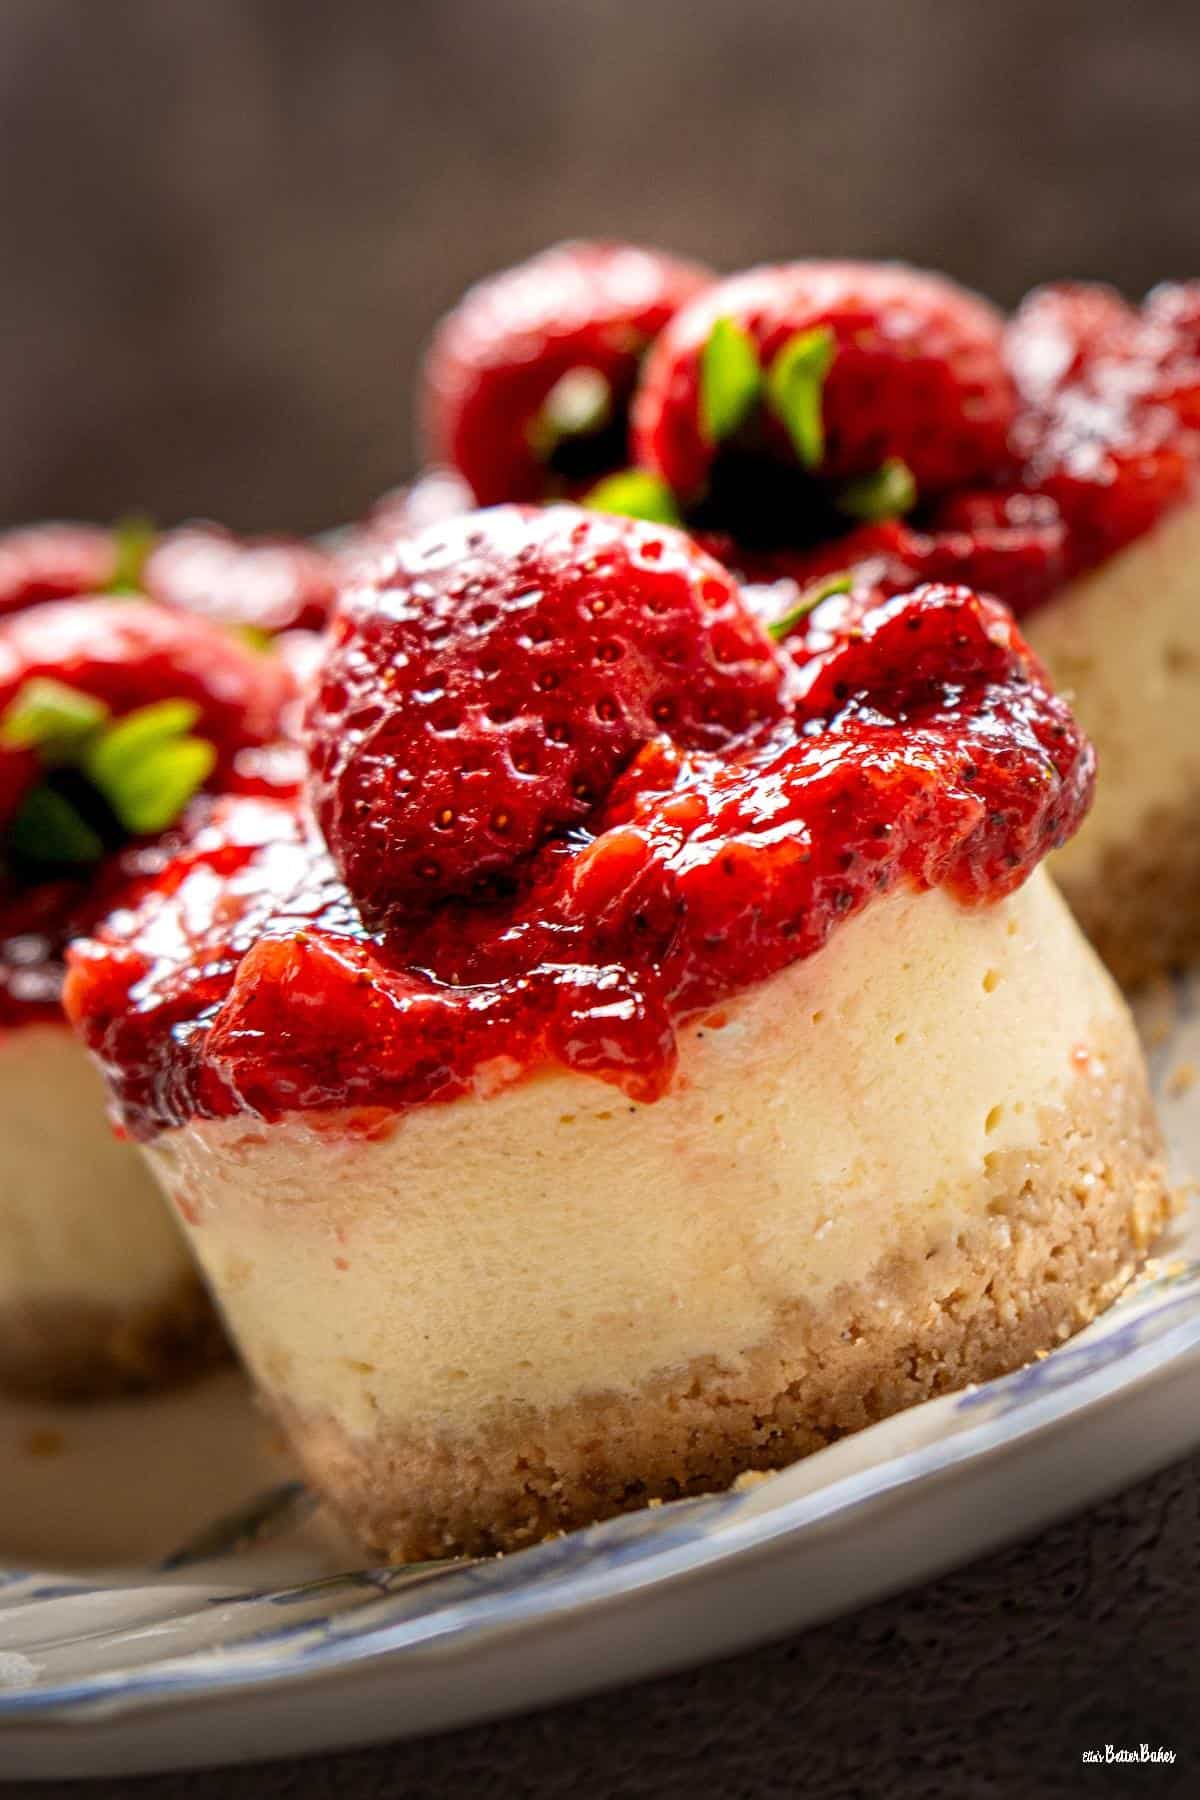
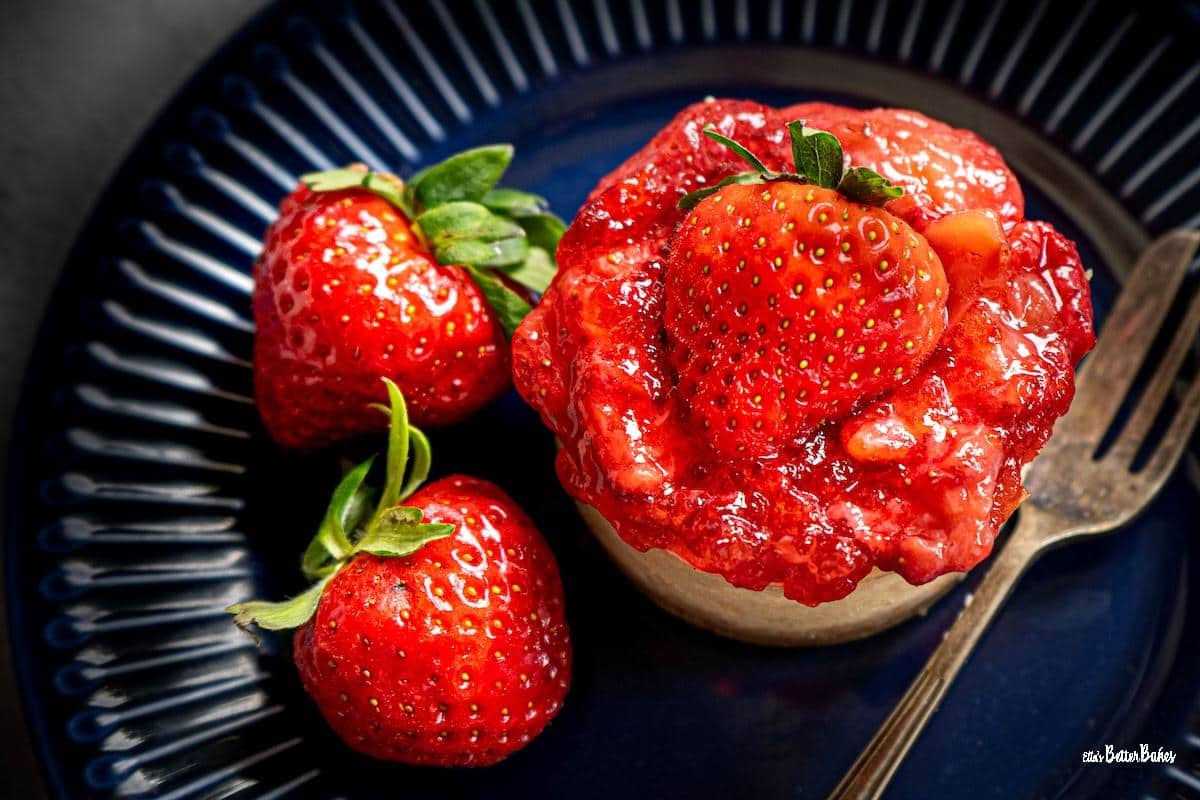
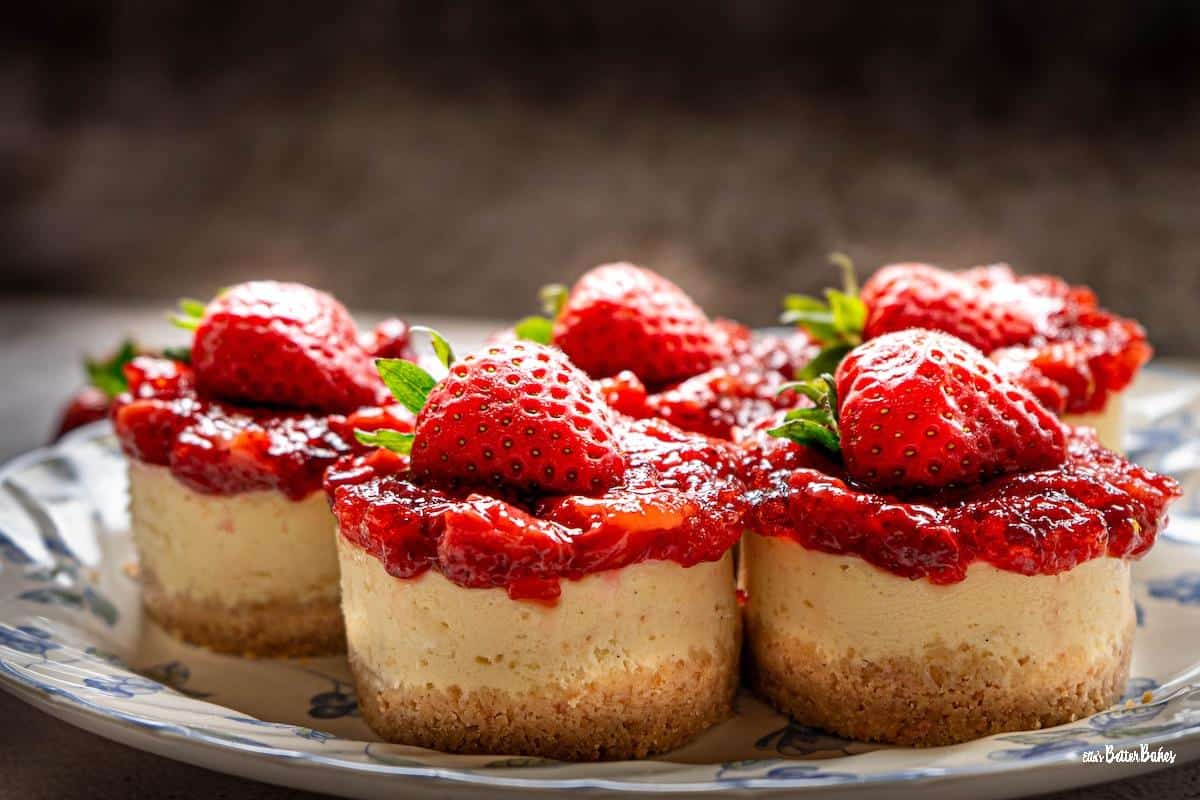
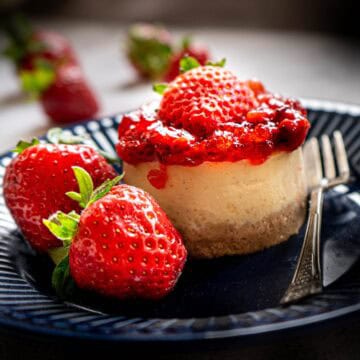
Roasted Strawberry Mini Cheesecakes
Roasted Strawberry Mini Cheesecakes with a biscuit base, velvety-smooth, creamy, slow-baked vanilla cheesecake filling, and delicious, jammy roasted strawberries on top.
This post contains affiliate links.
So, my lovely people, there are two main reasons for this Roasted Strawberry Mini Cheesecake post:
- I ADORE the sheer cuteness of mini cheesecakes and wanted to add some to Ella's Better Bakes.
- I (cheekily) reached out to Wrenbury to ask if they fancied teaming up with me, and they very kindly agreed! The deal being they'd send me their mini cheesecake tin (also available here on Amazon) and I'd give it an honest review in return. Quite frankly, reaching out in this way is not something I usually do, but I liked the look of their bakeware so much I thought I'd give it a go.
And I was not disappointed. The tin is excellent on every level!
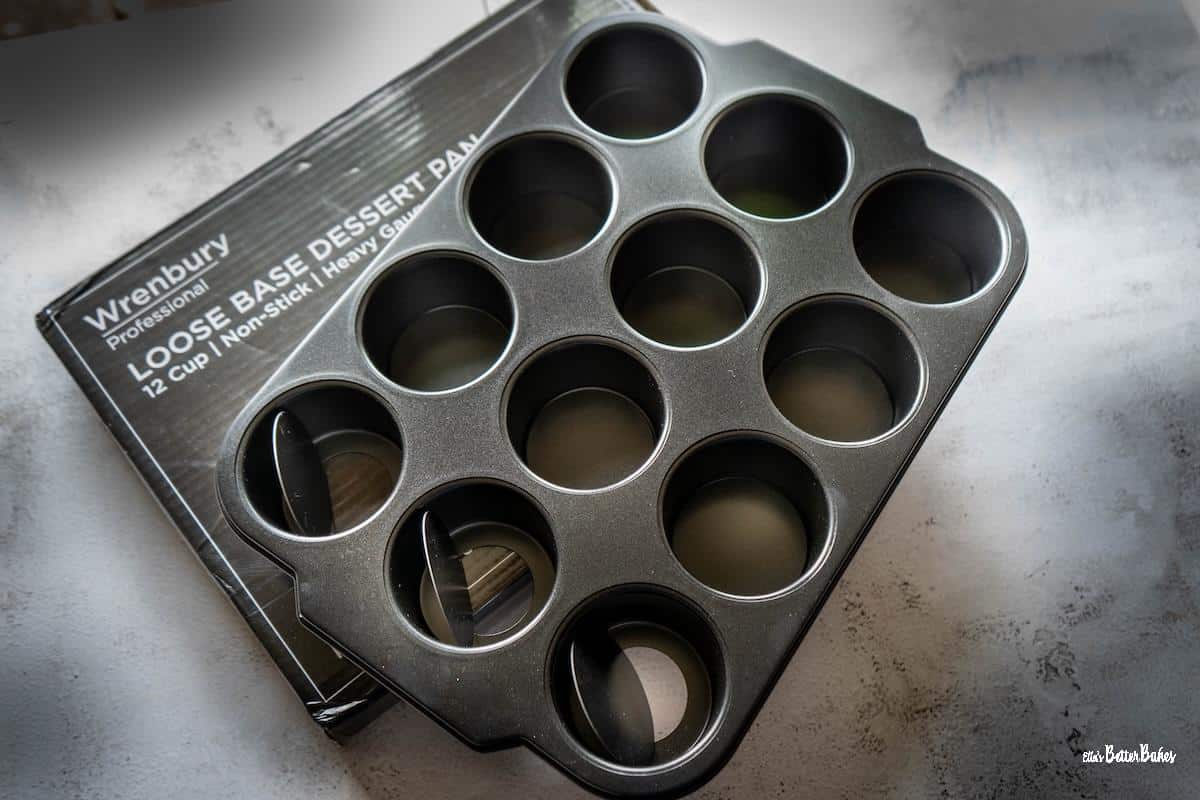
Check out 👀 the EXCELLENT Wrenbury 12 Cup Mini Cheesecake tin 👆🏻
What I love about WRENBURY products:
- Excellent quality - their bakeware is heavy-gauge carbon steel, which means it's heavy, solid and most importantly conducts heat to ensure an even bake. I was genuinely impressed by the sheer weight of the 12-cup cheesecake tray. It came in a presentation box and was well packaged.
The strawberry cheesecakes came out deep and evenly baked. They did not stick to the tin, and the loose bottoms in the tin meant they were easy to release. - Family run firm - another thing I really like about Wrenbury is their ethos and ethics; they are a family run small business who care about providing good-quality products to do a good quality job. And they succeed.
- Bakeware designed in England - Wrenbury design their own bakeware and use their own design processes, meaning they can guarantee the quality of their products.
- 10 year warranty - I know many items do come with a 10-year warranty these days, and I do wonder who takes something back after 9.5 years! But as Wrenbury products are of such excellent long-lasting quality, I think the odds are nobody will ever bother them regarding the warranty anyway. Evidently this extensive warranty is also proof that Wrenbury are totally confident of the durability of their bakeware.
Buy once...buy well... as they say.
So my advice to my lovely readers is, if you are going to make this recipe, invest in a Wrenbury 12 cup cheesecake tin; you won't regret it.
Getting back to the recipe for Roasted Strawberry Mini Cheesecakes then...
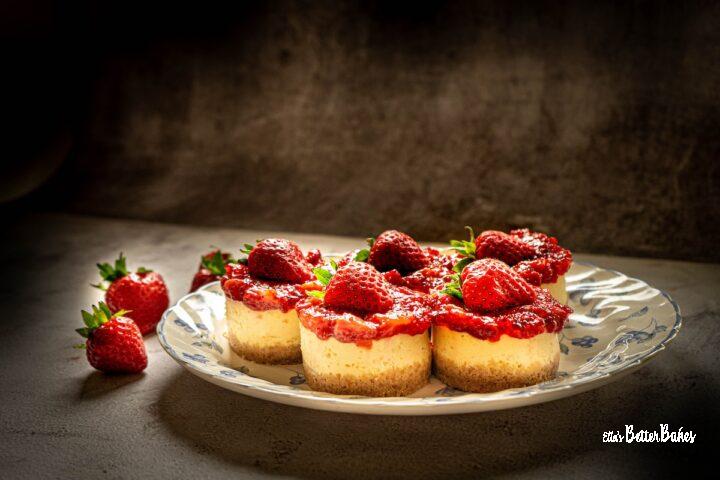
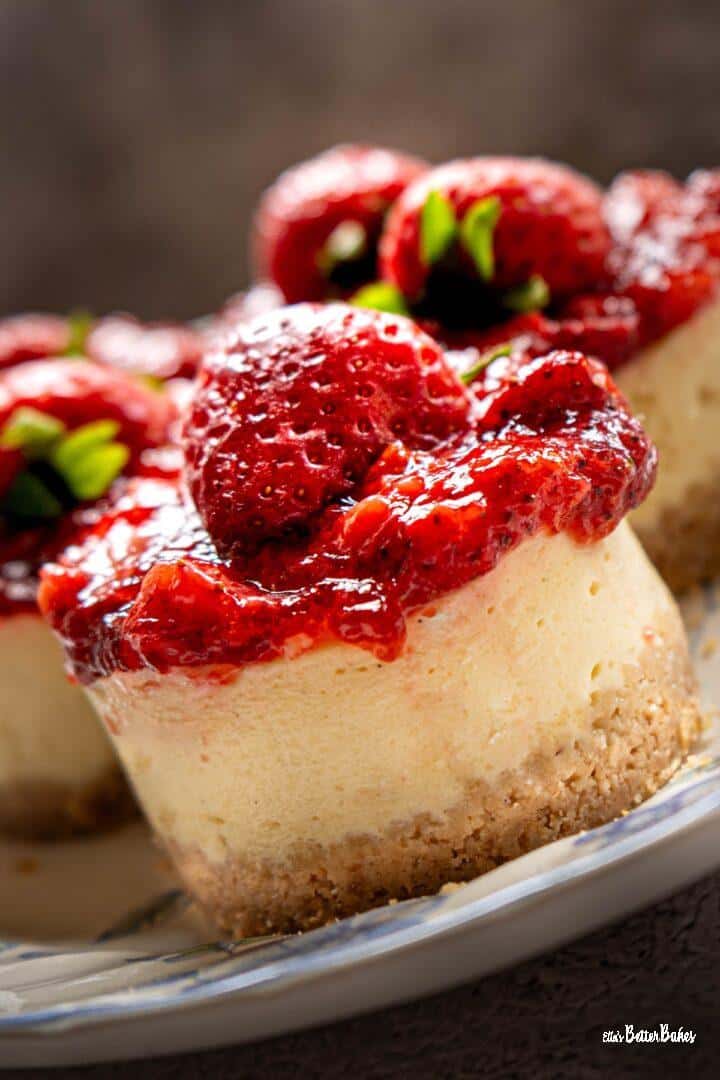
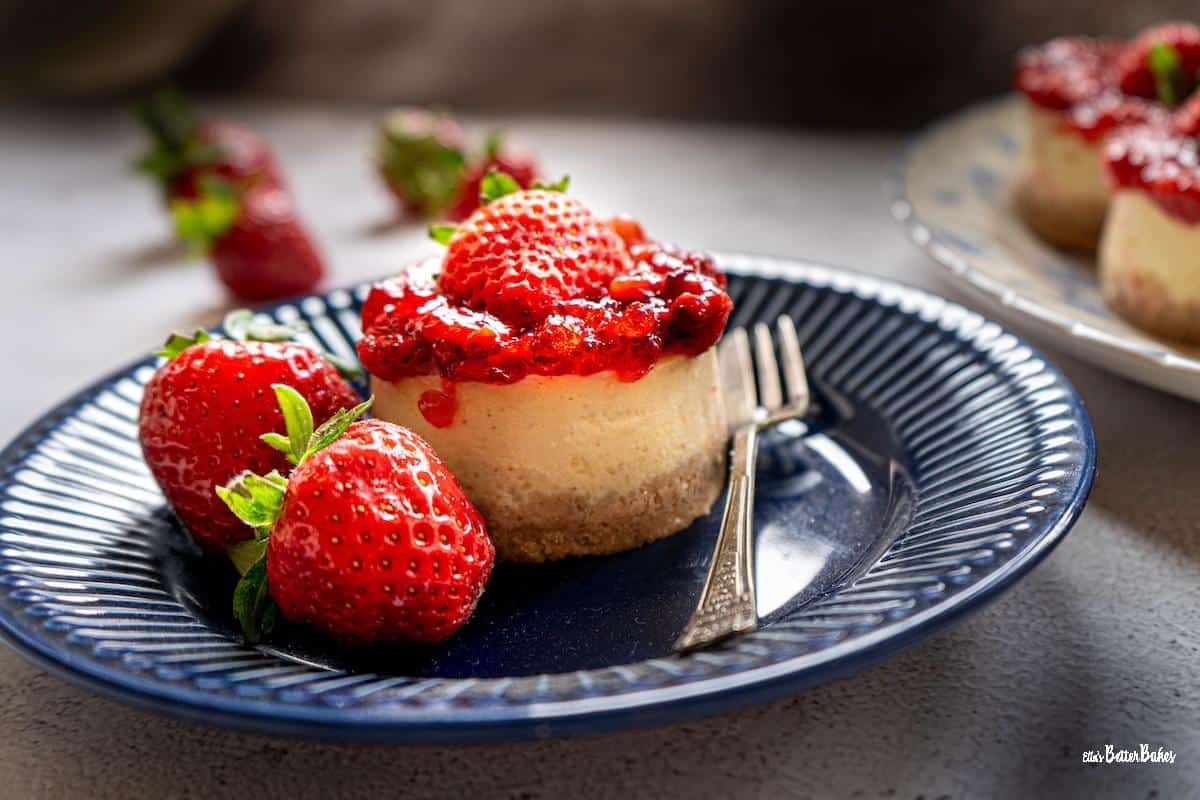
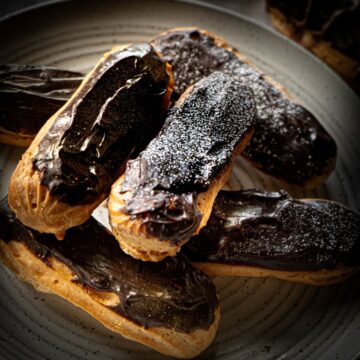
First of all, my, aren't they adorable!
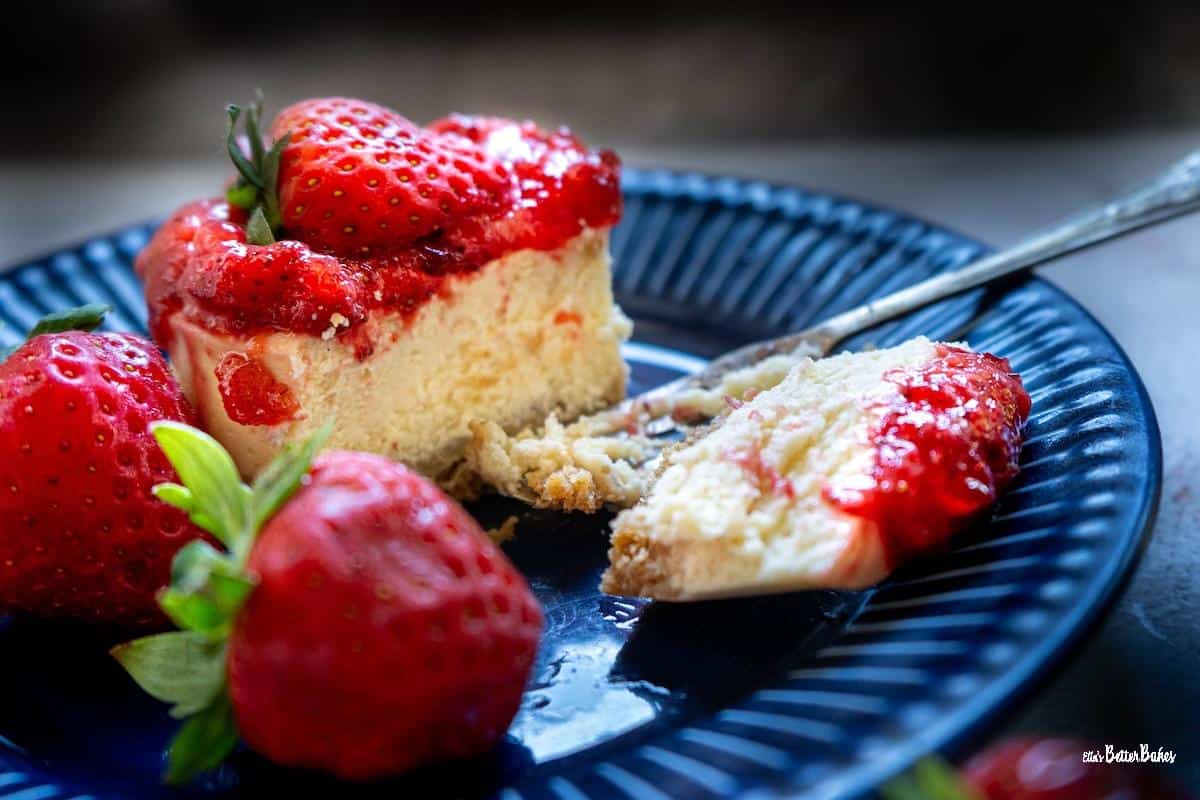
These are baked cheesecakes, but I will put a recipe below should you want to make the unbaked version. Both are great; I do slightly prefer the texture of a baked cheesecake, though; it is beautifully creamy and smooth.
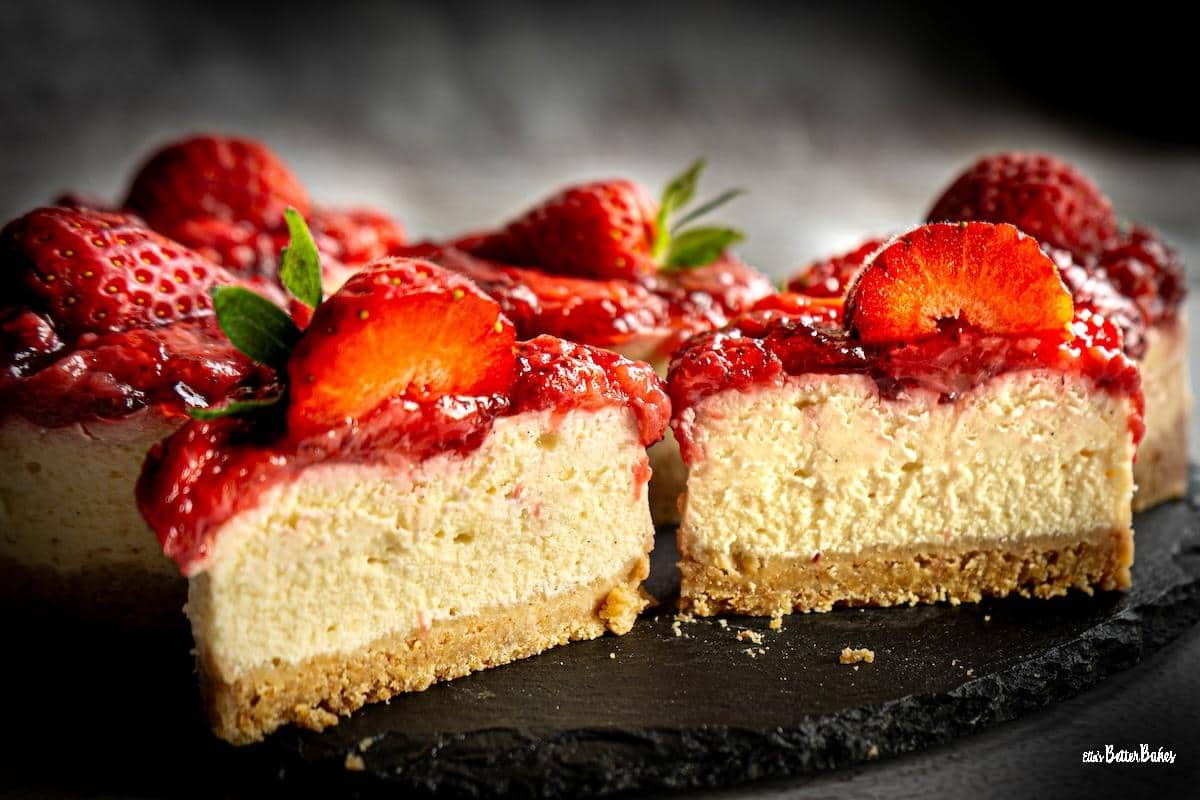
Roasted strawberries are also a game-changer. If you have never had roasted strawberries before, you are in for a real treat. The roasting process really intensifies the strawberry flavour. I mix them with a little bloomed (i.e. pre-soaked) gelatin to thicken them up a bit so that they sit on top of the mini cheesecakes without sliding down the sides. But this is optional.
Jump to:

Why make these Roasted Strawberry Mini Cheesecakes?
Thick biscuit base ✔️
Slow-cooked baked cheesecake filling means it is super creamy and velvety ✔️
Roasted strawberry jammy topping ✔️
Great way to use up strawberries that are just starting to go over ✔️
Perfect dessert ✔️
Can be made the day before needed ... in fact, they are better if left a day ✔️
Ingredients and Substitutions
See the Recipe card below for the exact quantities.
- Fresh strawberries - the strawberries do not have to be perfect; this recipe is great for using up ones that are just starting to go a little mushy (but not mouldy, of course!)
- Cream cheese - I prefer to use "Philadelphia" for all my cheesecakes; it just has a lovely flavour and gives the cheesecakes a perfect soft texture.
- Creme fraiche and sour cream - although I split this in the recipe feel free to alter the quantities for each, as long as together they come to 425 ml
- Eggs
- Digestive biscuits (Graham crackers if you are in the US) - feel free to try different biscuit bases; "Oreo" biscuits work really well, and Ginger Nuts are really good too for adding a bit of spice.
- Unsalted butter - I prefer unsalted, but salted butter will be fine.
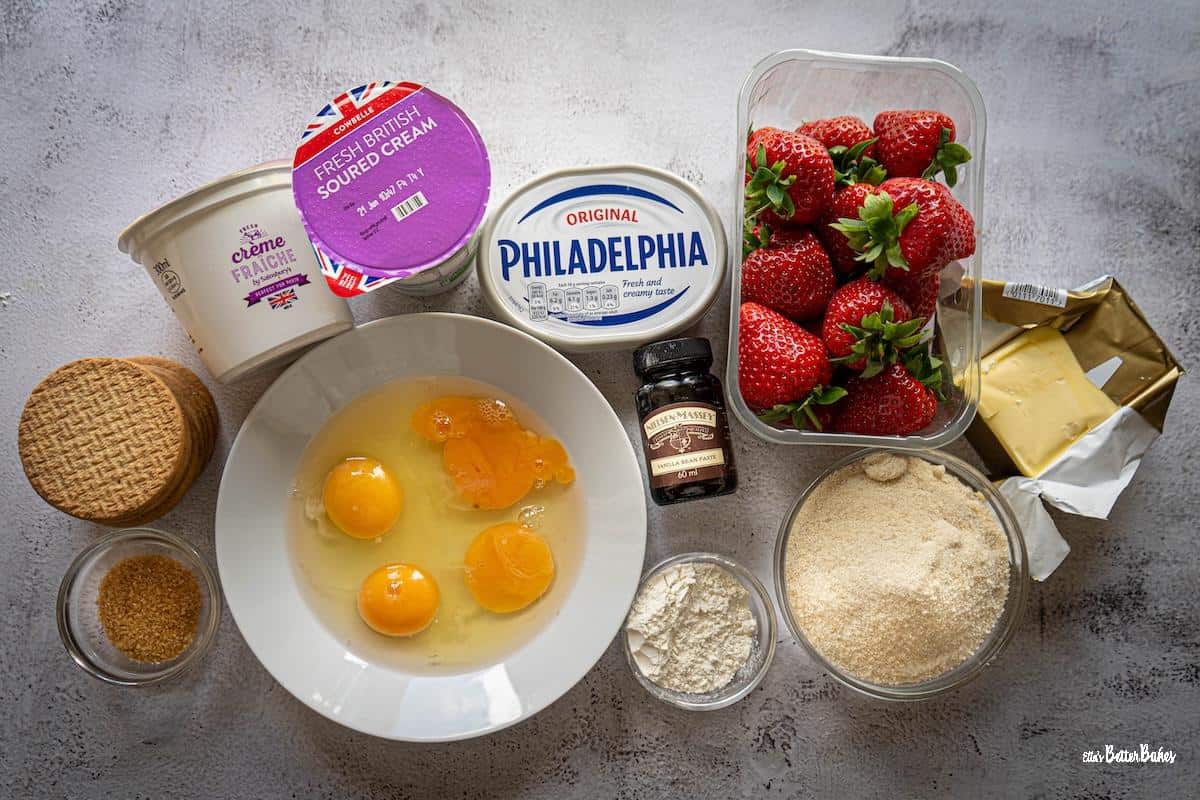
- Vanilla bean paste - I do find that the bean paste gives the cheesecake filling a lovely flavour as it is more intense than vanilla extract. That said, if vanilla extract is what you have, then go ahead and use that. I don't recommend vanilla essence though; horrible stuff and tastes very artificial.
- Golden caster sugar (superfine sugar) - this gives a light caramel undertone, but it can be replaced with white caster sugar .
- Plain flour - added to bind the cheesecake mixture together
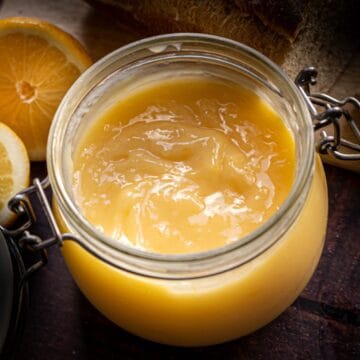
- Lemon juice - added to the roasted strawberries to help them gel together. Also added to the cheesecake mixture as lemon juice mixed with dairy acts as a leavening agent.
- Granulated sugar - for the roasted strawberries, but any sugar will be fine, or you can use honey or maple syrup.
- Gelatin powder - a little is mixed with some water and then added to the roasted strawberries whilst they are still hot; it helps firm up the liquid so that the strawberries stay sitting on top of the cheesecakes. It is optional though.
Instructions
See Recipe card for exact instructions.
Biscuit Base
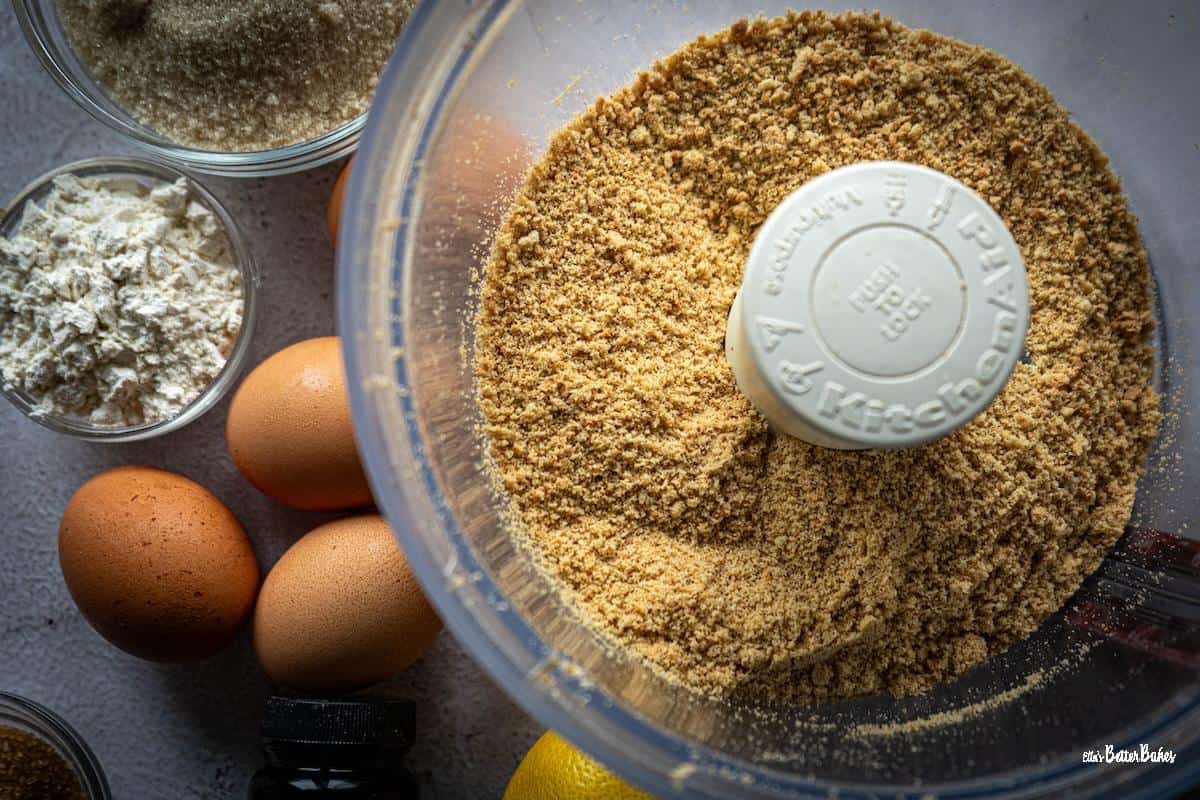
Place your biscuits into a food processor with the blade attachment fitted and whizz until sand-like. (Do not be tempted to use a NutriBullet; it will turn the biscuits to dust!)
.
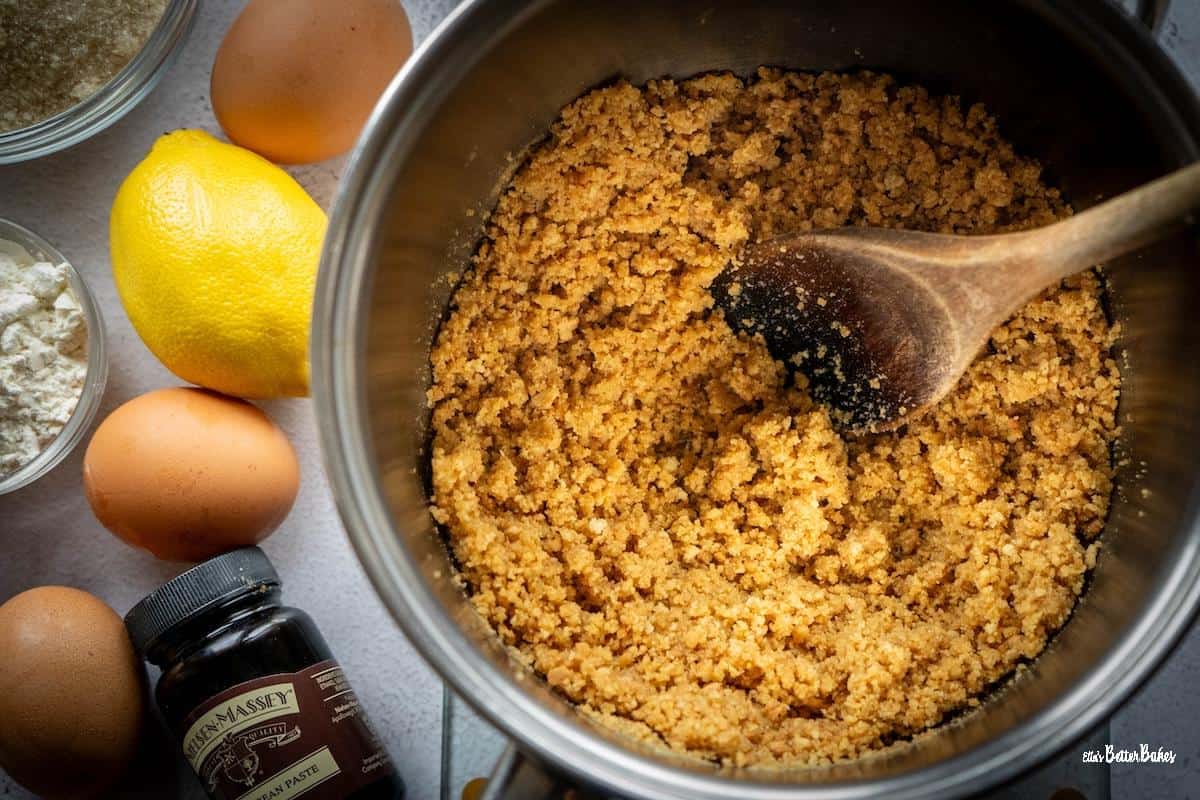
Melt your butter and then tip in the biscuit mixture and the demerara sugar. Mix until the butter has soaked up all of the biscuit.
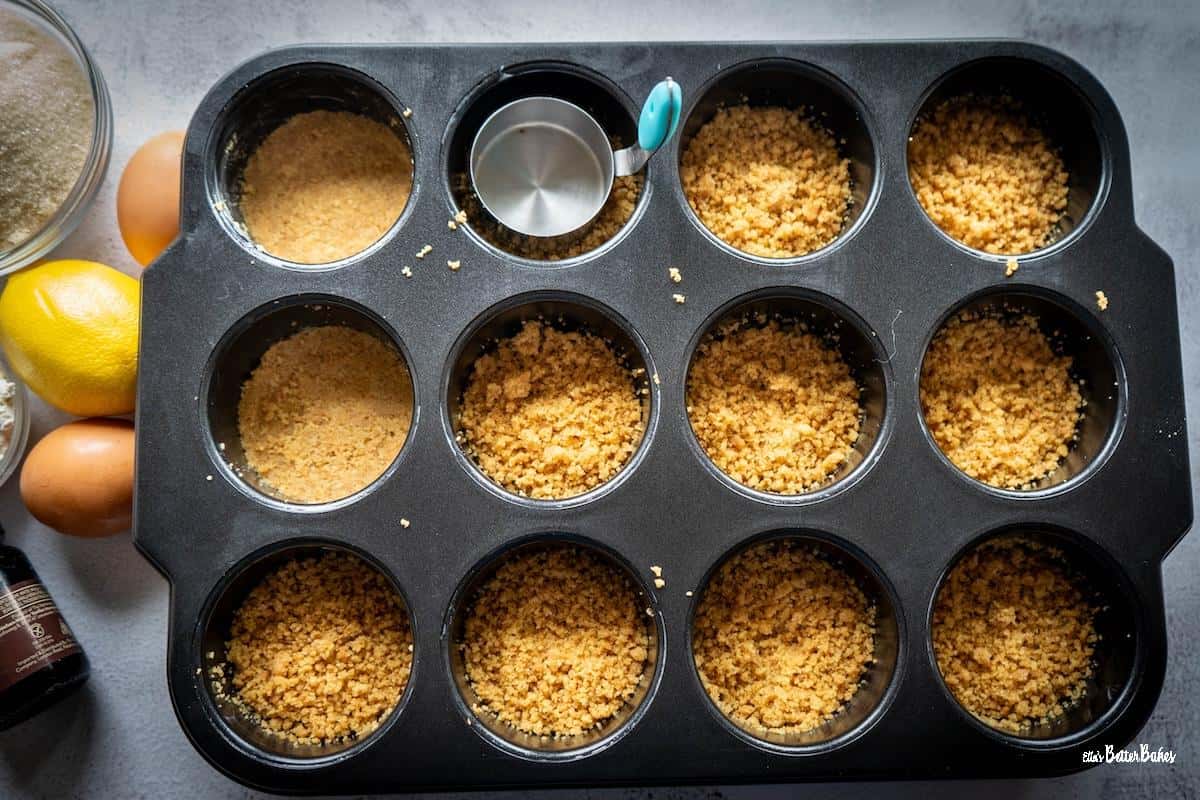
Place an equal amount of the biscuit mixture into each hole of your greased 12-cup loose-based cheesecake tin.

Press down firmly and then refrigerate for 30 minutes until hardened.
Cheesecake Filling
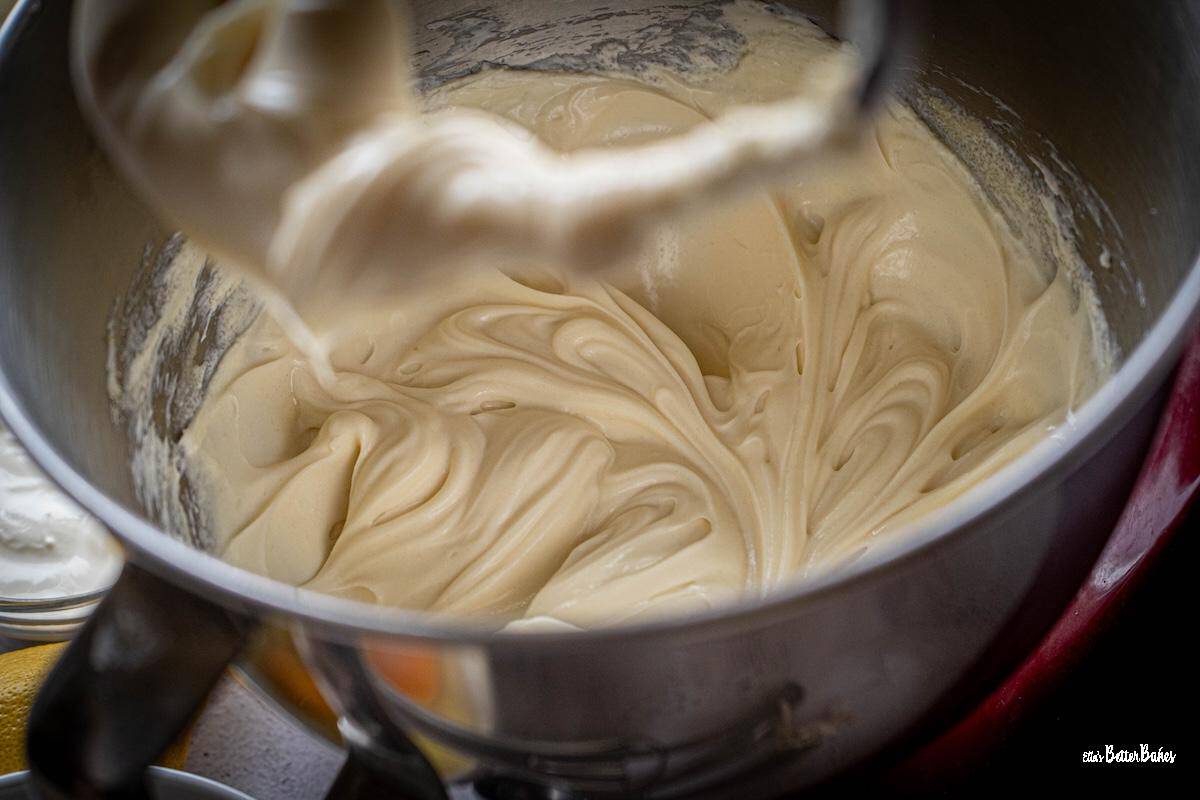
Place your soft cheese (I use "Philadelphia") and your sugar into your mixing bowl and mix for a minute on a low setting until smooth.
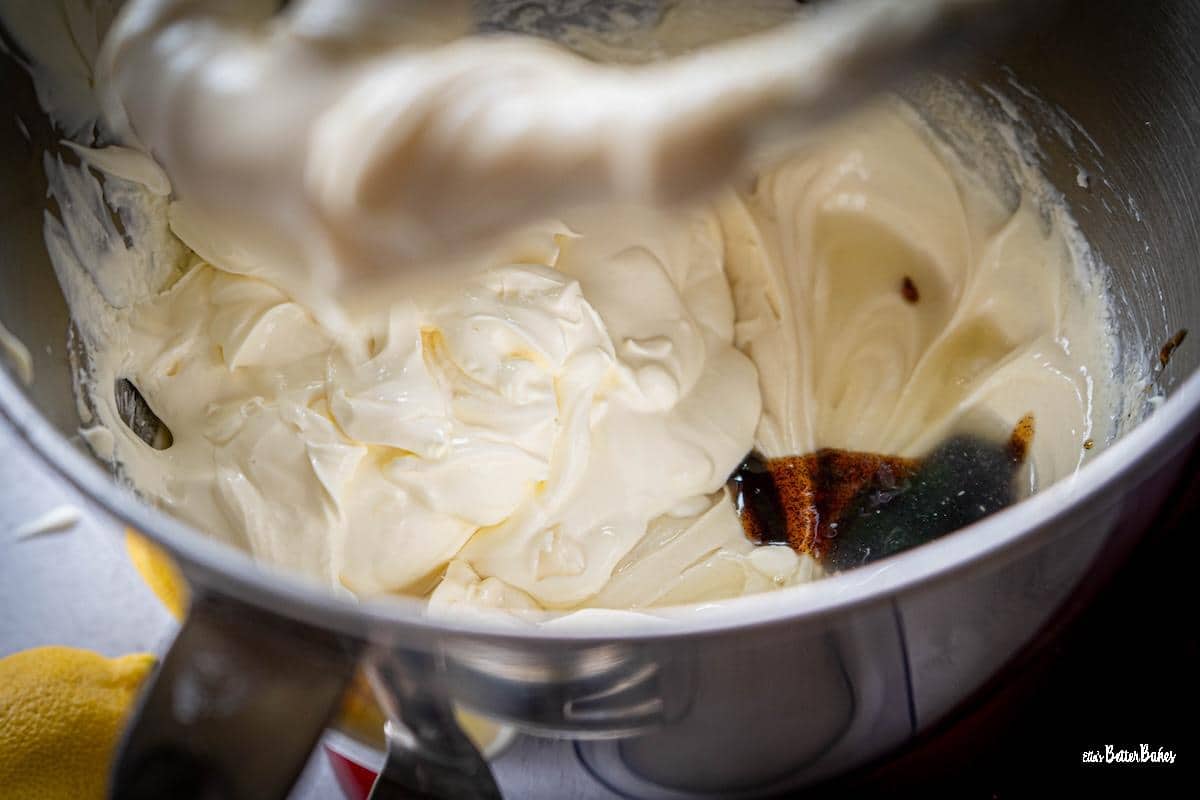
Add your creme fraiche, sour cream, vanilla bean paste (or extract) and lemon juice and beat briefly until incorporated.
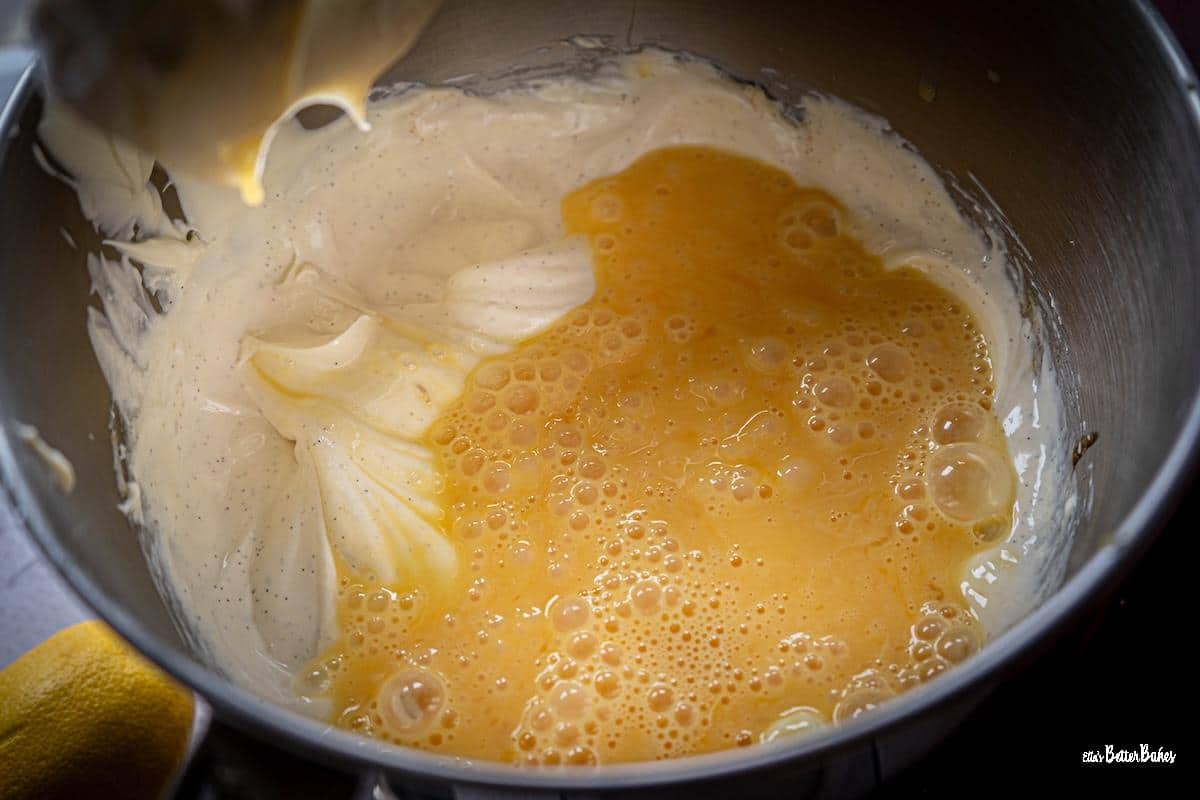
Lightly beat your eggs and then beat them in very briefly.
Top tip: be careful not to overbeat, as this will introduce too much air into the cheesecakes, meaning they will rise too much when baking and then collapse.
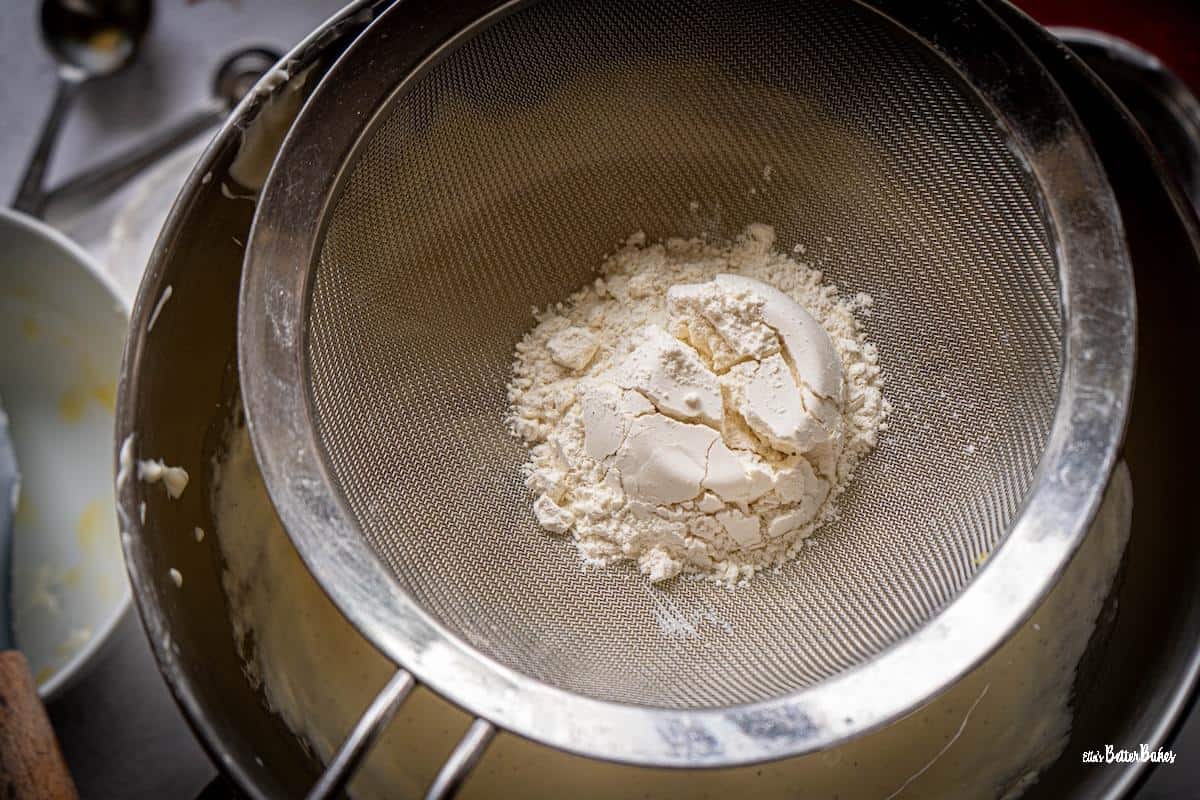
Sift your flour into the mixture and beat in briefly until mixed, or fold in by hand.
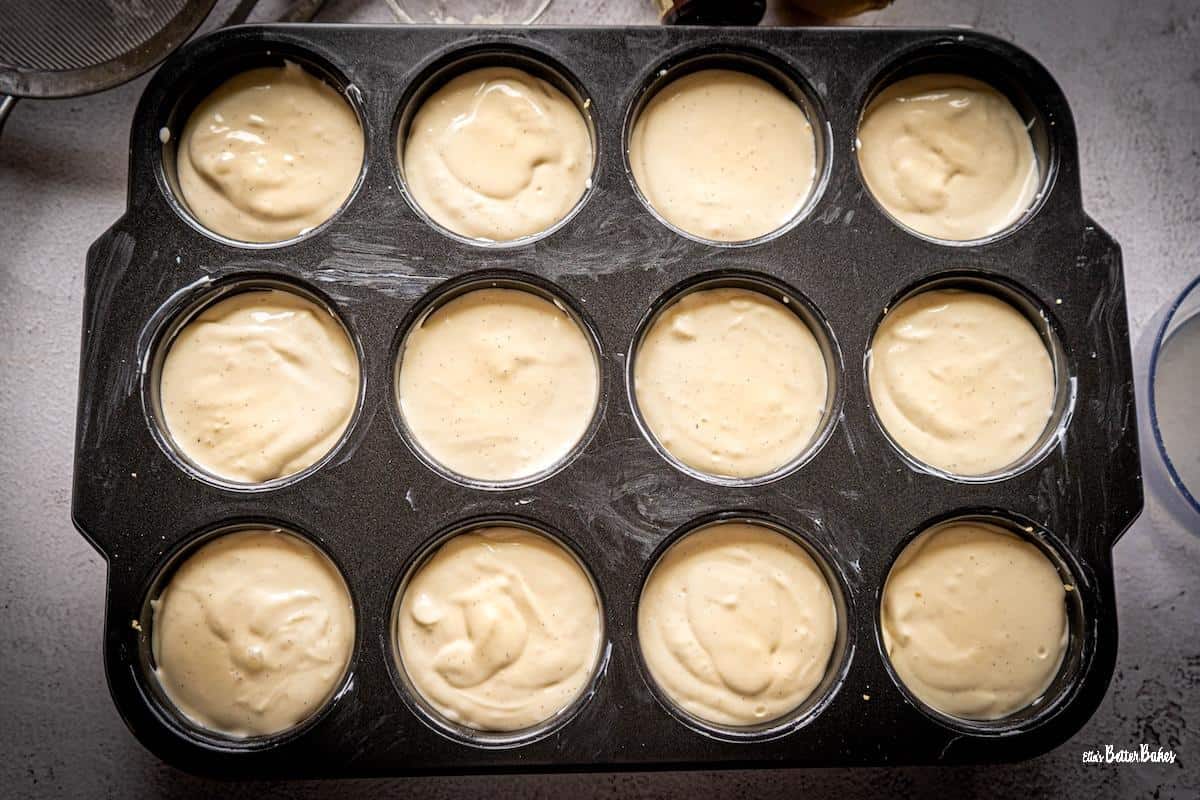
Add equal amounts of the mixture to your cheesecake tin and level out. Bake for 5 minutes before turning the oven down and baking for 40 minutes. Then turn the oven off and leave the cheesecakes inside for 2 hours to fully set. Leave to fully cool and then cover with cling film and refridgerate overnight (or at least for 4 hours).
Roasted Strawberry Topping
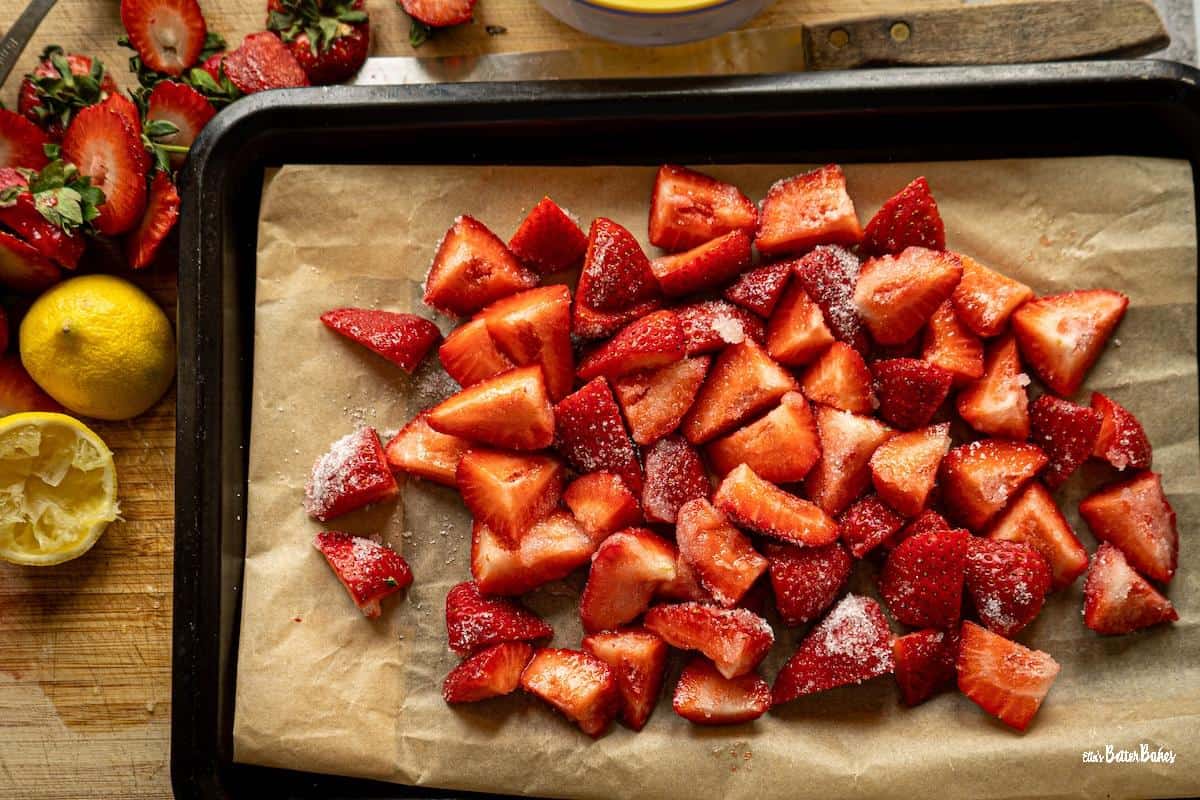
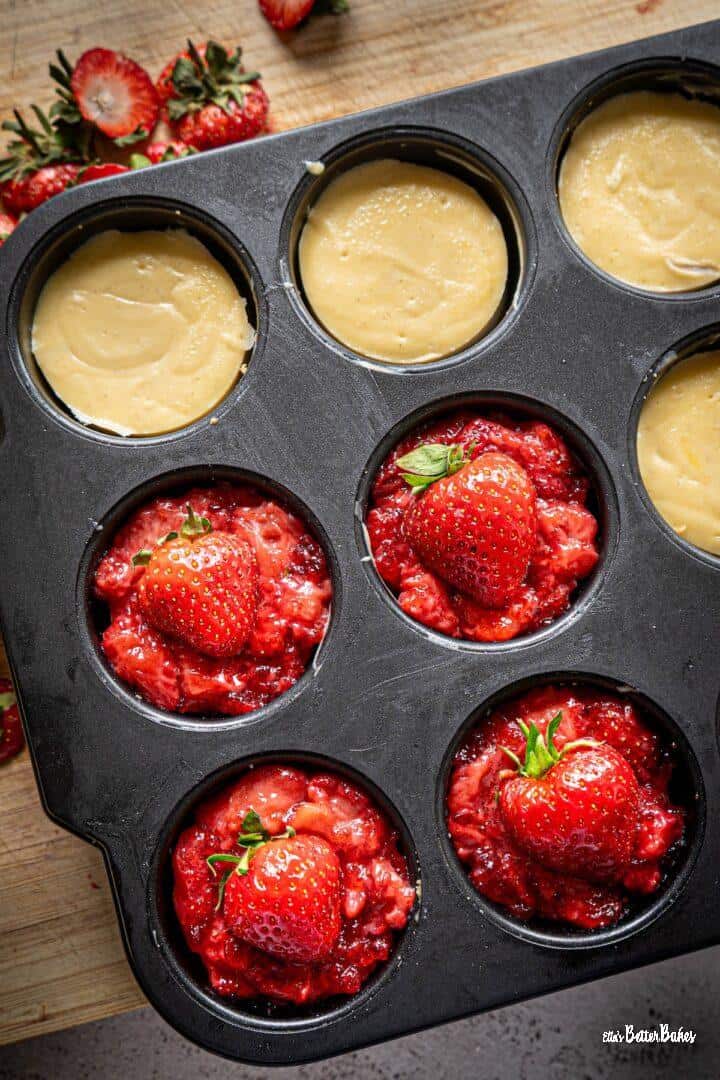
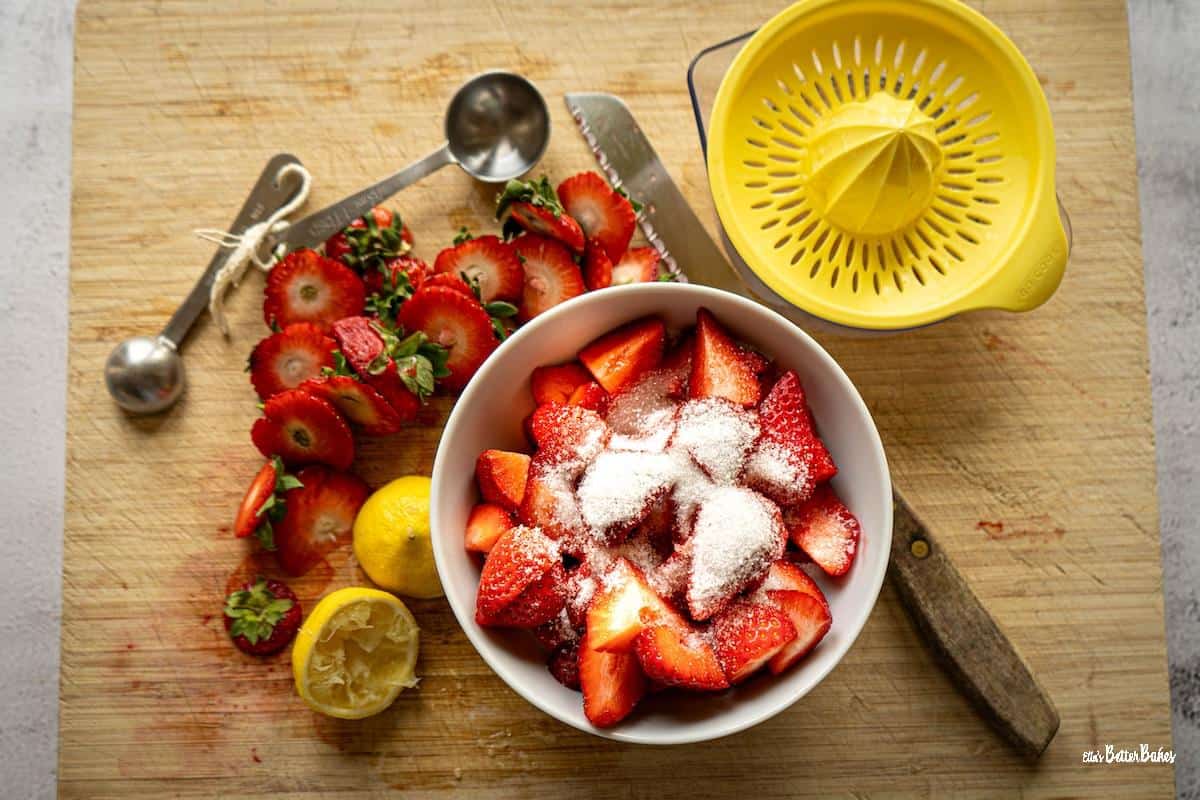
Cut your strawberries into quarters and then mix them with sugar and lemon juice. Spread out over a lined baking sheet.
Roast for about 25 minutes, until the edges start to just turn dark on a few strawberries.
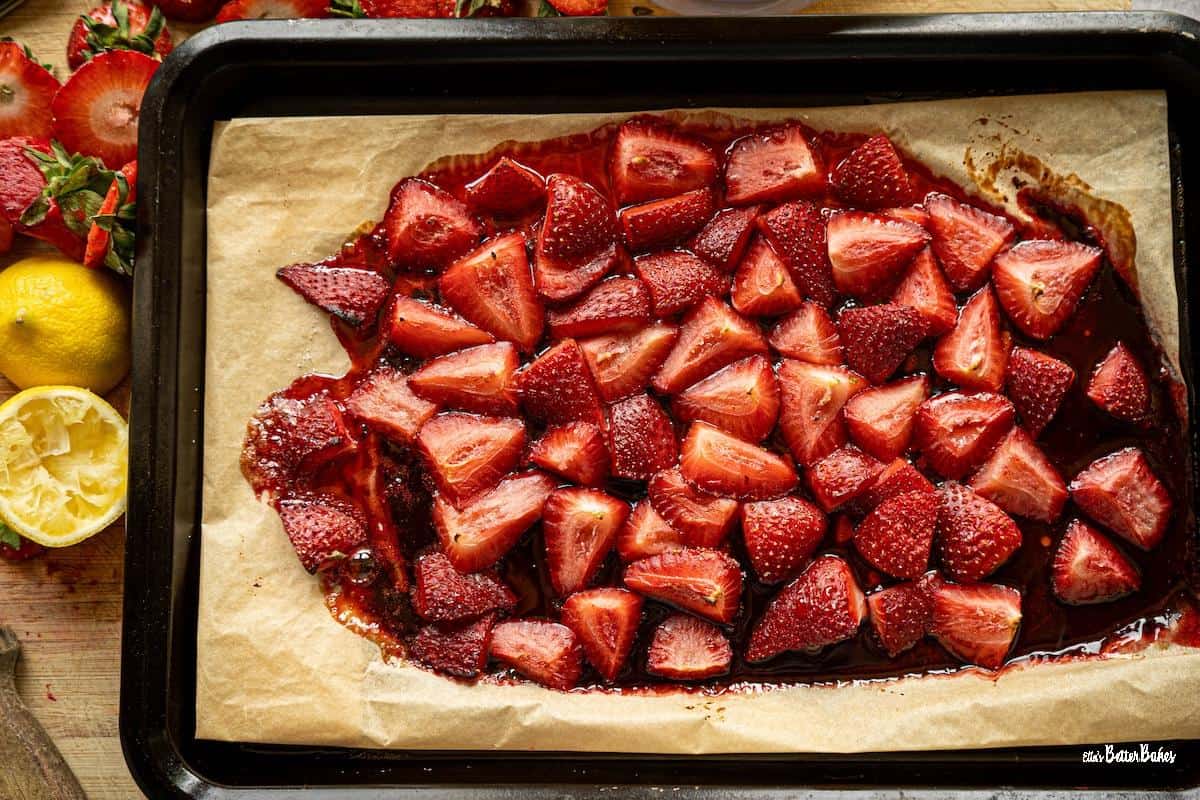
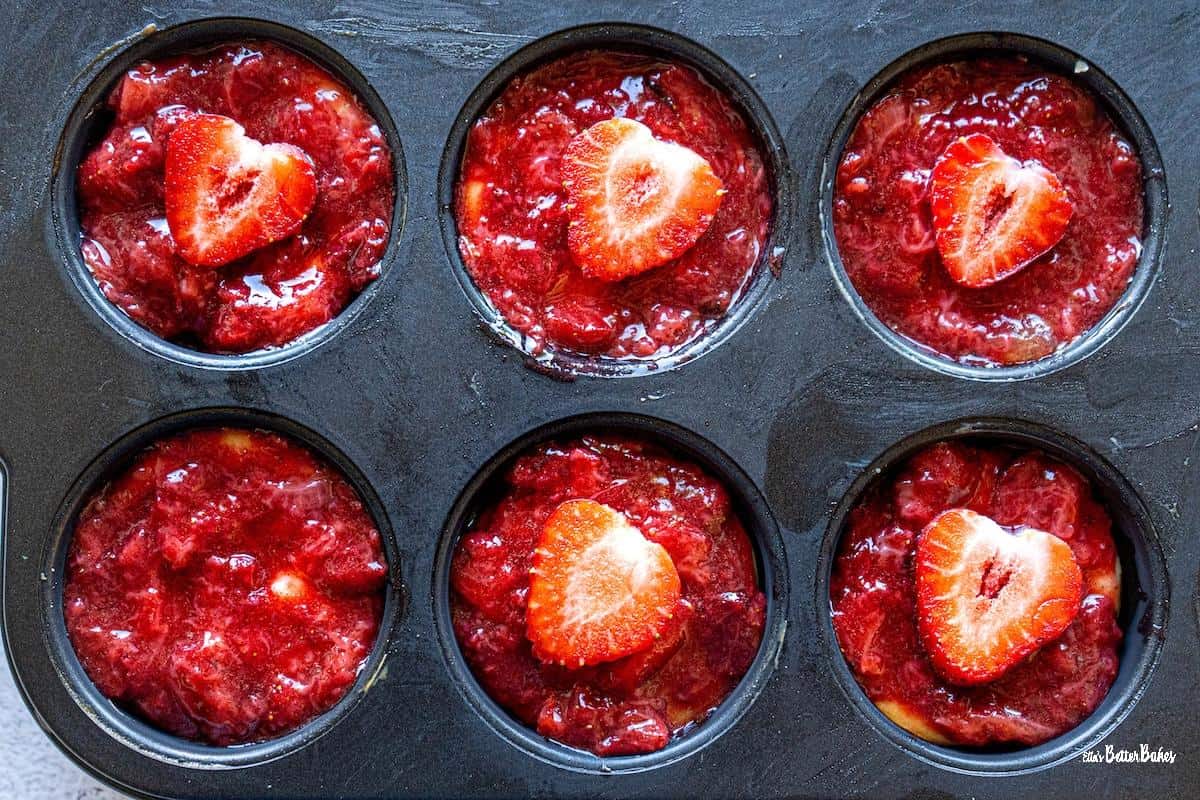
Tip into a heatproof dish and then mix in your vanilla paste or extract and your bloomed gelatin. Leave to fully cool.
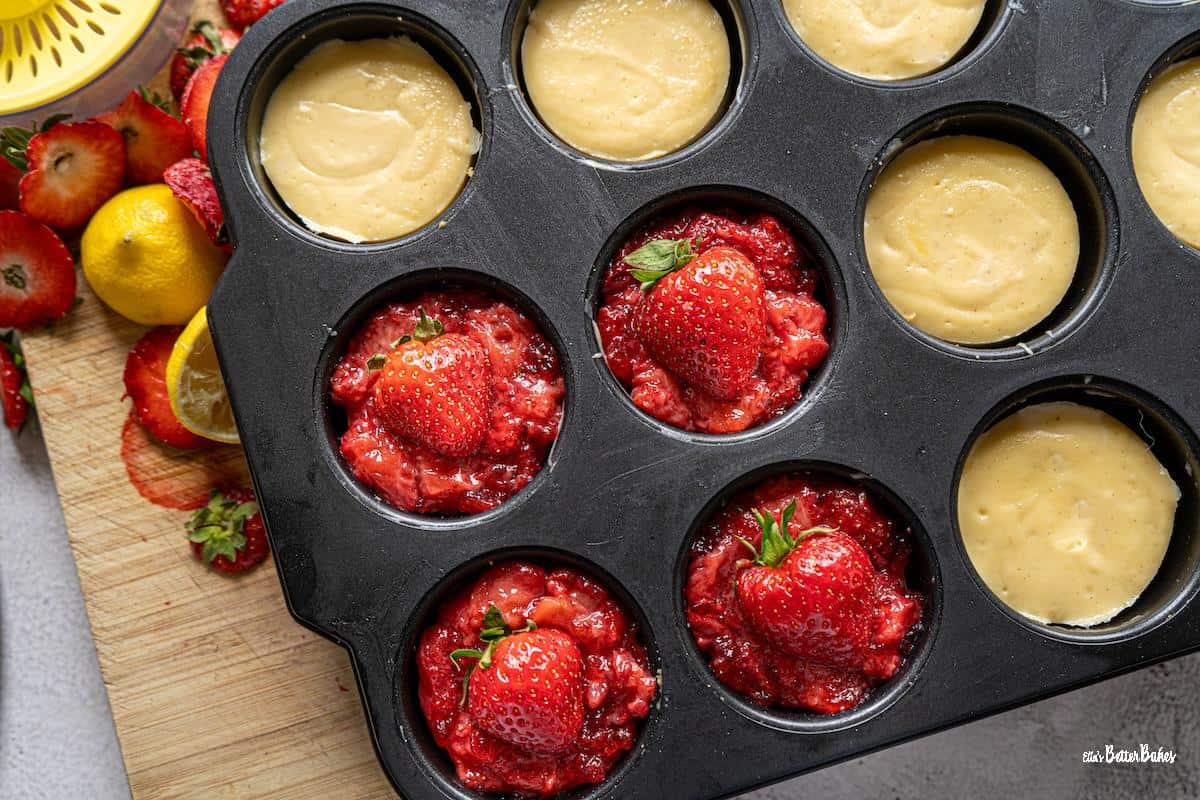
Spread equal amounts out over each cheesecake and top with a halved strawberry. Refridgerate to set.
Storage
Once made, keep your Roasted Strawberry Mini Cheesecakes covered and refrigerated. They will be fine for 2-3 days.
Top tips for Roasted Strawberry Mini Cheesecakes
Press the biscuit base down firmly
The biscuit base is made by mixing ground biscuits with melted butter. The idea being the butter sets firm when refrigerated. The base therefore needs to be pressed down as firmly as possible to ensure it sets hard.
Do not overbeat your cheesecake filling
Only beat your ingredients briefly; too much air will cause the cheesecakes to rise like souffles during baking. They will then sink back down whilst cooling, often leaving a crack across the top and a divot in the middle.
Use good quality cream cheese if you can
A good-quality cream cheese really does make all the difference to the texture and flavour of a cheesecake. I always use "Philadelphia" full fat cream cheese.
Leave your cheesecakes to sit in a the oven for 2 hours
Baking cheesecakes is a rather sensitive process. They need to be coaxed at a low heat for a long time to bake and set.
The shock of the temperature change when they are taken out of a warm oven can cause cheesecakes to crack and/or to sink in the middle.
Therefore once baked, turn the oven off and leave them in there for about 2 hours to continue to set and cool down.
Use a loose-bottomed tin
The Wrenbury 12 Cup Cheesecake tin benefits from having loose bottoms for each cheesecake. The advantage is that, once set, the cheesecakes can easily be pushed up from the base in order to release them from the pan.
Ensure your oven is at the right temperature
Oven temperature can vary in different areas; therefore, I highly recommend using an oven thermometer.

Alternatives
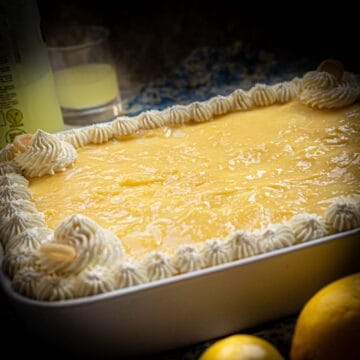
If you want to make a whole Roasted Strawberry Cheesecake, simply use the same ingredients in a 20-centimetre spring-form cake tin. Bake as per instructions in my Vanilla Cheesecake with Fruit Topping.
No-bake Roasted Strawberry Cheesecakes
You may prefer to make no-bake roasted strawberry cheesecakes, which are also delicious and a bit quicker.
Simply create the same biscuit base as per the Recipe Card and then for the cheesecake filling use:
160 grams (three quarter of a Cup) of golden or white caster sugar
500 grams (2 Cups and 2 tablespoons) of cream cheese ("Philadelphia" is by far the best for this)
250 grams (1 Cup) of mascarpone
300 ml (1 Cup) of double cream (heavy cream)
1 teaspoon of vanilla extract or vanilla bean paste
and then simply...
Mix your sugar, cream cheese, mascarpone and vanilla extract in your stand mixer with the paddle attachment fitted, or with your hand mixer and the beaters fitted, for 2 minutes on a low setting.
In a separate bowl, beat your double cream using the whisk attachment this time, until it forms stiff peaks (be careful not to overbeat it) and then add it to the cream cheese mixture.
Mix thoroughly and then add equal amounts of the mixture to each of the cups in your cheesecake tin and level out.
Refridgerate for at least 4 hours, but preferably overnight, as that really helps set the filling and allows the flavours to meld together.
Easy peasy lemon squeezy.
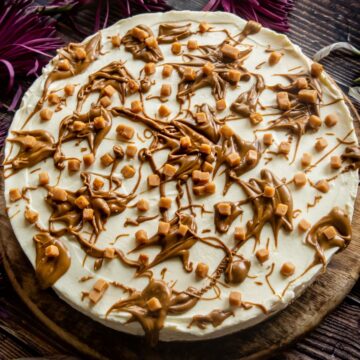
For other no-bake cheesecakes, check out my Salted Caramel Cheesecake (No Bake) and Mojito Cheesecake (No Bake).
Or for another delicious baked cheesecake, you may like my Vanilla Cheesecake with Fruit Topping.
FAQ
Cheesecake often sinks in the middle either because it has been overbeaten and thus contains too much air. This causes it to collapse once it has come out of the oven. Another reason for cheesecake sinking can be that the baking temperature was too high.
Related
Looking for other recipes like this? Try these:


📖 Recipe
Roasted Strawberry Mini Cheesecakes
Here's what you'll need...
- 12 Cup Mini Cheesecake Tin made by Wrenbury
- Medium saucepan
- Baking sheet
- Food processor optional - you can crush the biscuits in a bag
- Baking sheet
Ingredients you'll need...
Biscuit Base
- 250 g Digestive biscuits (or if in the US use Graham crackers - 2¼ cups)
- 120 g Unsalted butter (½ Cup and 1 tablespoon) plus a little extra for greasing
- 20 g Demerara sugar or granulated sugar (1½ tablespoons)
Cheesecake Filling
- 560 g Cream cheese (ie soft cheese) at room temperature. "Philadelphia" full fat cream cheese is the best to use (2½ Cups)
- 250 g Golden caster sugar (1¼ Cups)
- 290 ml Crème fraiche - full fat at room temperature (1¼ Cups)
- 135 ml Sour cream at room temperature (½ Cup)
- 1 tablespoon Vanilla bean paste or vanilla extract
- 1 tablespoon Lemon juice equates to the juice of 1 average lemon
- 4 Large eggs - use 3 eggs and 1 yolk lightly beaten and at room temperature
- 45 g Plain flour (6 level tablespoons)
Roasted Strawberry Topping
- 500 g Fresh strawberries (4 Cups) quartered
- 6 large strawberries for decoration halved
- 4 tablespoon Granulated white sugar
- 1½ tablespoon Lemon juice must be fresh lemon - juice of about 1 average lemon
- 1 teaspoon Vanilla bean paste or vanilla extract
- 1 teaspoon Powdered gelatin optional, helps to set the topping
Here's what we do...
Cheesecake Biscuit Base
- Grease your 12 Cup muffin tin with some extra butter. (To be honest, if you use the Wrenbury 12 Cup Cheesecake tin you probably don't need to do this, I just do it from habit and a bit of OCD!).
- Place your digestive biscuits into your stand mixer and blitz into crumbs. Or you can put them in a food bag, seal and smash them with a rolling pin. They need sand-like, but not dust-like (i.e. don't use a NutriBullet).
- Melt your butter slowly in your saucepan over a low heat (so that none evaporates) and then mix in your biscuit crumb mixture and demerara sugar. Make sure all of the butter has been absorbed.
- Weigh your biscuit mixture and divide it by 12 so that you know how much to add to each hole in your cheesecake tin. Mine comes to about 32 grams each.
- Add equal amounts of biscuit mixture to your tin and press down so that it is tightly compacted. I use the back of a cup measure to achieve this, the base of a glass would also work well.
- Refridgerate for 30 minutes until firm and set .
Cheesecake Filling
- Heat your oven to 180°C/160°C Fan/Gas Mark 4/350°F.
- Fit the paddle attachment to your stand mixer or the beaters to your hand mixer and place all of your cream cheese into your mixing bowl along with the sugar. Then beat on a low setting for 1-2 minutes until smooth.
- Add your creme fraiche, sour cream, vanilla bean paste (or extract) and lemon juice and beat a few times until incorporated.
- Add your lightly beaten eggs and beat until just mixed in.
- Sift over your flour and beat in briefly. Make sure the mixture is fully combined. I tend to fold it over a few times with a wooden spoon to be sure and to avoid adding too much air.
- Add equal amounts of the cheesecake mixture to each cavity of your cheesecake tin and level out.
- Bake for 5 minutes and then turn the oven down to 120°C/100°C Fan/Gas Mark ½/250°F. Continue to bake for another 40 minutes. The cheesecakes are ready when the middles have a very slight wobble still. They will be very pale on top.
- Turn the oven off but leave the cheesecakes in there for 2 hours to continue to set.
- Remove the cheesecakes and allow them to cool, still in the tin, on the counter. Once fully cool, wrap the tin in cling film and refridgerate for at least 4 hours, but preferably overnight.
Roasted Strawberry Topping
- Pre-heat your oven to 200℃/180℃ Fan/Gas mark 4/ 350℉.
- Line your baking sheet with greaseproof paper.
- Bloom your gelatin if using. To do this add 1 teaspoon of dried gelatin to 30 grams of water and mix thoroughly. Set aside.
- Mix your quartered strawberries with your sugar and lemon juice and then spread out on your baking tin.
- Roast in the centre of your oven for 25 minutes. The strawberries are ready when they are soft and the very edges of a few are just starting to turn black.
- Remove the strawberries and their juice to a heat proof bowl and immediately mix in your vanilla bean paste (or extract) and your prepared gelatin (including the water you mixed it in).
- Leave the strawberry mixture to fully cool, and then, leaving your cheesecakes still in tin, spread the roasted strawberries over the top of each one. Place half a strawberry on top.
- Return the cheesecakes to the fridge for an hour, to set the strawberry topping.
- Run a blunt knife around the edge of the cheesecakes and remove them from the tin by pressing up from the base.
Supporting Notes
Alternatives
If you want to make a whole Roasted Strawberry Cheesecake then simply use the same ingredients but in a 20 centimetre spring-form cake tin. Bake as per instructions in my Vanilla Cheesecake with Fruit Topping.No-bake Roasted Strawberry Cheesecakes
You may prefer to make no-bake roasted strawberry cheesecakes, which are equally delicious and also a bit quicker. Simply create the same biscuit base as per the Recipe Card and then for the cheesecake filling use: 160 grams (¾ Cup) of golden or white caster sugar500 grams (2 Cups and 2 tablespoons) of cream cheese ("Philadelphia" is by far the best for this)
250 grams (1 Cup) of mascarpone
300 ml (1 Cup) of double cream (heavy cream)
1 teaspoon of vanilla extract or vanilla bean paste and then simply... Mix your sugar, cream cheese, mascarpone and vanilla extract in your stand mixer with the paddle attachment fitted, or with your hand mixer and the beaters fitted, for 2 minutes on a low setting. In a separate bowl, beat your double cream using the whisk attachment this time, until it forms stiff peaks and then add it to the cream cheese mixture Mix thoroughly and then add equal amounts to each of the cups in your cheesecake tin and level out. Refridgerate for at least 4 hours, but preferably overnight as that really helps set the filling and allows the flavour to really meld together. Easy peasy lemon squeezy. For other no- bake cheesecakes, check out my Salted Caramel Cheesecake (No Bake) and Mojito Cheesecake (No Bake). Or for another delicious baked cheesecake, you may like my Vanilla Cheesecake with Fruit Topping


Comments
No Comments