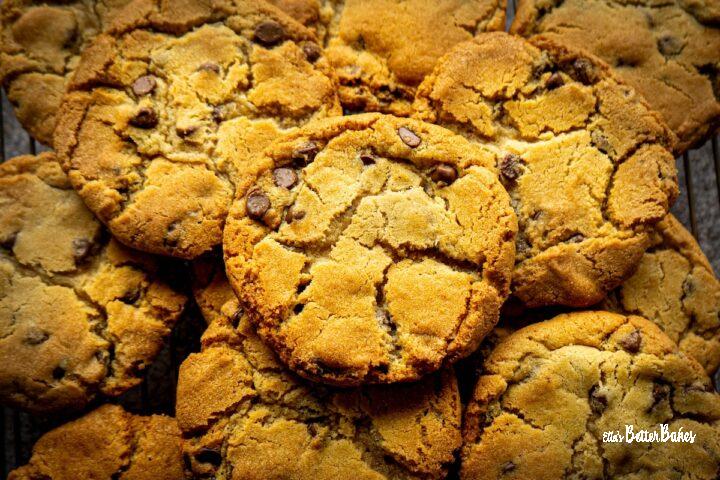
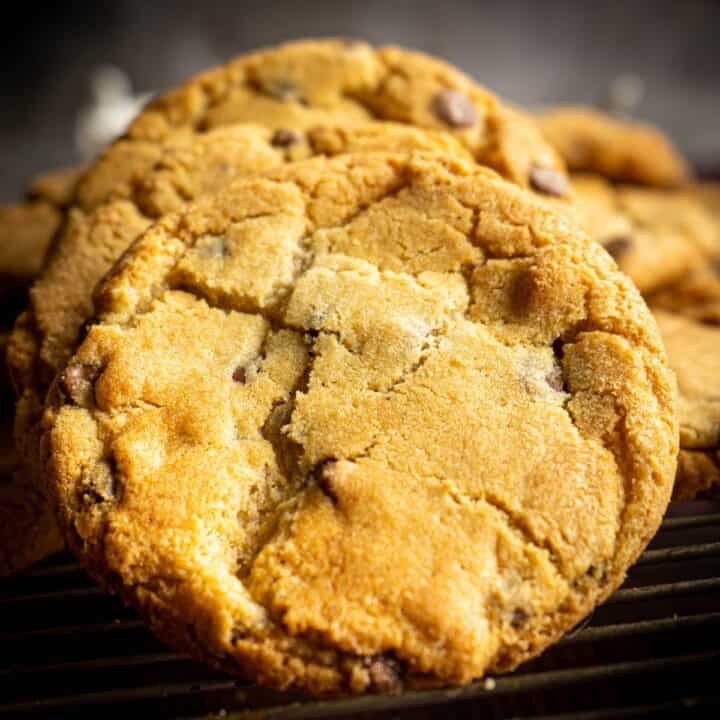
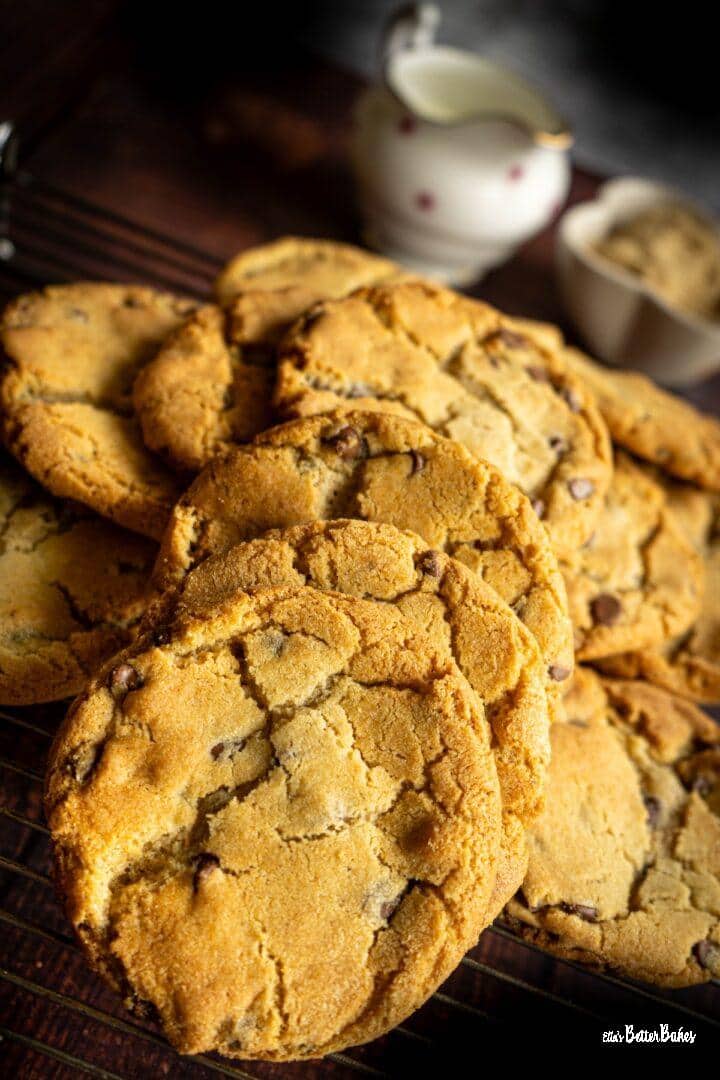
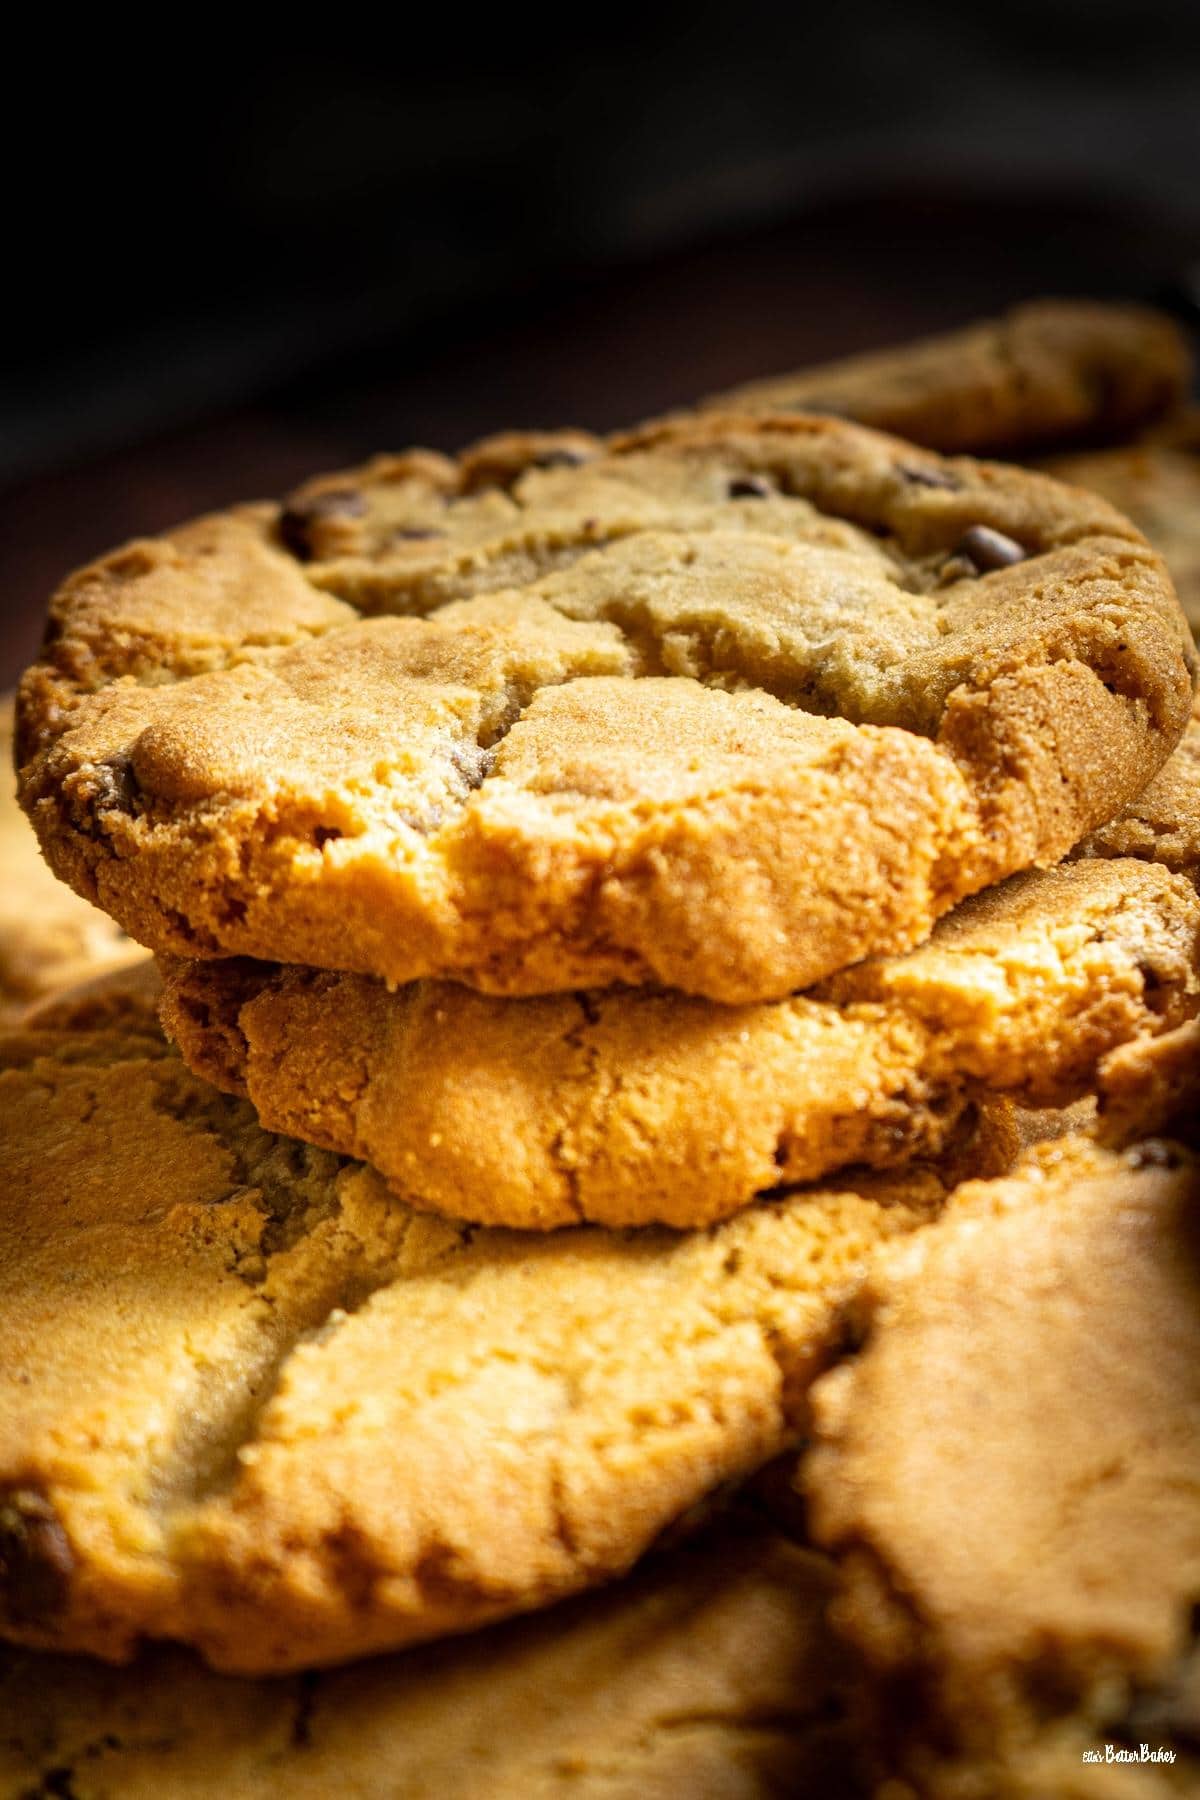
The BEST Chocolate Chip Cookies
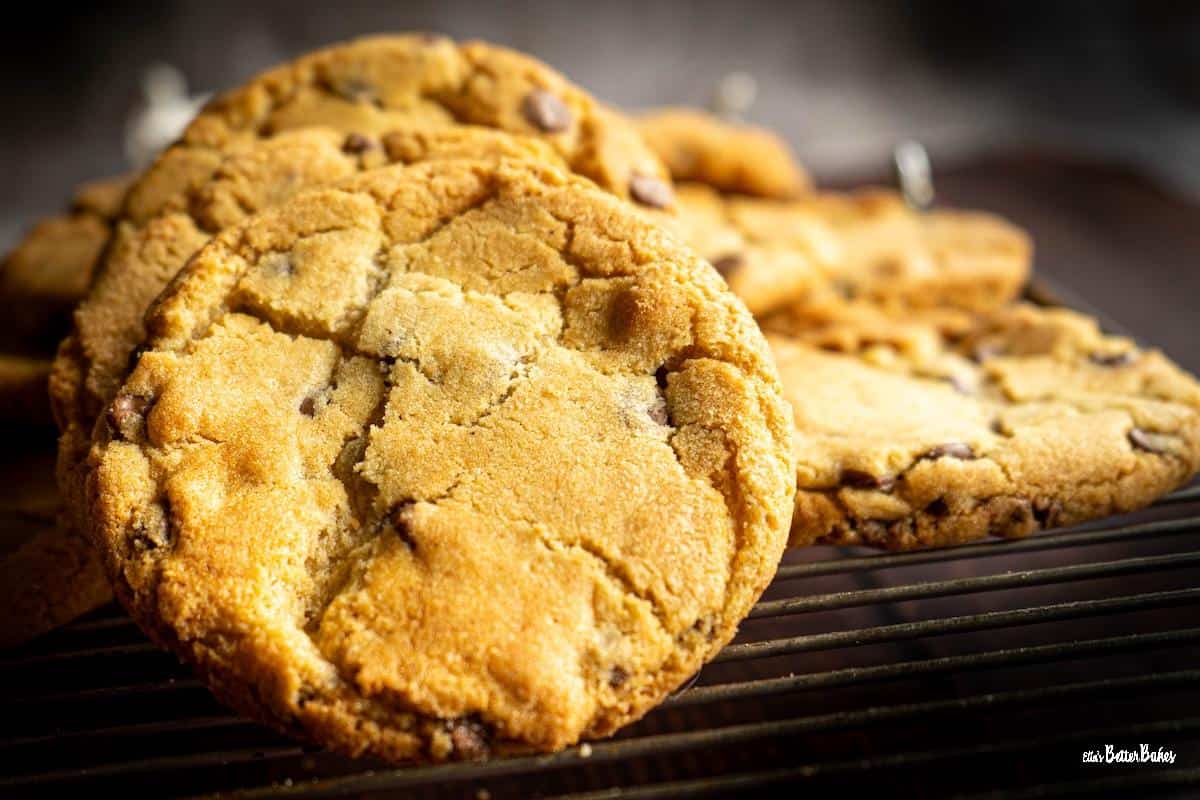
Have you been searching for the BEST chocolate chip cookie recipe?
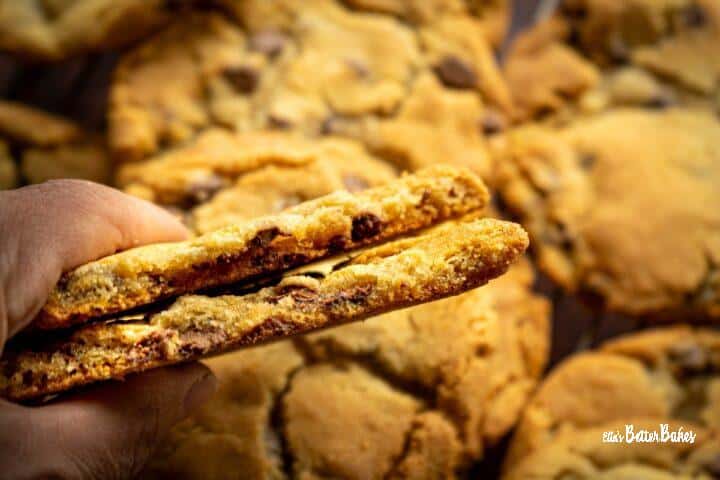
One that will give you soft, melt-in-the-mouth cookies with a crisp outer and a chewy inner? Full of lovely caramel undertones and rammed with pockets of gooey chocolate?
Well, look no further, my friends!
WARNING: You will NOT be able to stop eating these cookies once baked! They are absolutely addictive!
Secret ingredient? Browned butter. Absolute game changer. Not only for flavour but for texture. Take out the browned butter, and you have a nice enough cookie; add it and boom, next level here we come!
I am sooooooo pleased with this chocolate chip cookie recipe. I use it every time now. Plus it is also incredibly quick and easy.
Oh, and do stop by to check out my other cookie recipes; I highly recommend this bad boy: Apple and Oat Cookies, trust me, you won't regret it and your kitchen will smell utterly divine.
Also, as noted below in the section "Alternatives", you can use this recipe as the base for any cookie you want to make.
Enjoy! And do drop me a comment and/or rate the recipe if you can 🙏🏼 . It helps Google to take it seriously (lol) and offer it up in the search results.
Jump to:
Why is this the BEST Chocolate Chip Cookie recipe?
Browned butter, for caramel flavour and chewy texture ✔️
No need to refrigerate the browned butter ✔️
Creamed butter for a fluffy cookie texture ✔️
Cornflour for added gooey texture ✔️
A mix of brown and white sugars for caramel flavour ✔️
.... and, well, because it just IS the best chocolate chip cookie recipe ever! 🤷🏻♀️
Ingredients and Substitutions
See the Recipe card below for the exact quantities
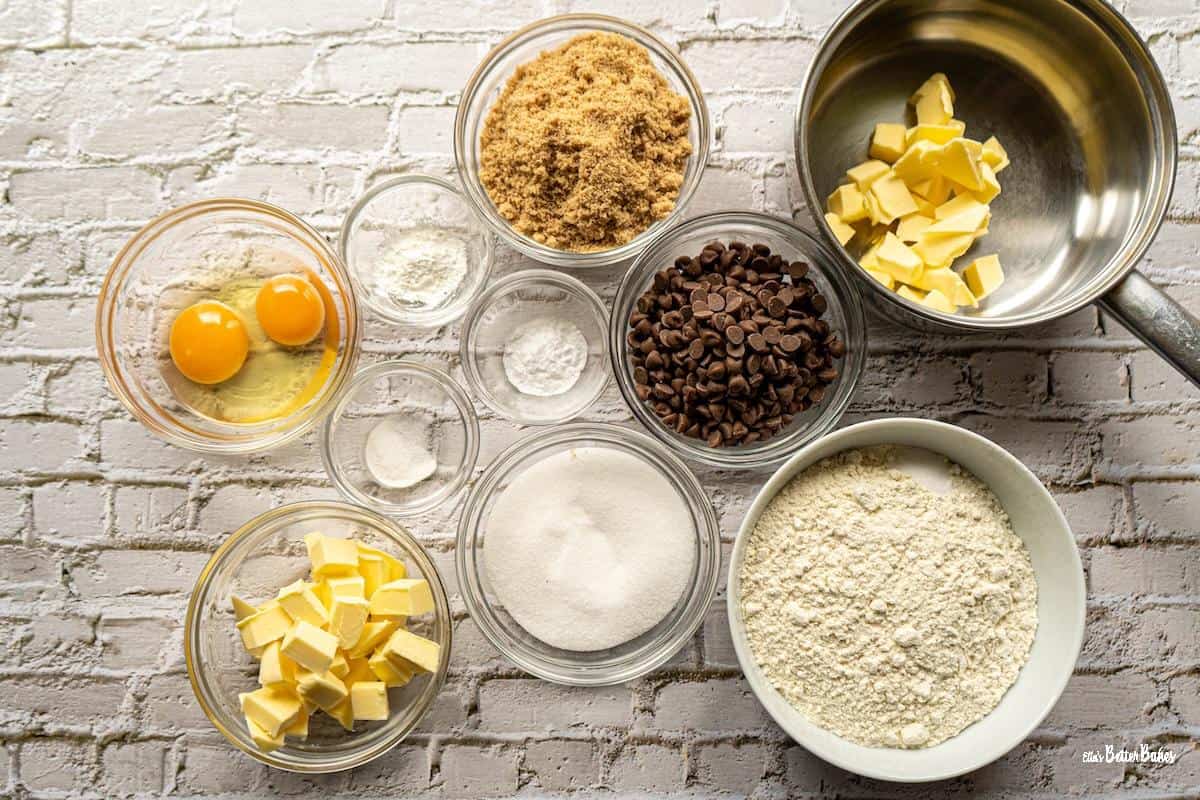
- Unsalted butter -some of the butter is browned, which adds caramel flavour to your cookies. This is then poured over the remaining butter, and both are creamed together, so you get the best of both worlds in these cookies: browned butter for flavour and creamed butter for fluffiness.
- Plain flour (all-purpose flour) - self-raising flourMcontains too much baking powder, hence why it has to be plain.
- Baking powder - just a smidge to prevent the cookies from flattening during baking.
- Bicarbonate of soda(baking soda) - helps the chocolate chip cookies have a light texture.
- Cornflour (cornstarch) - cornflour is added to make the cookie texture a bit chewier. It also helps to prevent the cookies from spreading when baking, as it restricts gluten development in the flour.
- Fine salt - necessary to help bring out flavours
- Caster sugar (superfine sugar) - rather than granulated sugar, caster sugar is added because the smaller grains melt quickly when baking and give the cookies a lighter texture.
- Light brown sugar (or dark brown sugar, or a mix of both) - brown sugar gives the cookies a caramel flavour and chewy texture.
- Eggs - they help bind the cookies together, and provide flavour from the fats in the yolks. An extra yolk is added for extra fat and flavour.
- Milk chocolate drops - this chocolate chip cookie recipe also works with dark or white chocolate drops. Alternatively, you can chop some chocolate up into small chunks. When doing so you will also invariably end up with fine slivers of chocolate. My advice is to add the chunks to the cookie dough and then sprinkle the slivers onto the top of the cookies before they bake.
Instructions
See Recipe card for exact instructions.
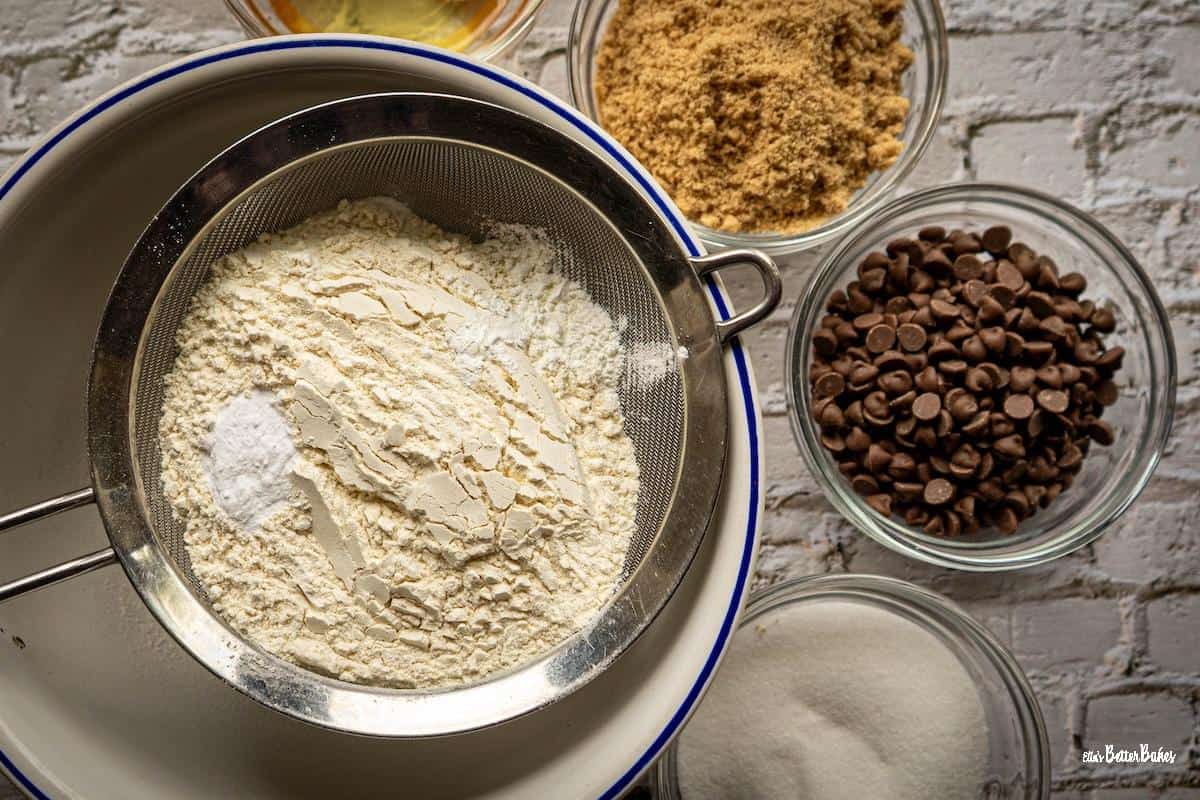
Sift your flour, baking powder, bicarbonate of soda, cornflour and salt together and set aside.
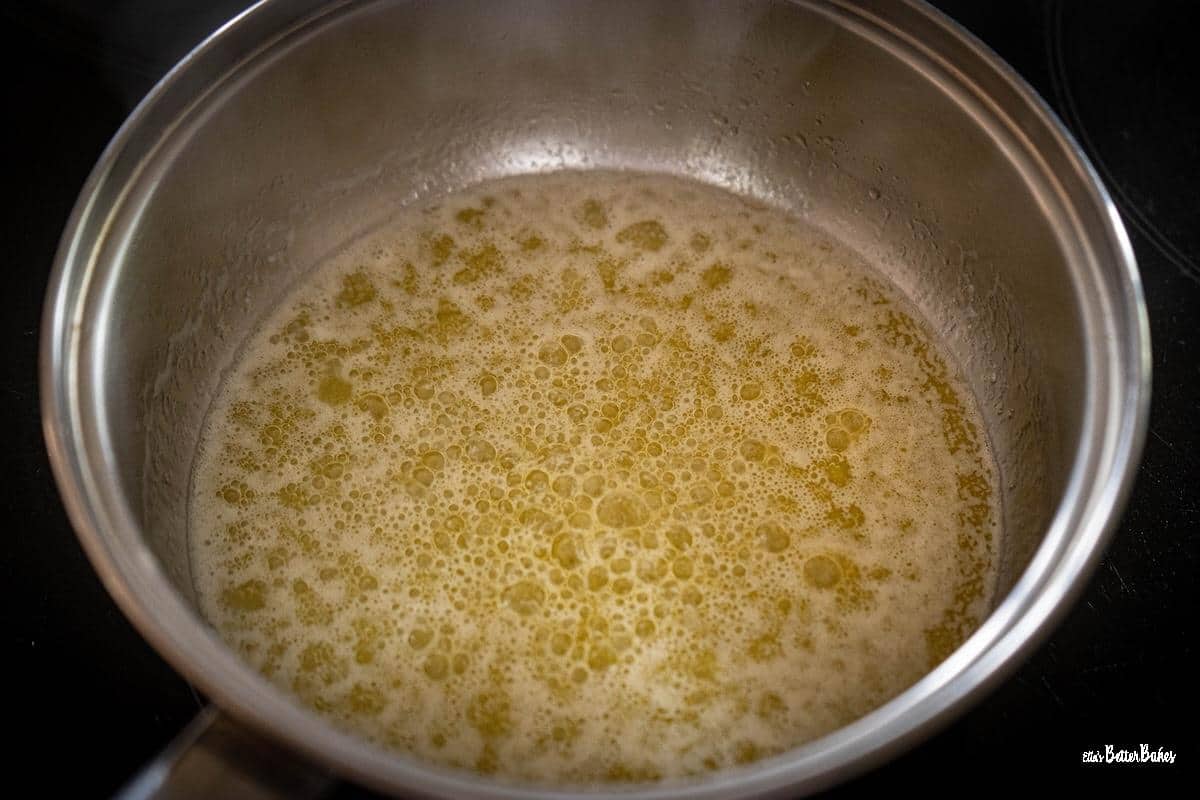
Add your butter for melting to a small pan and melt it gently on a medium-low heat. Once melted, turn the heat up and bring it to a gentle simmer. It will soon start to froth on the top.
Tip: Do not simmer your butter on a high heat, as it will cause a lot of it to evaporate.
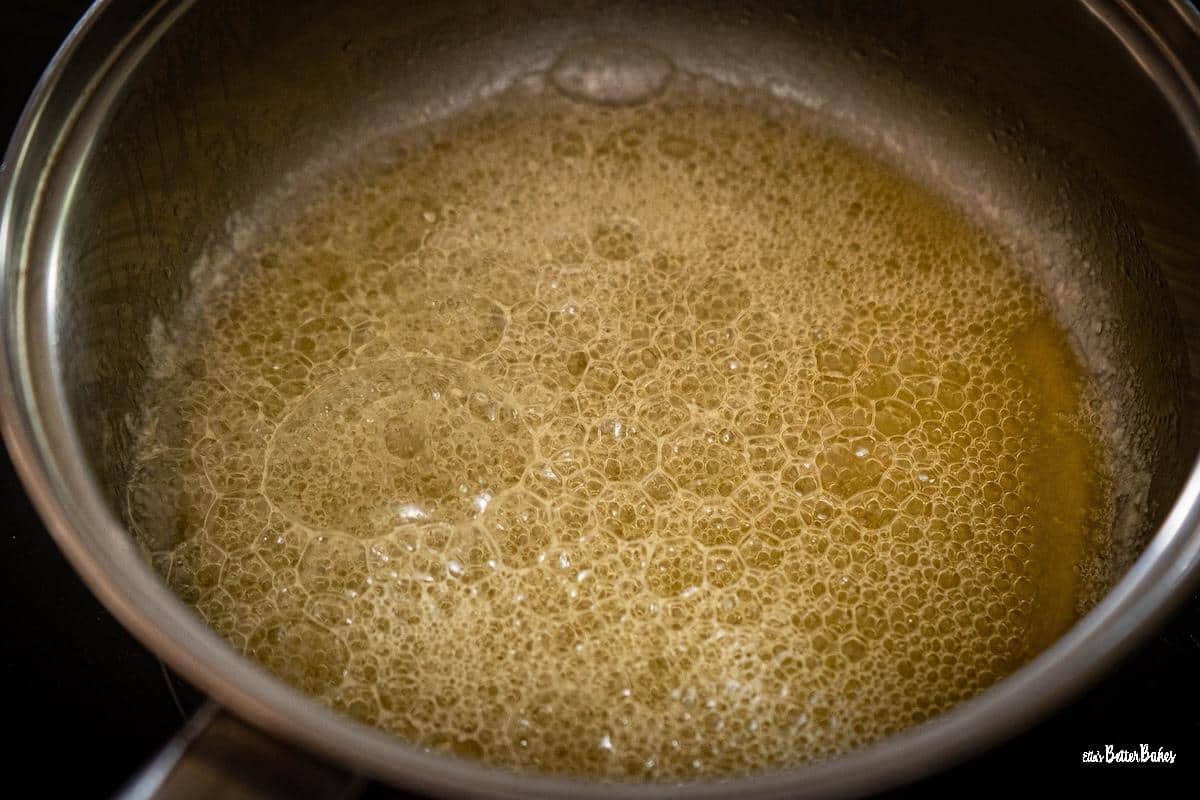
Stir the butter regularly. The froth will continue to grow, and you will notice small flecks of brown appear on the base as the milk solids cook.
Shortly after this, the melted butter will turn a deep golden colour and have a nutty aroma. The whole process, from the start of simmering until fully browned, takes about 4 minutes.

Immediately remove your browned butter from the heat and measure out 60 grams into a heatproof bowl.
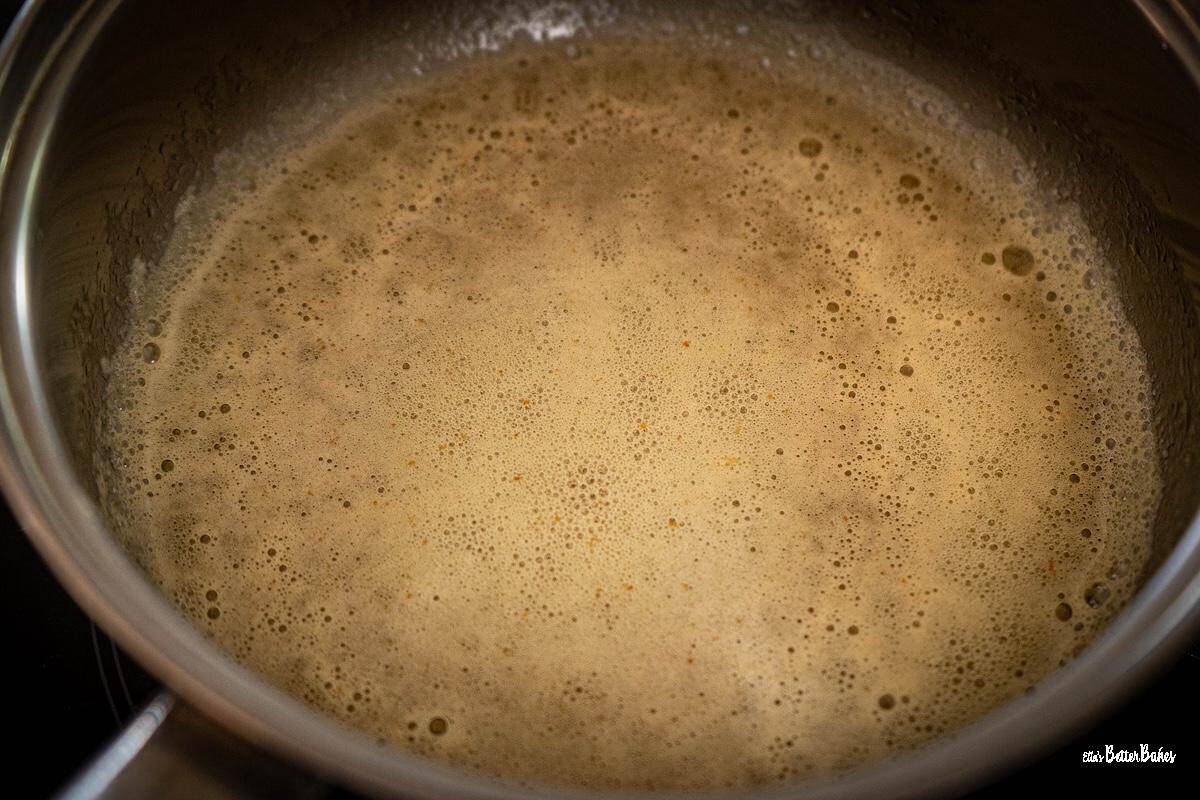
Pour the browned butter over the butter in your mixer bowl and immediately set it to beat for 2 minutes. If a few lumps of cold butter remain, that is fine.
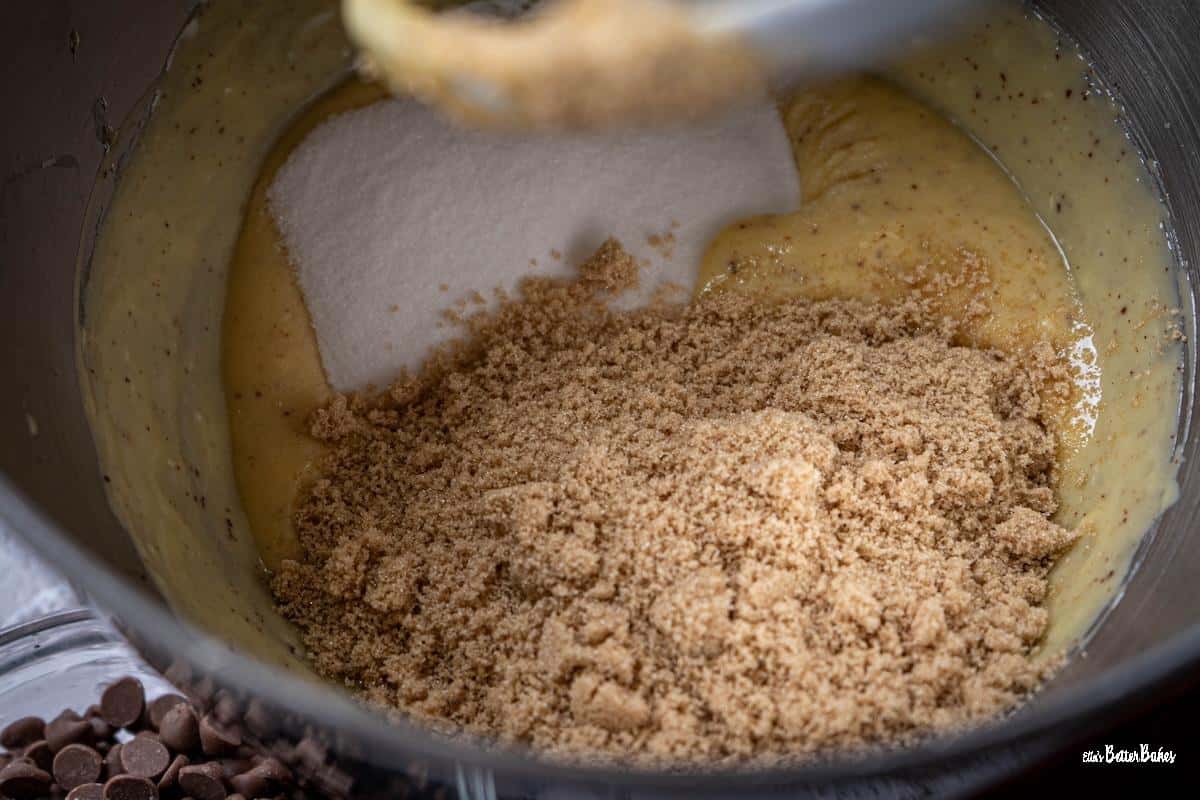
Then add your sugars and beat for 2 minutes on a medium-high setting.
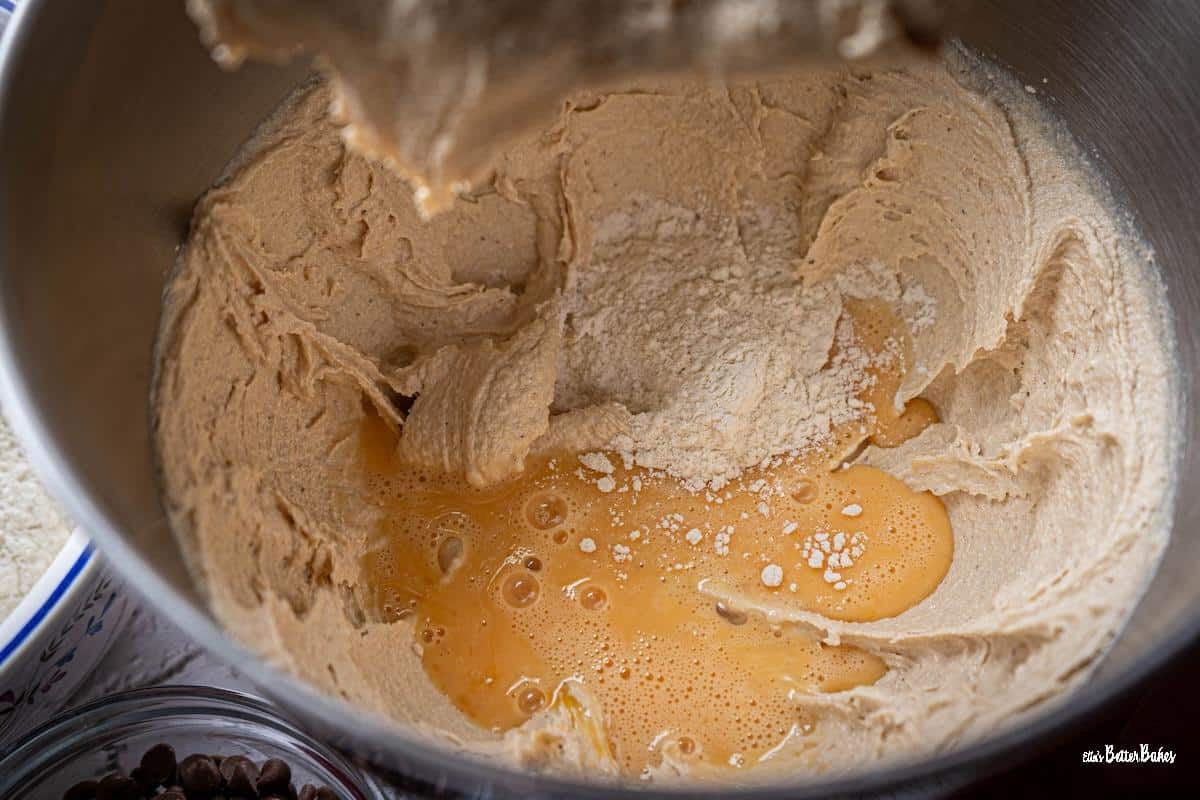
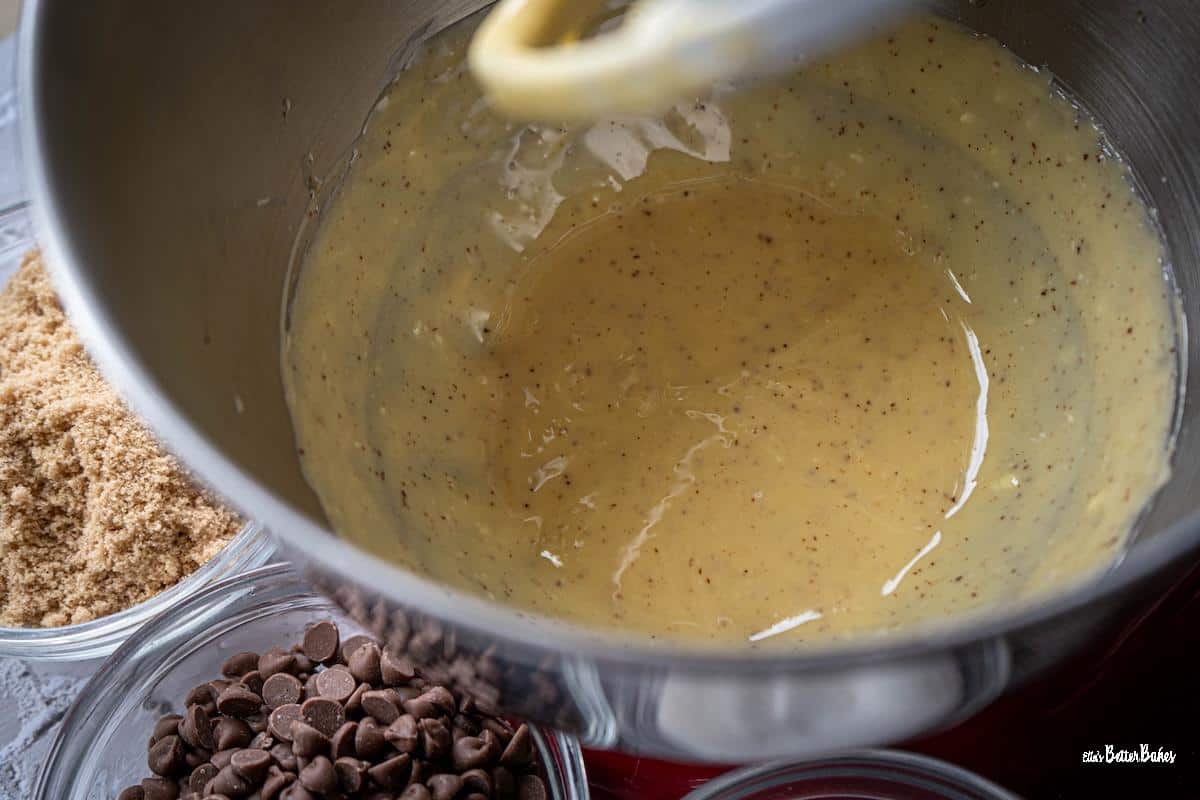
Next, add your egg and a dessertspoonful of your flour mixture and beat until all of the egg has been incorporated.
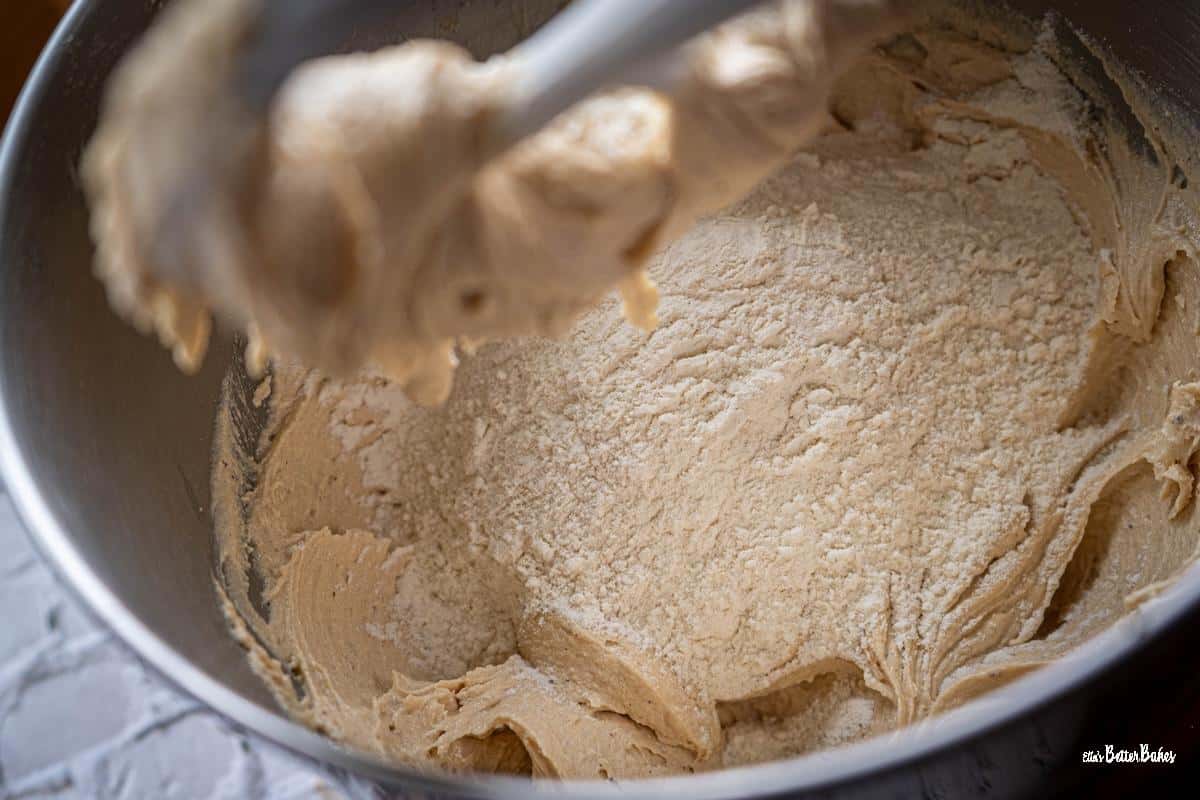
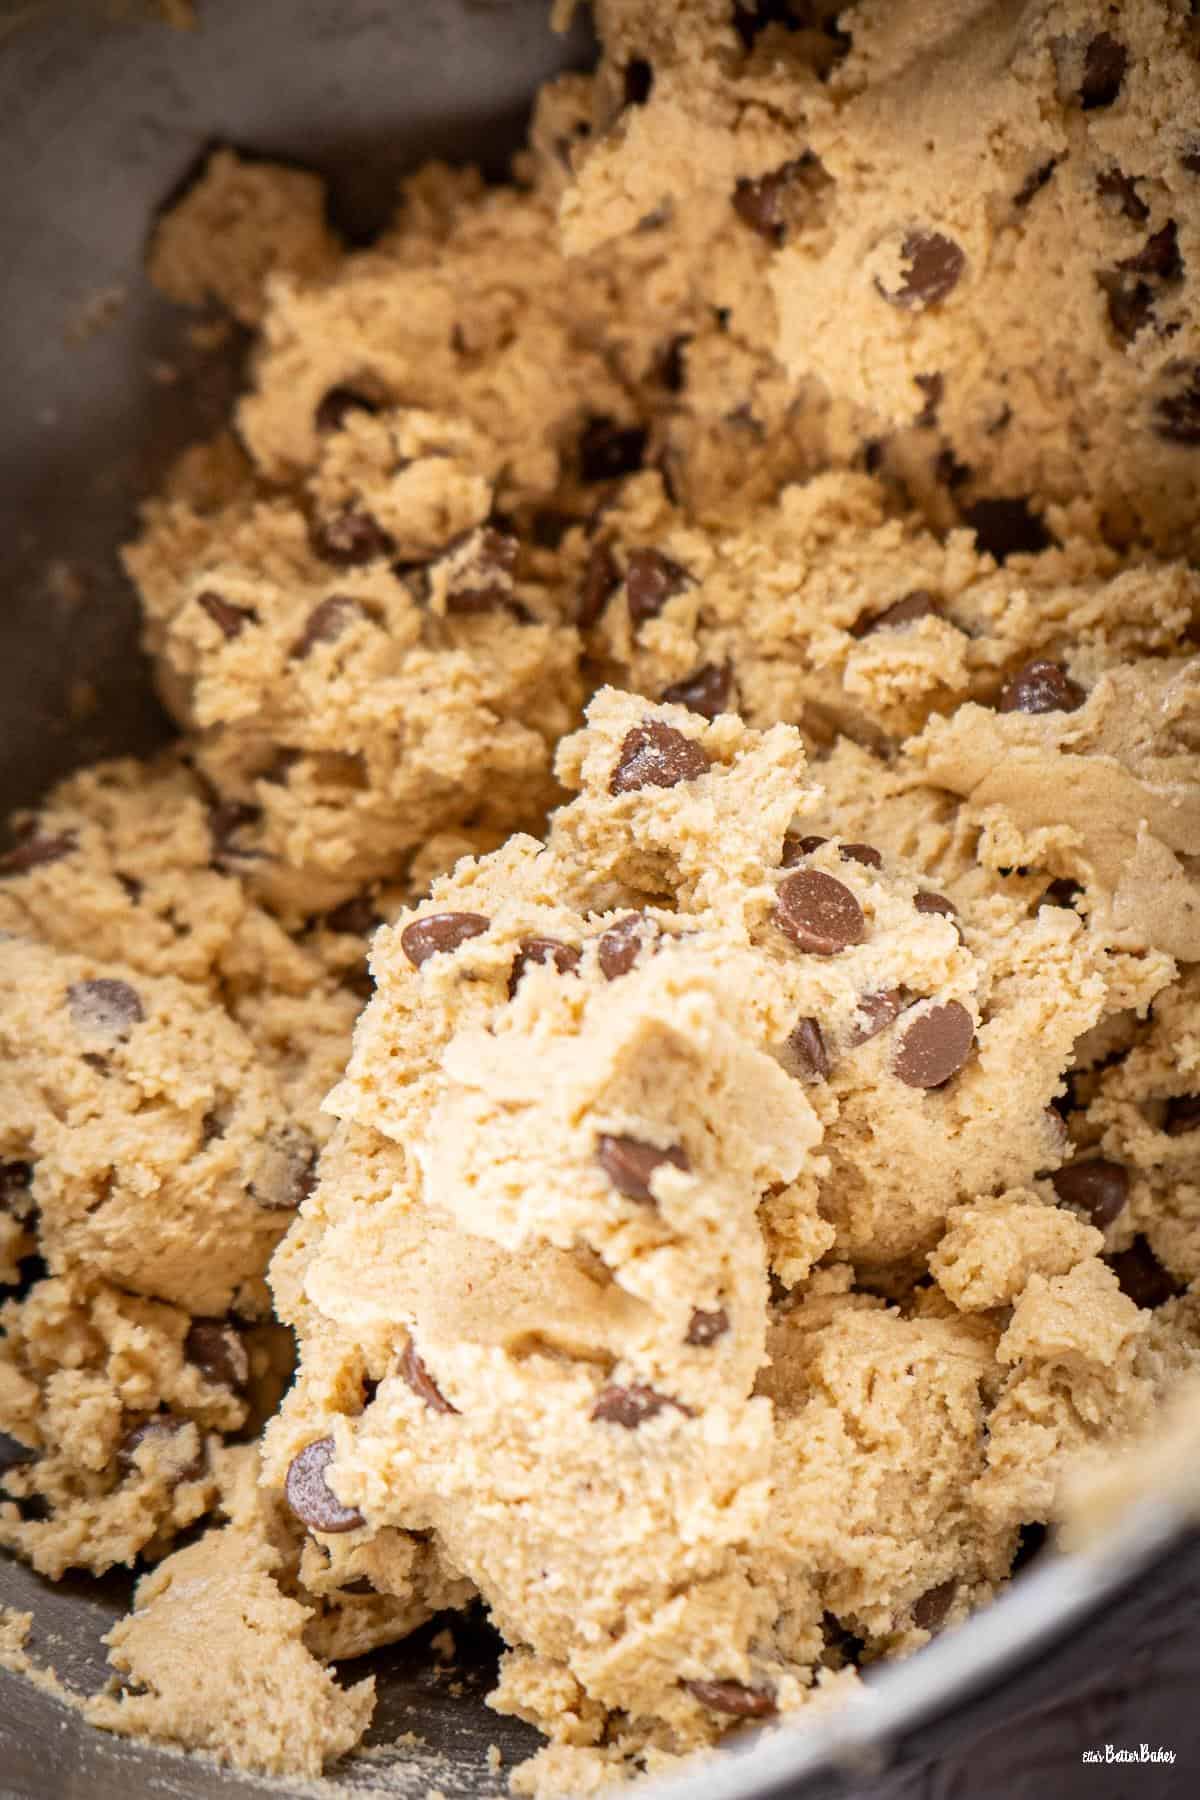
Dump in all of your flour and beat it on a low setting briefly until it just starts to clump together. Add your chocolate drops and beat a few times to mix them in.
Tip - Overbeating your flour will affect the texture of your cookies.
Remove your mixer bowl and gently pull the dough together with your hands.
Weigh out equal clumps of the cookie mixture; mine come in at about 67 grams each. Roll into balls and then refridgerate them for at least 6 hours, preferably overnight.
Tip: Always refrigerate your cookie dough. It improves the texture and flavour of your baked cookies. Alternatively, freeze the dough in balls and then bake the cookies from frozen; increase the baking time by 5 minutes.
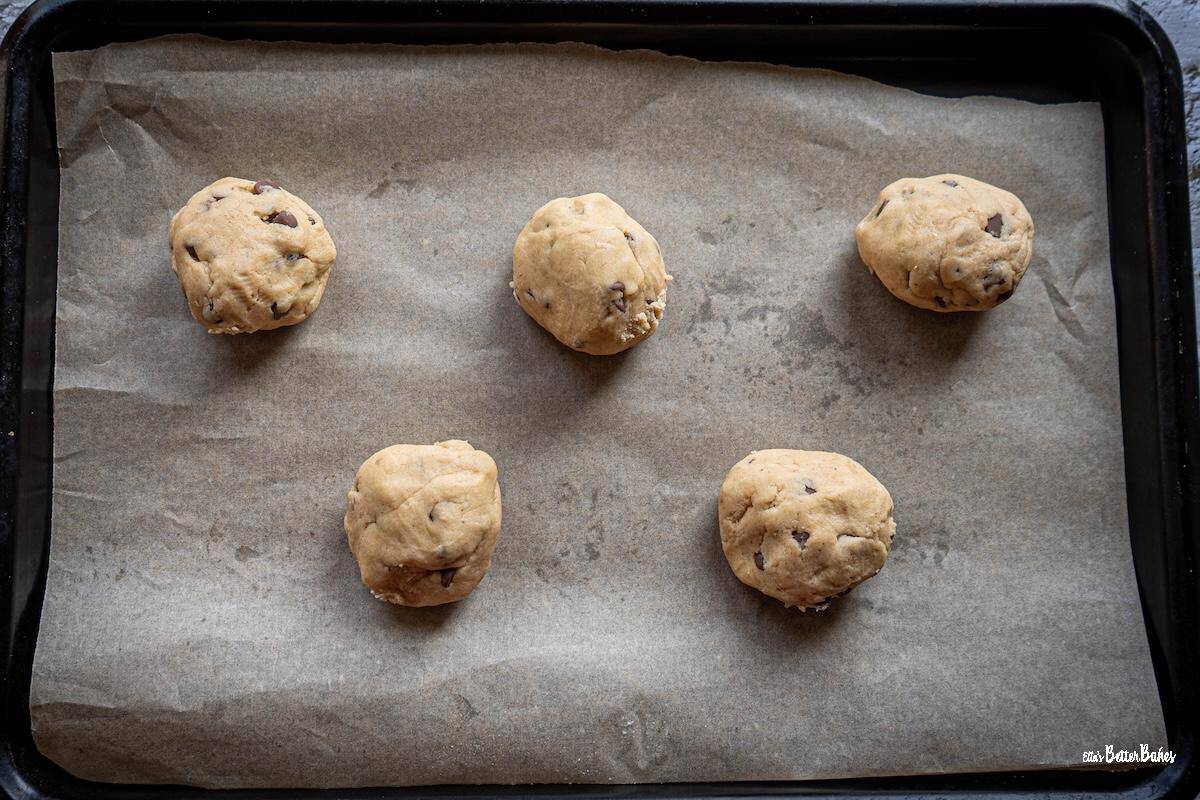
Heat your oven and line your baking tray with greaseproof paper. Place your cookie balls about 3 inches apart.

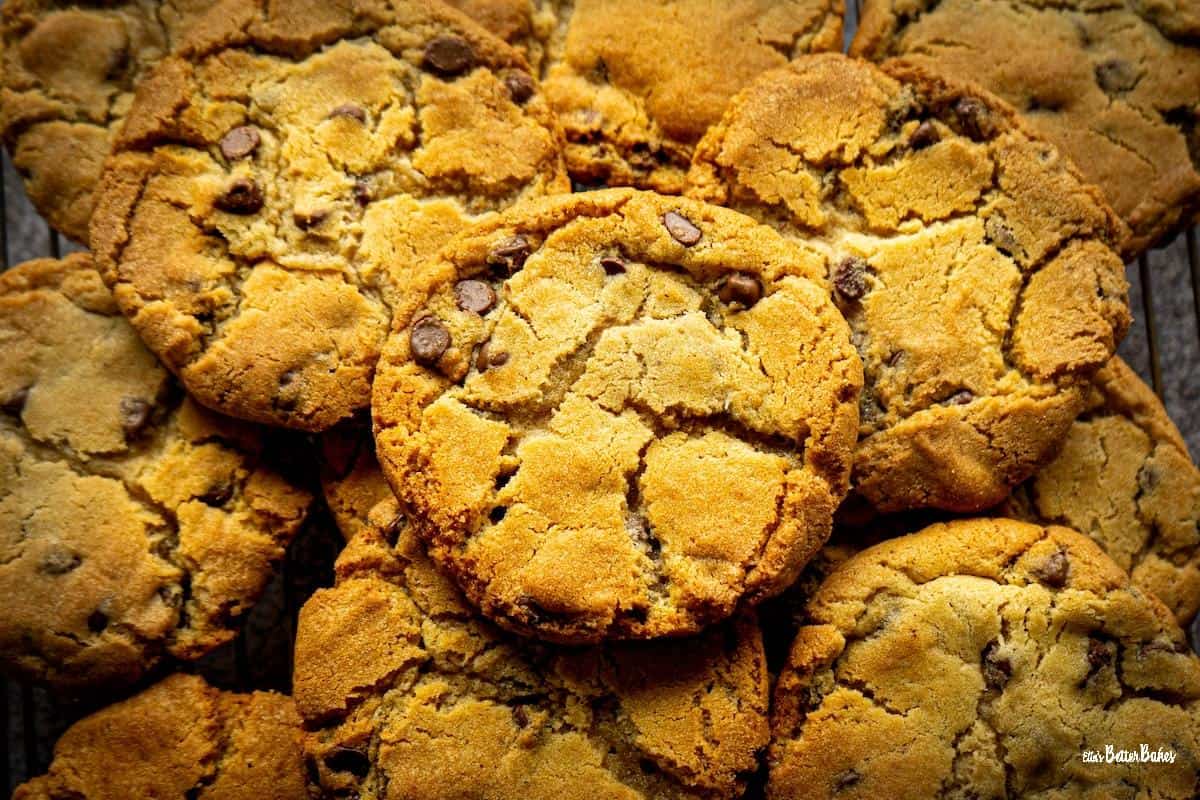
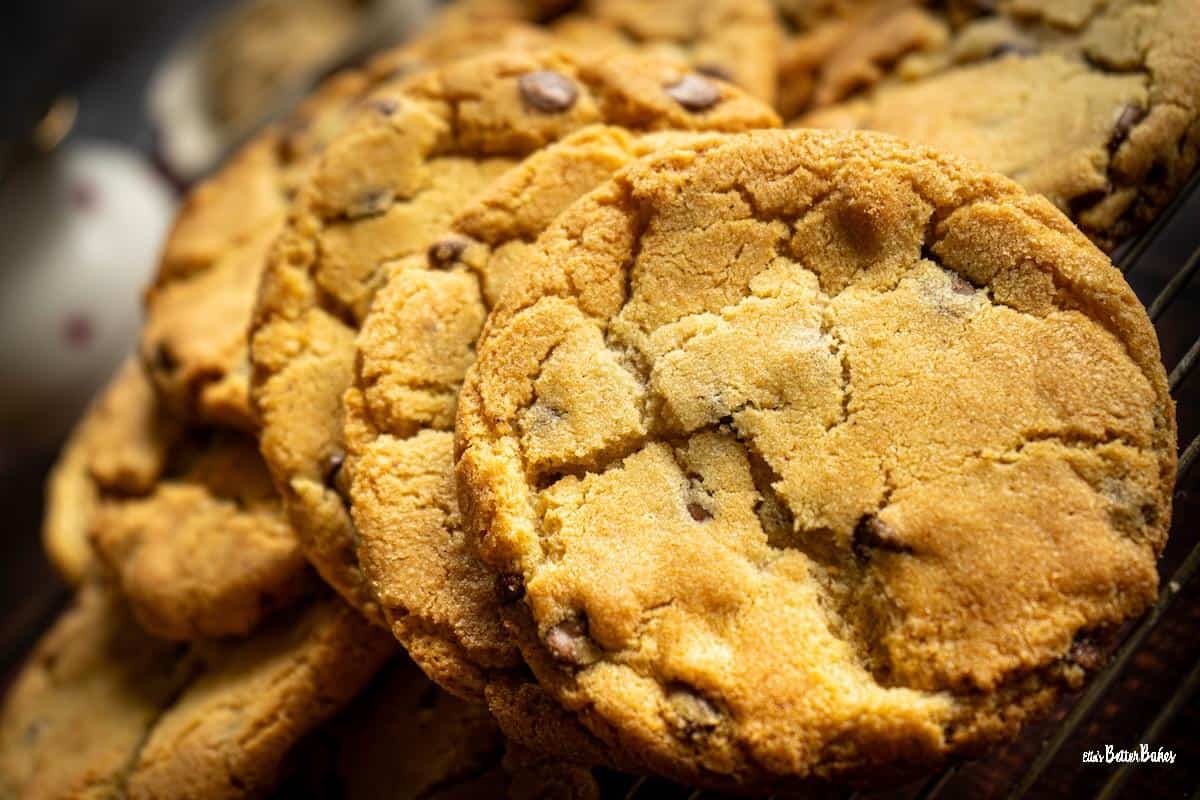
Bake your cookies immediately while they are still very cold. They should take about 15 minutes to bake in the centre of your pre-heated oven. They should still look slightly underdone in the middle when ready.
Really important 👉🏻 Leave the cookies on the baking tray for 10 minutes so that they can continue to cook in the middle and set. Then remove them from the tray and onto a cooling rack.
Storage
Keep your Chocolate Chip Cookies in an airtight container. They will be good for at least 4 days.
You can freeze the dough in balls and bake from frozen. They will take another 5 minutes to bake.

Top tips for PERFECT chewy chocolate chip cookies
So there are a few key things we do when making these truly wonderful cookies....
Brown the butter
Browning butter is truly really easy, and it makes ALL of the difference to both the texture and flavour of your chocolate chip cookies.
How to know when your butter has properly browned:
- Little flecks of brown sit at the base of your pan; these are milk solids, and give your cookies lots and lots of caramel flavour.
It is absolutely vital to always scrape the milk solids off the pan and add them to the dough. - The butter has a frothy top all over, and you have to move it aside to see the base of the pan
- The butter has turned a deep golden brown - be careful to remove it quickly at this point, as it will quickly burn
- It gives off a gorgeous nutty aroma

Top Tip for browned butter: Don't worry too much if you are unsure if your butter has sufficiently browned; even if just lightly golden it will still add loads of flavour to your cookies. If it burns, though, discard it and start again.
Refridgerate your cookie dough for at least 6 hours (preferably overnight)
This is a game-changer and absolutely vital. It allows the gluten in the flour to relax and the flavours to develop.
After all, all good things come to those who wait! Or rather, perfect cookies do!
Do not overbeat the flour
To be honest, this applies to most bakes, whether chocolate chip cookies, cakes, pastry, etc. Once added to a mixture, flour starts to develop strength the more you move it around. This is why bread dough is kneaded for so long, it allows the flour to develop strength and become elastic. Not so for cookies, cakes and pastries though.
So once the flour is added, keep mixing as short and gentle as possible.
Alternatives
The beauty of this cookie dough recipe is that you can use it for all manner of other cookies.
Simply change the milk chocolate drops for the same weight in whatever additions you want to make.
You can also use this recipe for Cookie Pies.
Loaded Cookies
You can use this chocolate chip cookie recipe for loaded cookies.
How to make Loaded Cookies
- Make the cookie dough as per the recipe card, then weigh it out into balls of 120 grams
- Flatten each ball into a circle, about the size of your palm
- Place your filling in the middle (for example, Biscoff, chocolate spread, hazelnut chocolate spread). About a tablespoon is all that is needed.
Tip: for loaded cookies, it is always a good idea to freeze the filling first in chunks; using ice cube trays is ideal. Once frozen, it ensures the filling is easier to handle and prevents it from oozing everywhere when the cookies are baked. - Fold the sides of the cookie circle over the filling so that it is hidden in the centre
- Refridgerate the cookie balls for at least 6 hours
- Bake at 170℃ Fan/190℃ /375℉/Gas mark 5 for approximately 20 minutes; the cookies should be lightly browned but still a little gooey when ready.
- Leave to cool on the tray for 15 minutes, then remove to a cooling rack
Related
Looking for other recipes like this? Try these:


📖 Recipe

The BEST Chocolate Chip Cookies!
Here's what you'll need...
- Small saucepan
- Stand mixer with paddle attachment or hand mixer with beaters fitted
- Baking sheet - a good thick heavy duty one preferably
- Greaseproof paper (parchment paper)
Ingredients you'll need...
- 275 g Plain flour (2¼ Cups of all purpose flour)
- 1 teaspoon Cornflour (cornstarch)
- 1 teaspoon Bicarbonate of soda (baking soda)
- ½ teaspoon Baking powder
- ¼ teaspoon Fine salt
- 100 g Unsalted butter (cut into small pieces) must be cold (7 tablespoons)
- 85 g Unsalted butter (cut into small pieces) (⅓ Cup), you should have 60 grams (¼ Cup) of left once browned
- 125 g Caster sugar (10 tablespoons of superfine sugar)
- 165 g Light brown sugar (¾ Cup , loosely packed)
- 1 Large egg without the shell it needs to weigh 60 grams, must be at room temperature
- 1 Egg yolk at room temperature
- 180 g Milk Chocolate Chips (1 Cup and 2 tablespoons)
Here's what we do...
- Sift your plain flour, cornflour, bicarbonate of soda, baking powder and salt together and set aside.
- Place your 100 grams of cold butter into your mixing bowl and fit the paddle attachment (or beaters if using a hand mixer).
- Over a medium-low heat, gently melt your 85 grams of butter in your small saucepan.
- Turn up the heat to medium-high. The butter will soon start to simmer. Keep stirring and scraping the bits off the base. The butter will soon become frothy, and then brown flecks of milk solids will settle on the base of the pan. Soon after, the butter will develop a nutty aroma and turn a deep golden brown. It usually takes about 4 minutes from when the butter started simmering until when it has browned.
- Once browned, remove the pan from the heat and immediately weigh out 60 grams (¼ Cup). Make sure you scrape the brown bits from the base and include them as they are full of flavour.
- Pour the 60 grams of your browned butter over the butter waiting in your mixing bowl and then immediately beat the butters together for 2 minutes on a medium high setting. If there are a few lumps of butter remaining, that is fine.
- Tip both sugars over your butter and beat for a minute on low setting, then turn up to a medium high setting and beat for another minute. Wipe the bowl down with your spatula midway to be sure everything mixes evenly. The mixture is ready when it is soft and creamy, light brown in colour and sticking to the edges of the bowl, not the paddle or beaters.
- Beat your eggs together and then tip them into the butter mixture, along with a dessert spoonful of the sifted flour mixture. Beat on a low speed until all of the egg has been incorporated. This takes about 10 seconds. Then beat on high for 10 seconds until creamy.
- Dump in all of the remaining flour mixture and beat it in for 10 seconds on a low setting.
- Add your chocolate drops and again beat in very briefly, for only about 5 seconds, just to disperse them.
- Gently bring the cookie dough together into a ball by hand.
- Roll the cookie dough into equal balls. Mine weigh about 67-68 grams each.
- Set your cookies on a baking tray or plate and then cover them with cling film (plastic wrap) and refridgerate them for at least 6 hours. Overnight is even better.
- When you are ready to bake your cookies, heat your oven to 170℃ Fan/190℃/375℉/Gas mark 5.
- Line your large baking sheet with greaseproof paper.
- Place your cookie balls about 3 inches apart from each other. You will likely need two trays or need to bake in 2 batches.
- After 13-15 minutes your cookies should be just golden around the outside but look a bit undone in the middle. That is perfect. Remove the tray from the oven and leave them on the tray to continue to cook for 10 minutes.
- After 10 minutes remove the now set cookies from the trays onto a cooling rack to fully cool.
- Enjoy! They are irresistible!


Comments
No Comments