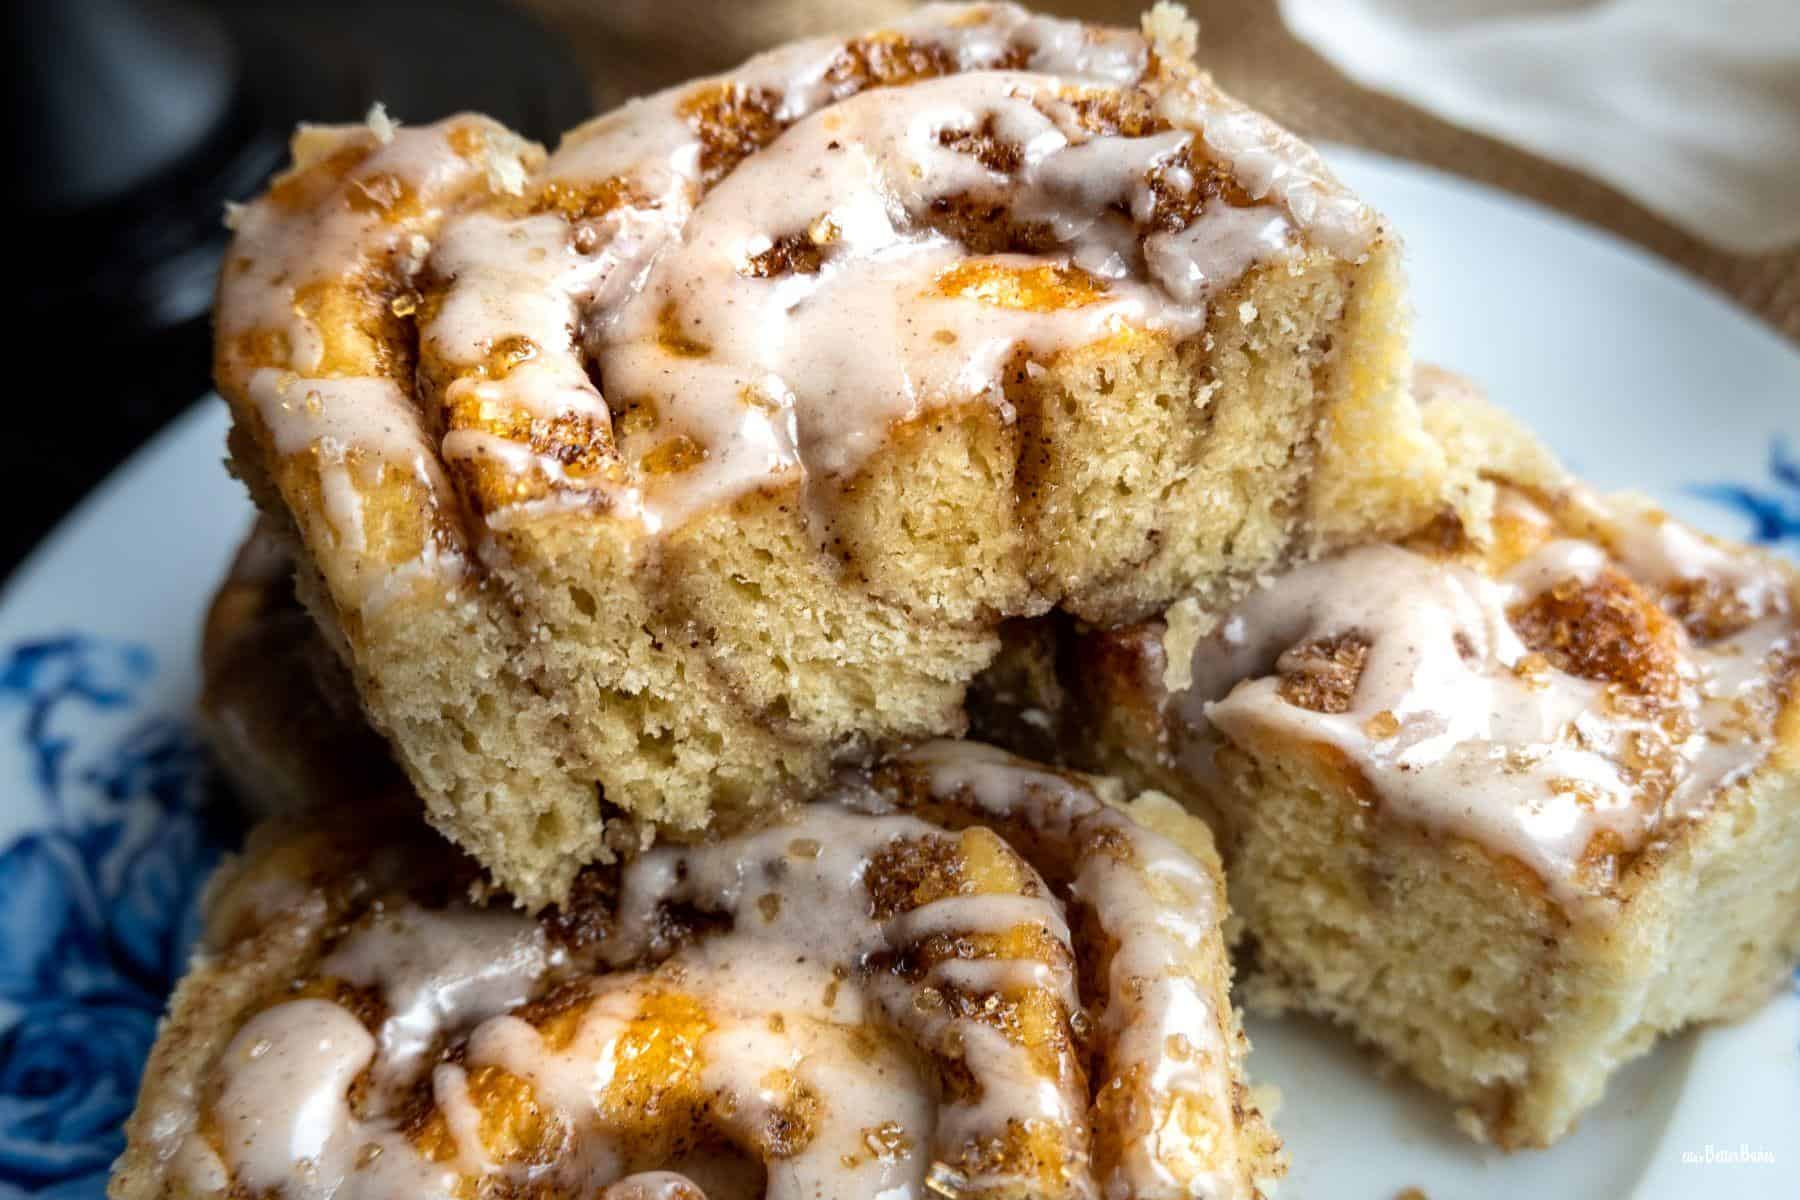
Cinnamon and Maple Syrup Buns
Soft, fluffy, light cinnamon and maple syrup buns, made with a cardamom infused bread, filled with a brown cinnamon sugar and drenched in a cinnamon and maple syrup icing.
This baking exploration was at the behest of the first-born son, who was back for the weekend and had confessed to a long standing addiction to cinnamon buns and an inability to survive the weekend without them. However, I didn't take much convincing to bake up a batch. The thought of a warm cinnamon bun with maple syrup and a steaming cup of rich dark coffee on a lazy Sunday morning was something I could hardly resist either.
Having previously made delicious traditional Swedish Kanelbullar, I wanted to pull in some cardamom flavours into these buns. The citrus spiciness of cardamom works so well when paired with cinnamon. In addition, these cinnamon rolls have also been treated to ample doses of maple syrup, added throughout. Perfection!
The aromas from the oven as they baked were, quite frankly, to die for.
Put it this way, they lasted 1.5 days in our house. I have tempted the first born back home again this weekend by promising to deliver up another batch.
What are the key elements to making cinnamon and maple syrup buns?
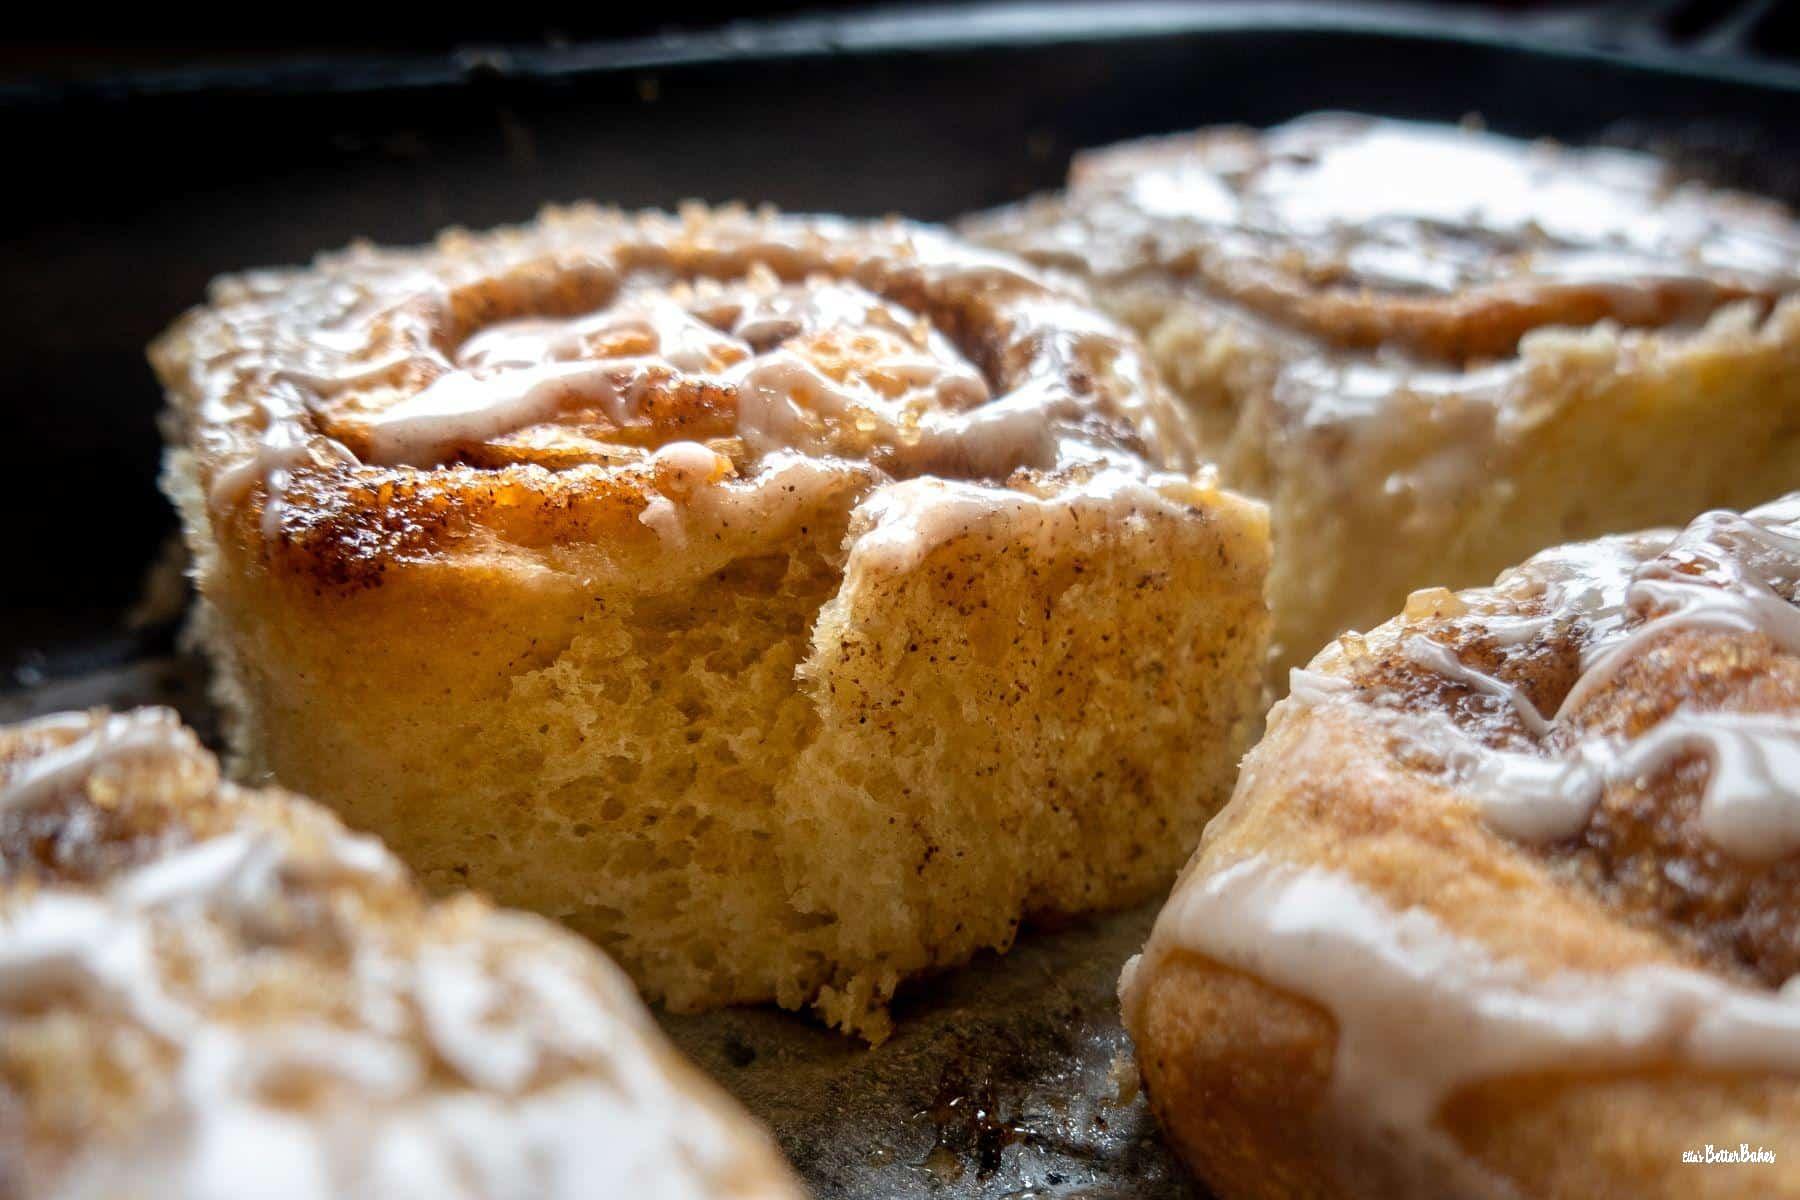
Mixture of flours : I used slightly more white bread flour than plain (all purpose) flour in these buns. Bread flour delivers a light and fluffy texture to the buns. Also, the additional protein in bread flour increases the gluten produced and thus ensures the cinnamon bun texture we all know and love. It's all in the science folks!
Cardamom infused milk :12 cardamom pods are broken apart and the seeds extracted. The seeds are then heated with the milk and everything is then left to cool and infuse. If, like me, you adore the flavour of cardamom you might like to try my Persian love cake with rosewater. You can use ½ a teaspoon of ground cardamom if you prefer. Using cardamom just adds another interesting flavour layer to the buns, but is very subtle.
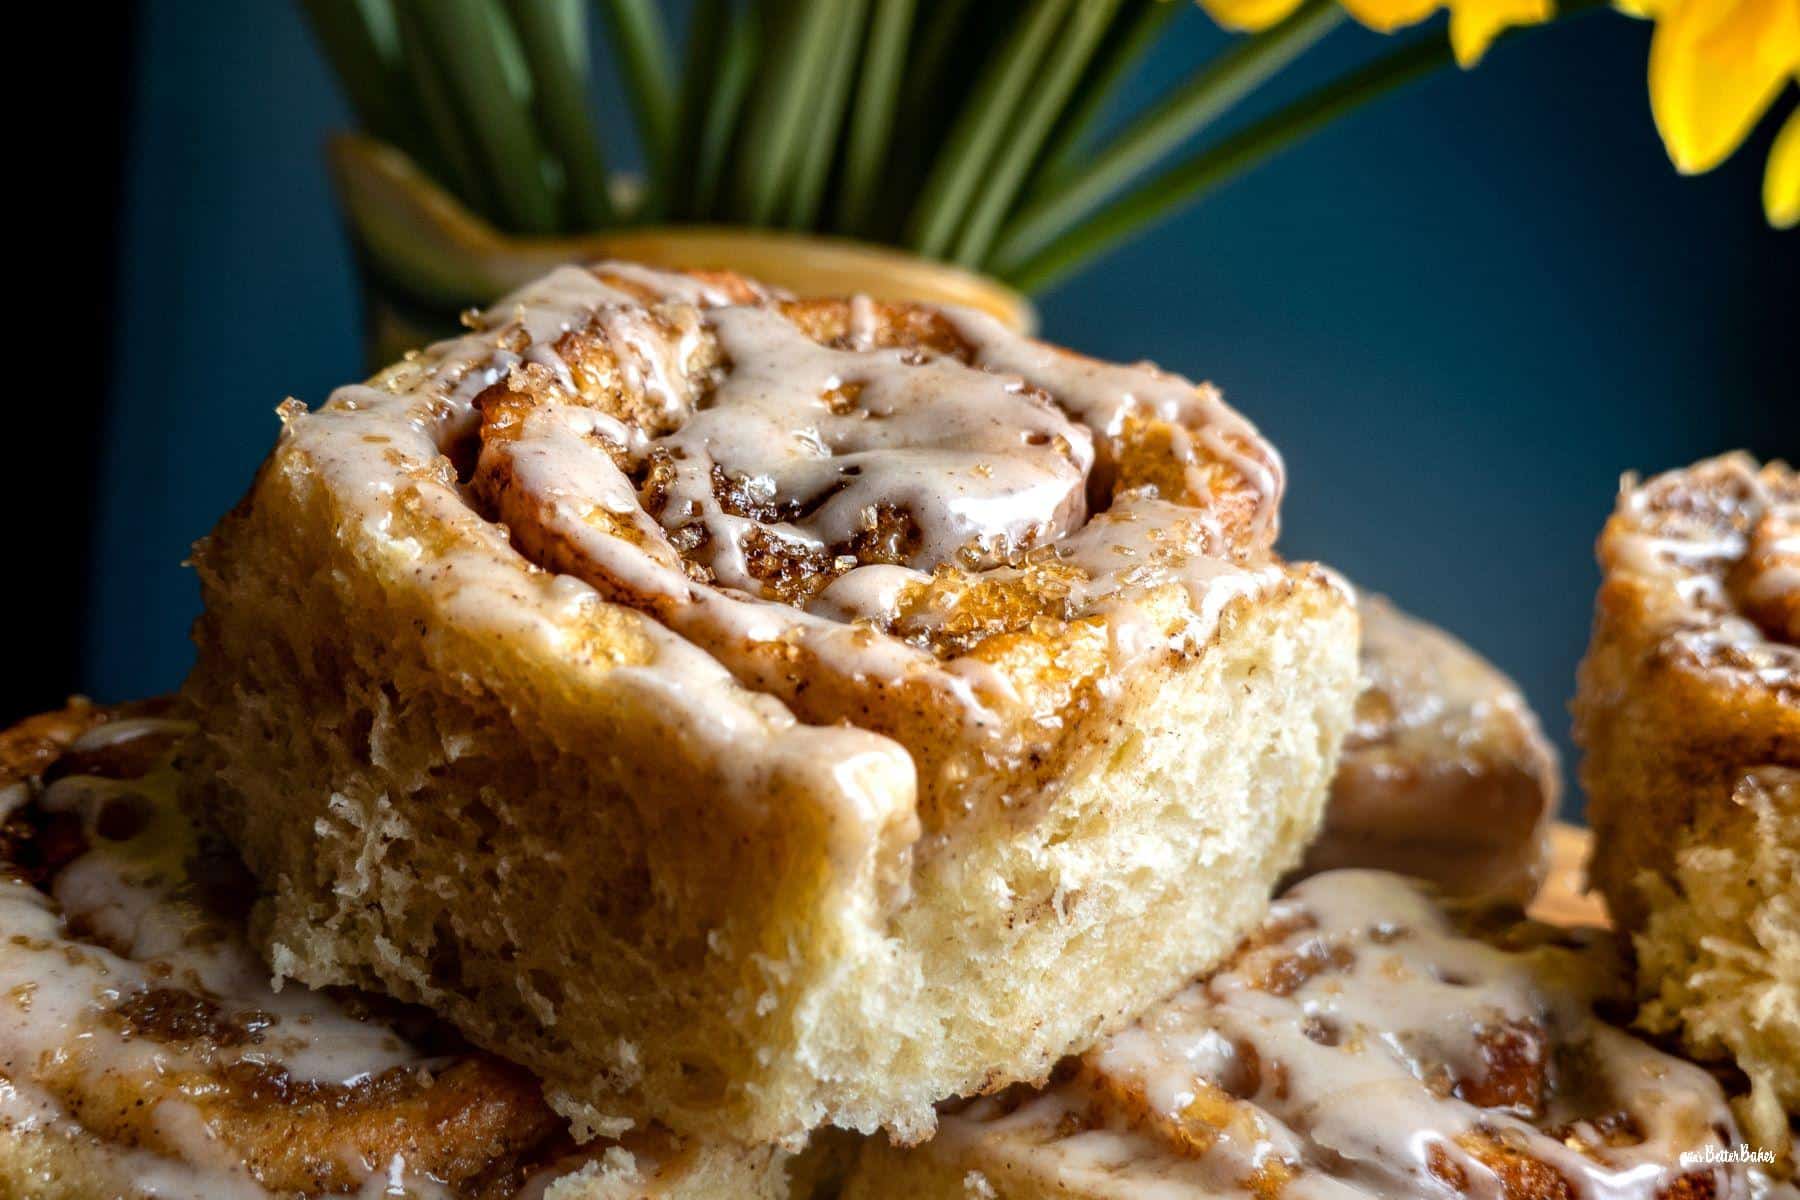
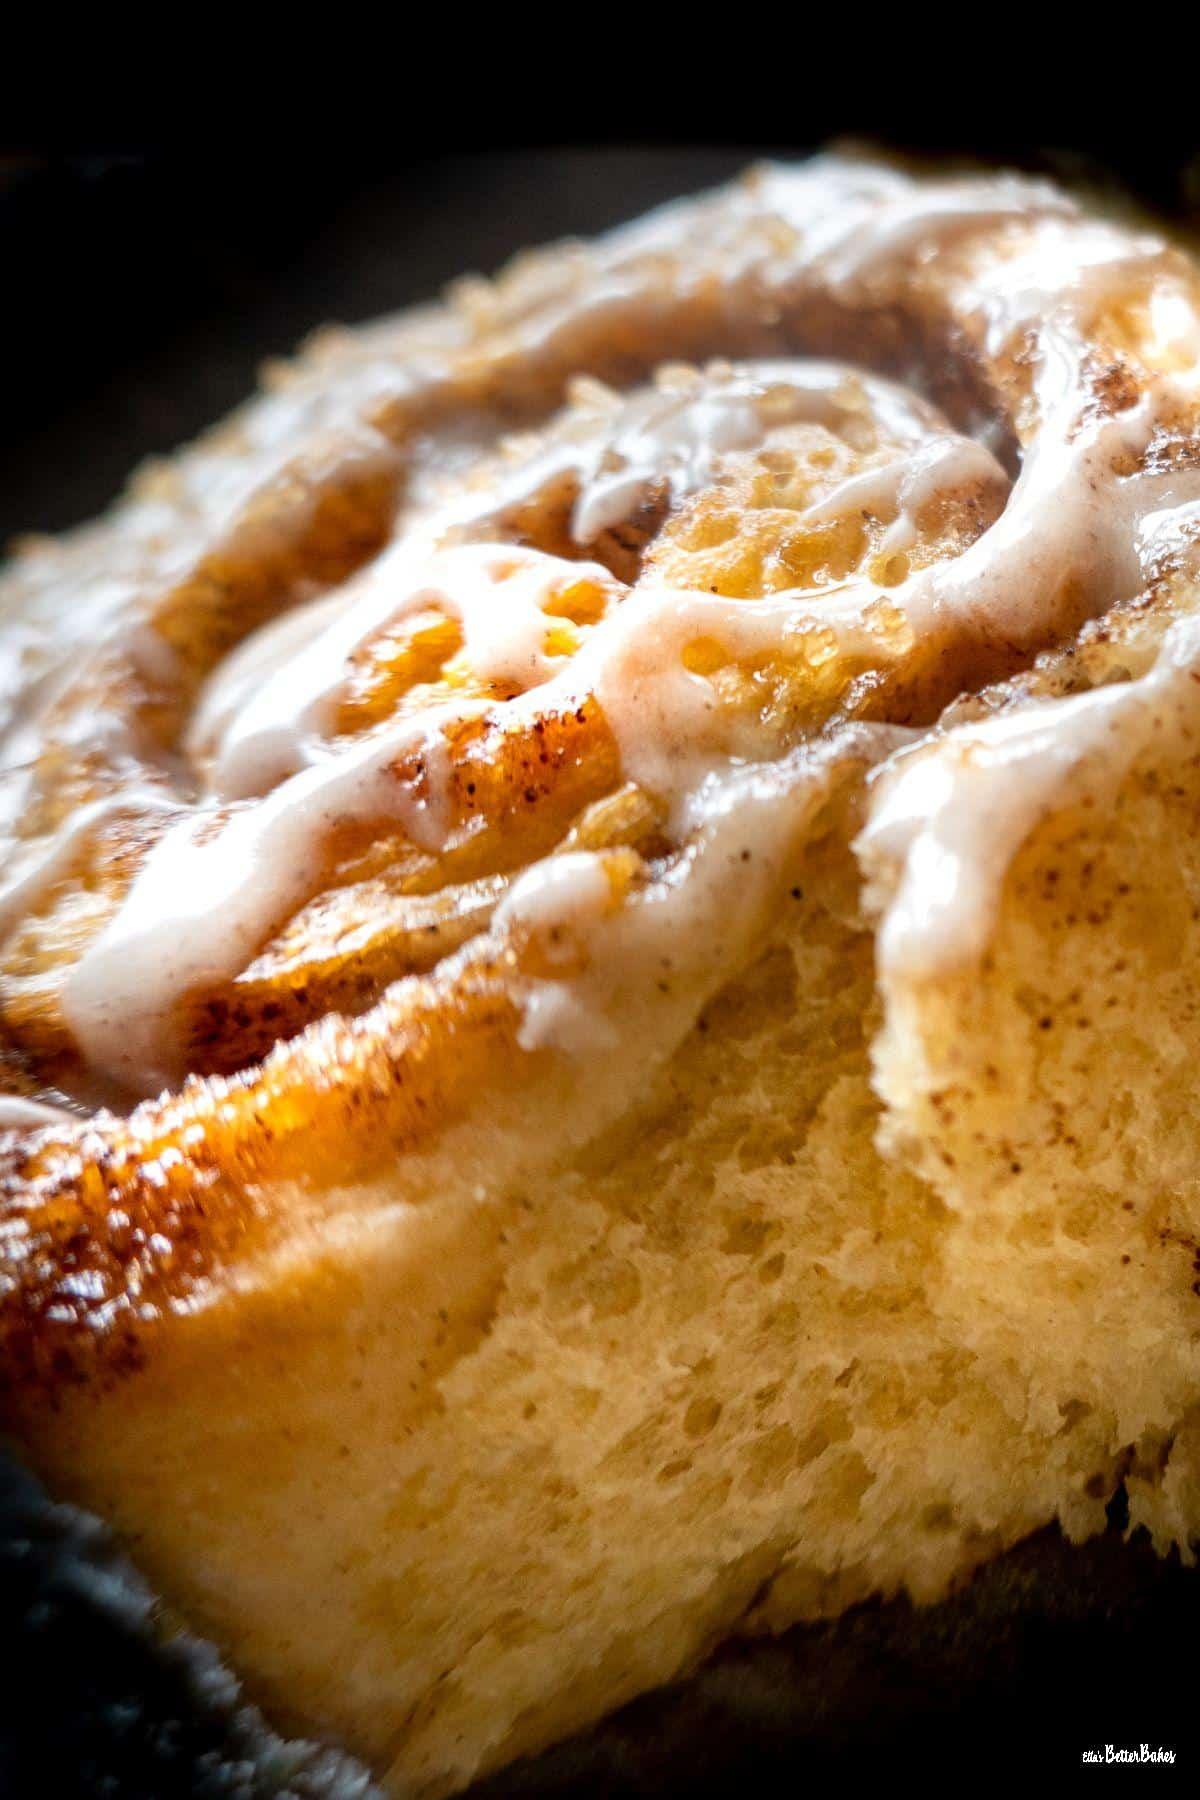
Light brown sugar filling : definitely use brown sugar in these cinnamon rolls, it gives them a nuttiness that works so well with the cinnamon spice and maple syrup. It also gives the cinnamon rolls a lovely dark brown filling. You can use any sugar you like however. If you prefer a deeper flavour you can use muscovado sugar (molasses) or if you go with simple white granulated sugar. Anything goes!
Because the buns are treated to a cinnamon icing you only want just enough cinnamon filling to ensure the rolls have just the right quantity of flavourings. You want to be able to taste the cardamon bread of the roll a well as the cinnamon filling as well as getting a hint of maple syrup.
How to make these cinnamon and maple syrup buns
Now there are a few stages to making these cinnamon and maple syrup buns. The buns are bread based therefore they require proving. Nonetheless, they are very simple to make. People are often put off by the idea of making anything bread based but really it's truly a cinch and well worth the love and attention that goes into the process.
Making the cinnamon buns : firstly, prepare your cardamom infused milk. Crack the cardamom pods, using a pestle and mortar or just a rolling pin, remove the seeds and discard everything else. Add them to your milk. Heat the milk until hot but not yet boiling. Set aside and leave to cool for about 20 minutes to allow the milk to absorb fully the cardamom flavours. Then pour the milk mixture through a fine mesh sieve and discard the cardamom seeds.
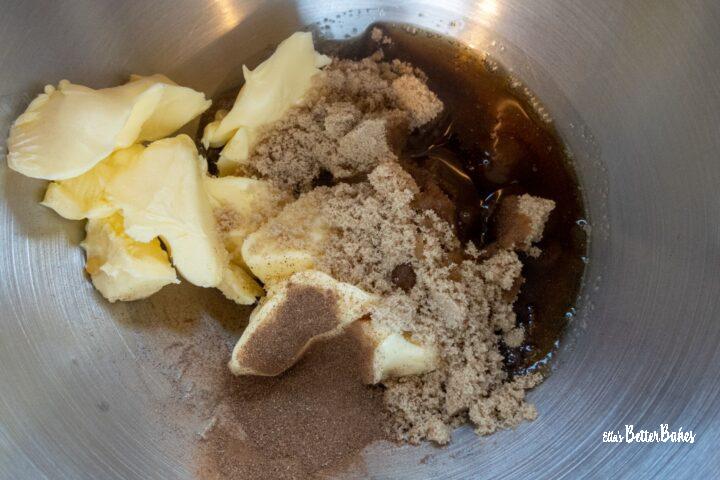
Add both flours to your mixing bowl along with your salt and give everything a mix together. Then rub in your softened butter. You can do this in a food processor, but I find it easier to just to do it by hand as there isn't much butter to rub in. Rub your butter in so that the mixture resembles breadcrumbs and all of the larger lumps of butter have disappeared. You can do this by rubbing the butter and flours between your thumb and fingers. Then mix in your sugar.
Reheat your milk so that it is hand hot, you want it just a bit hotter than lukewarm. But don't worry about it too much, it doesn't have to be a precise temperature. Beat together one of your eggs and one egg yolk. Then add the milk and eggs to the flours.
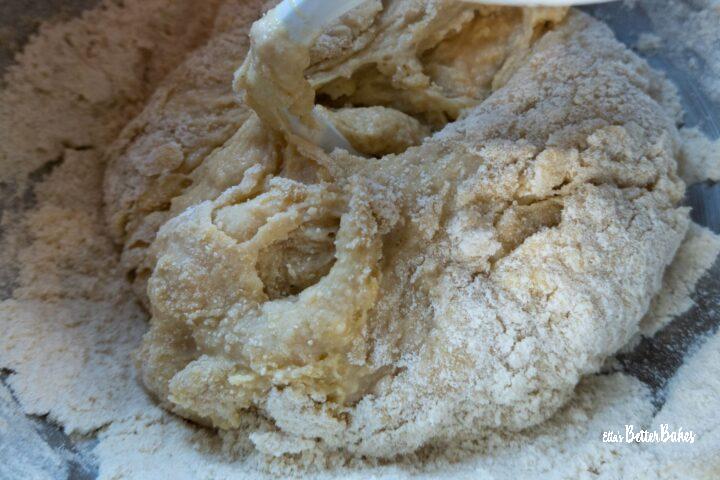

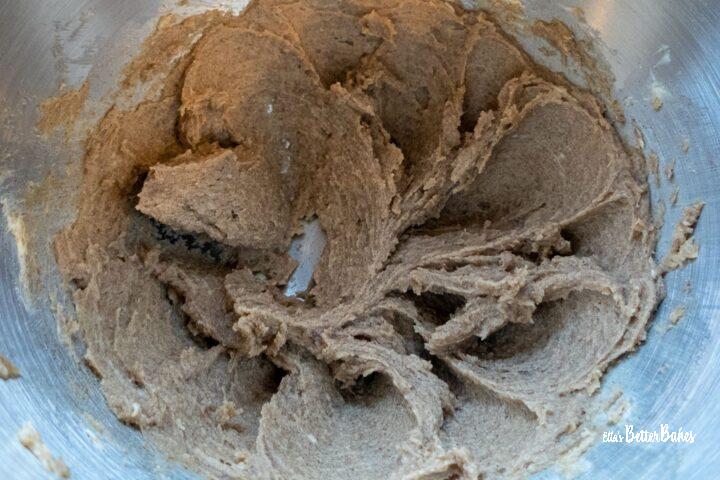
Rolling the rolls : using the dough hook on your stand mixer mix on a medium setting for 2 minutes. The dough should then be fully incorporated into one big ball which will likely have wrapped itself tightly around the dough hook. When you remove it the dough should feel smooth throughout. You can knead the dough by hand, the results will be just the same and it's a good workout for the upper arms! Knead for about 8 minutes, again when ready the mixture should be quite elastic and smooth. If you want to know how to knead go to this video.
Remove the dough from the bowl and grease the bowl with some flavourless oil. Then return the dough to the bowl and cover it with a piece of oiled clingfilm. Tuck the clingfilm over the sides of the bowl to retain the heat as it proves. The bowl must be big enough to allow the dough to prove to about twice it's original size without touching it's clingfilm lid. Leave the dough to prove for about one and a half hours, when ready it should have billowed to double the size.
Cinnamon and maple syrup filling
I love this bit. Lightly flour your workface then remove the dough from the bowl, it will deflate as you do so. Give it about 3 kneads just to knock it back. Then roll it out into a large rectangle. I find it easier to use my hands to push the dough out and then roll it.
Next mix together all of your filling ingredients. Then spread the filling over the rolled out dough. Personally, again, I find it easier to use my hands to spread the filling out evenly. Make sure you spread the filling right to the edges of the dough. It is messy yes, but it is much easier. And it's kinda fun.
Starting at the short end of the dough, gently roll up into a swiss roll shape. Then cut the roll in half, in half again and then into threes, so that you have 12 equally sized rolls. You may find the end rolls are a a little smaller than the others, but that doesn't matter in the least. When they prove they will all snuggle in together to fill the whole of the tin. Brush over some beaten egg.
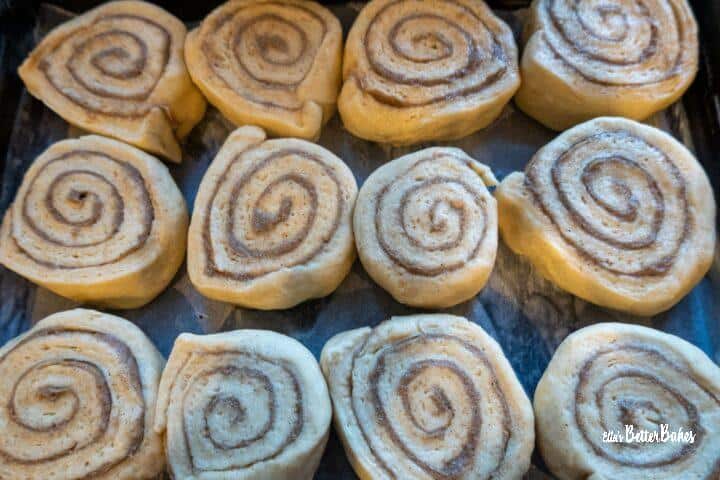

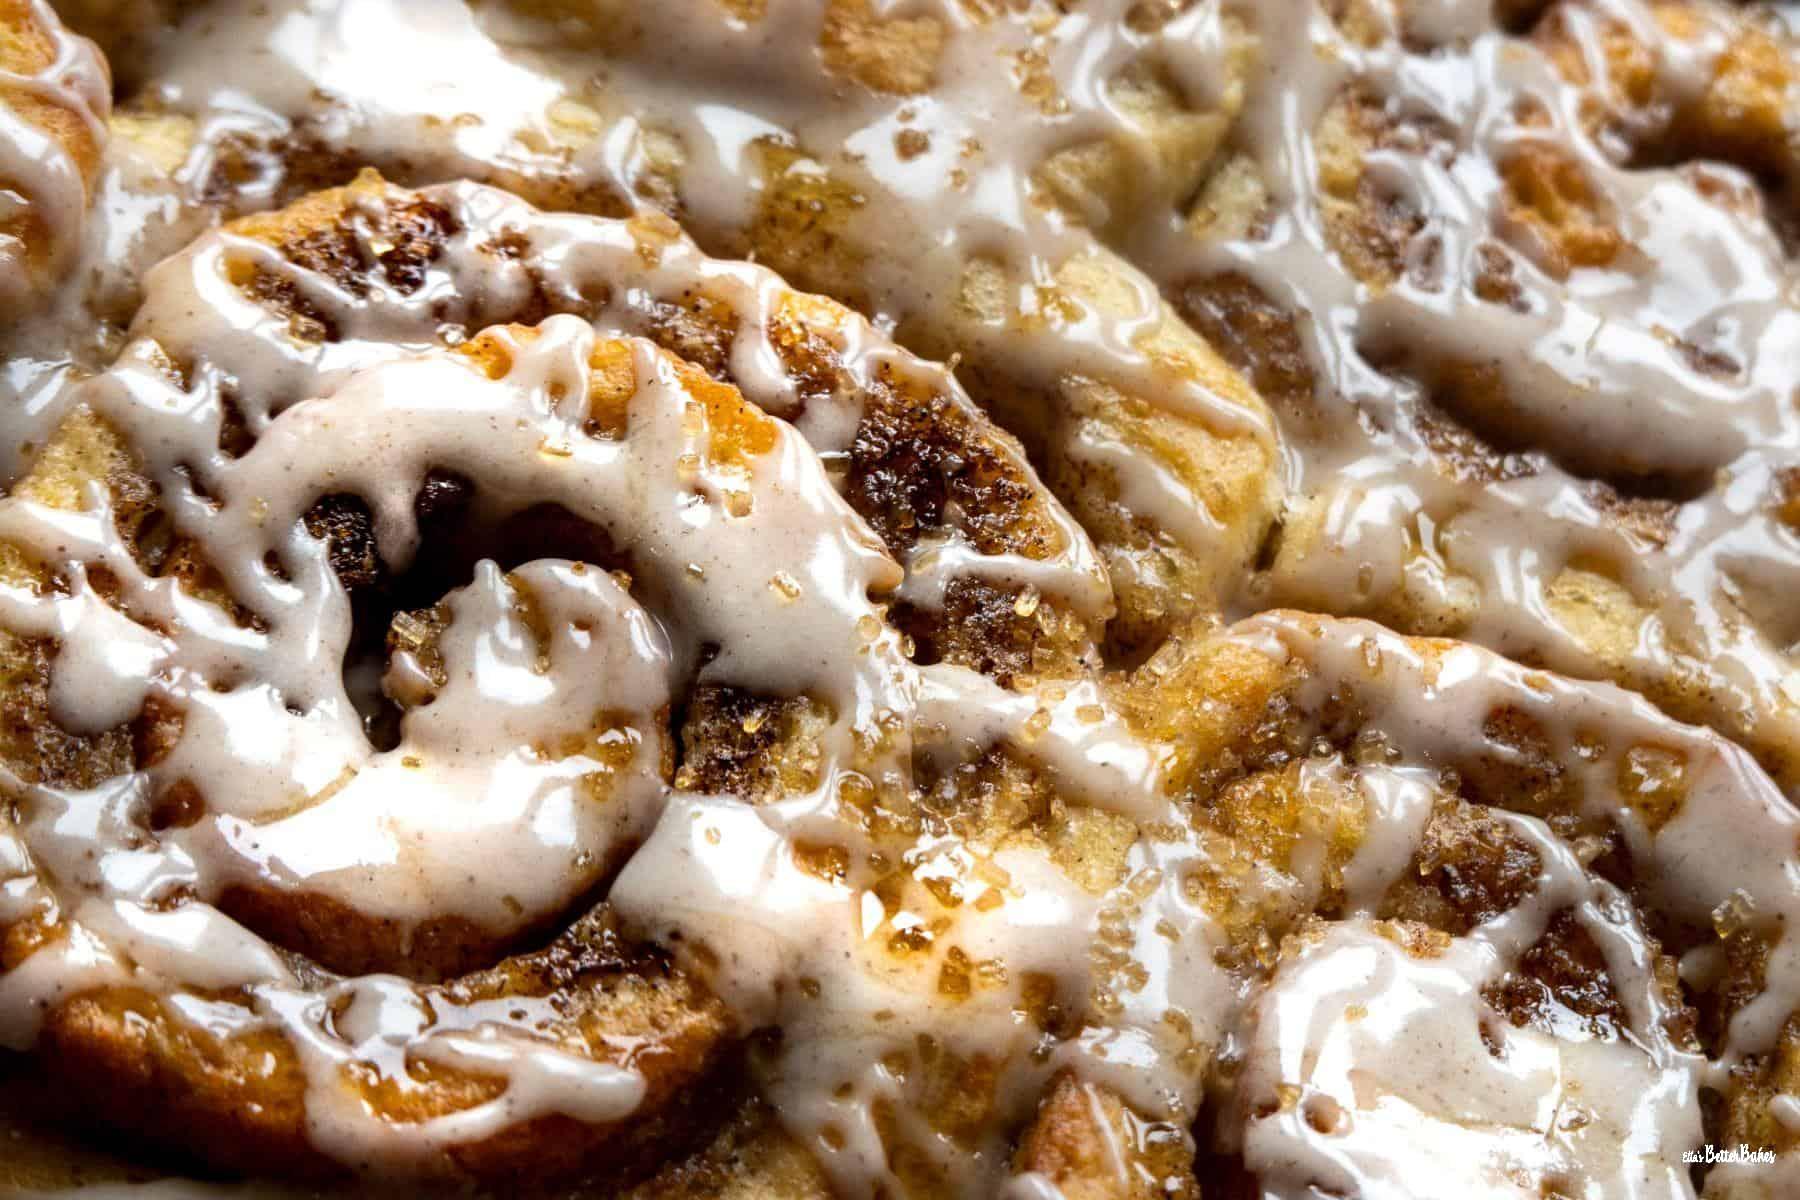
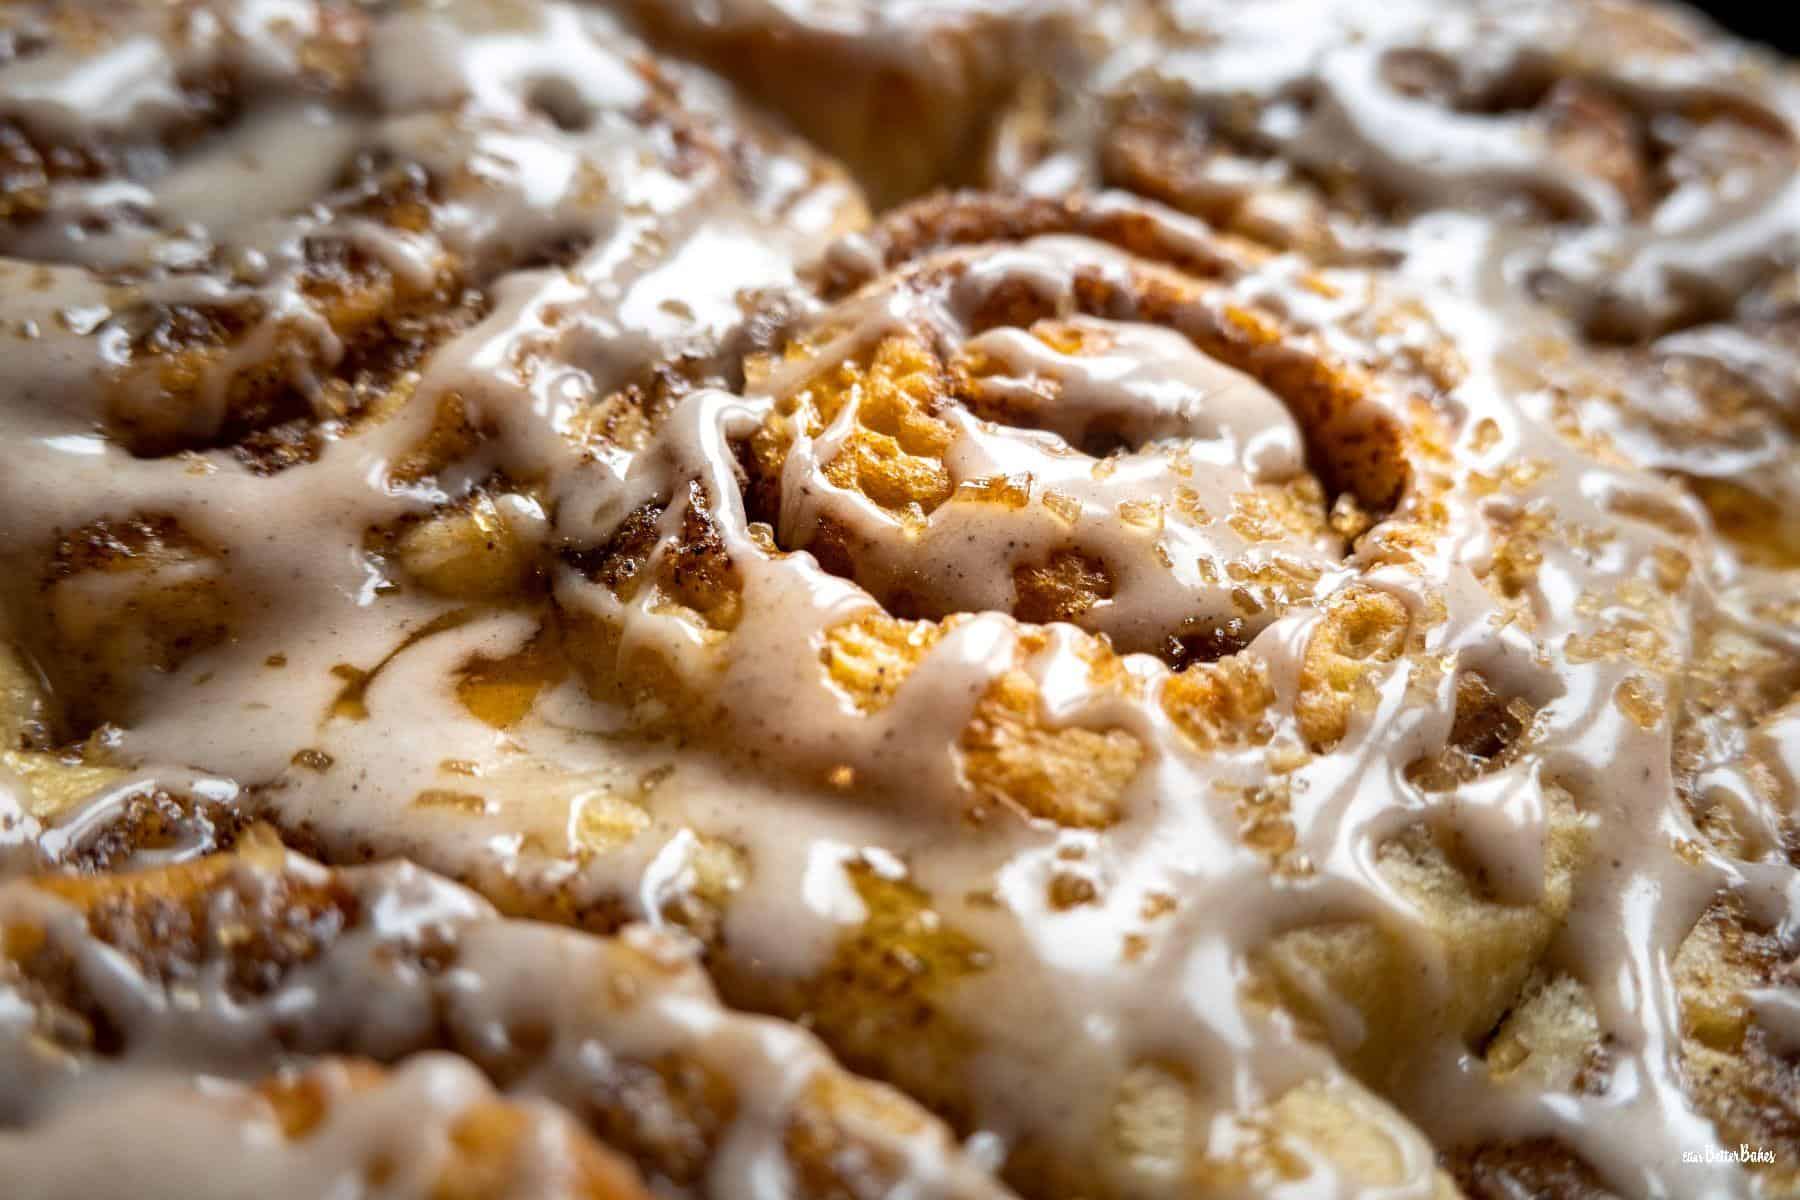
Place the rolls into your lined tin, 4 along the wide side and 3 deep. Cover with oiled clingfilm and again leave to prove for 30-45 mins. When ready they will have billowed in size and all be touching, filling the tin. Then just pop them in the oven to bake for 20 minutes. When ready the buns should be a lovely golden colour, don't overbake them as you want the bread to be soft and springy inside. Leave the rolls to cool in the tin.
Cinnamon and maple syrup icing
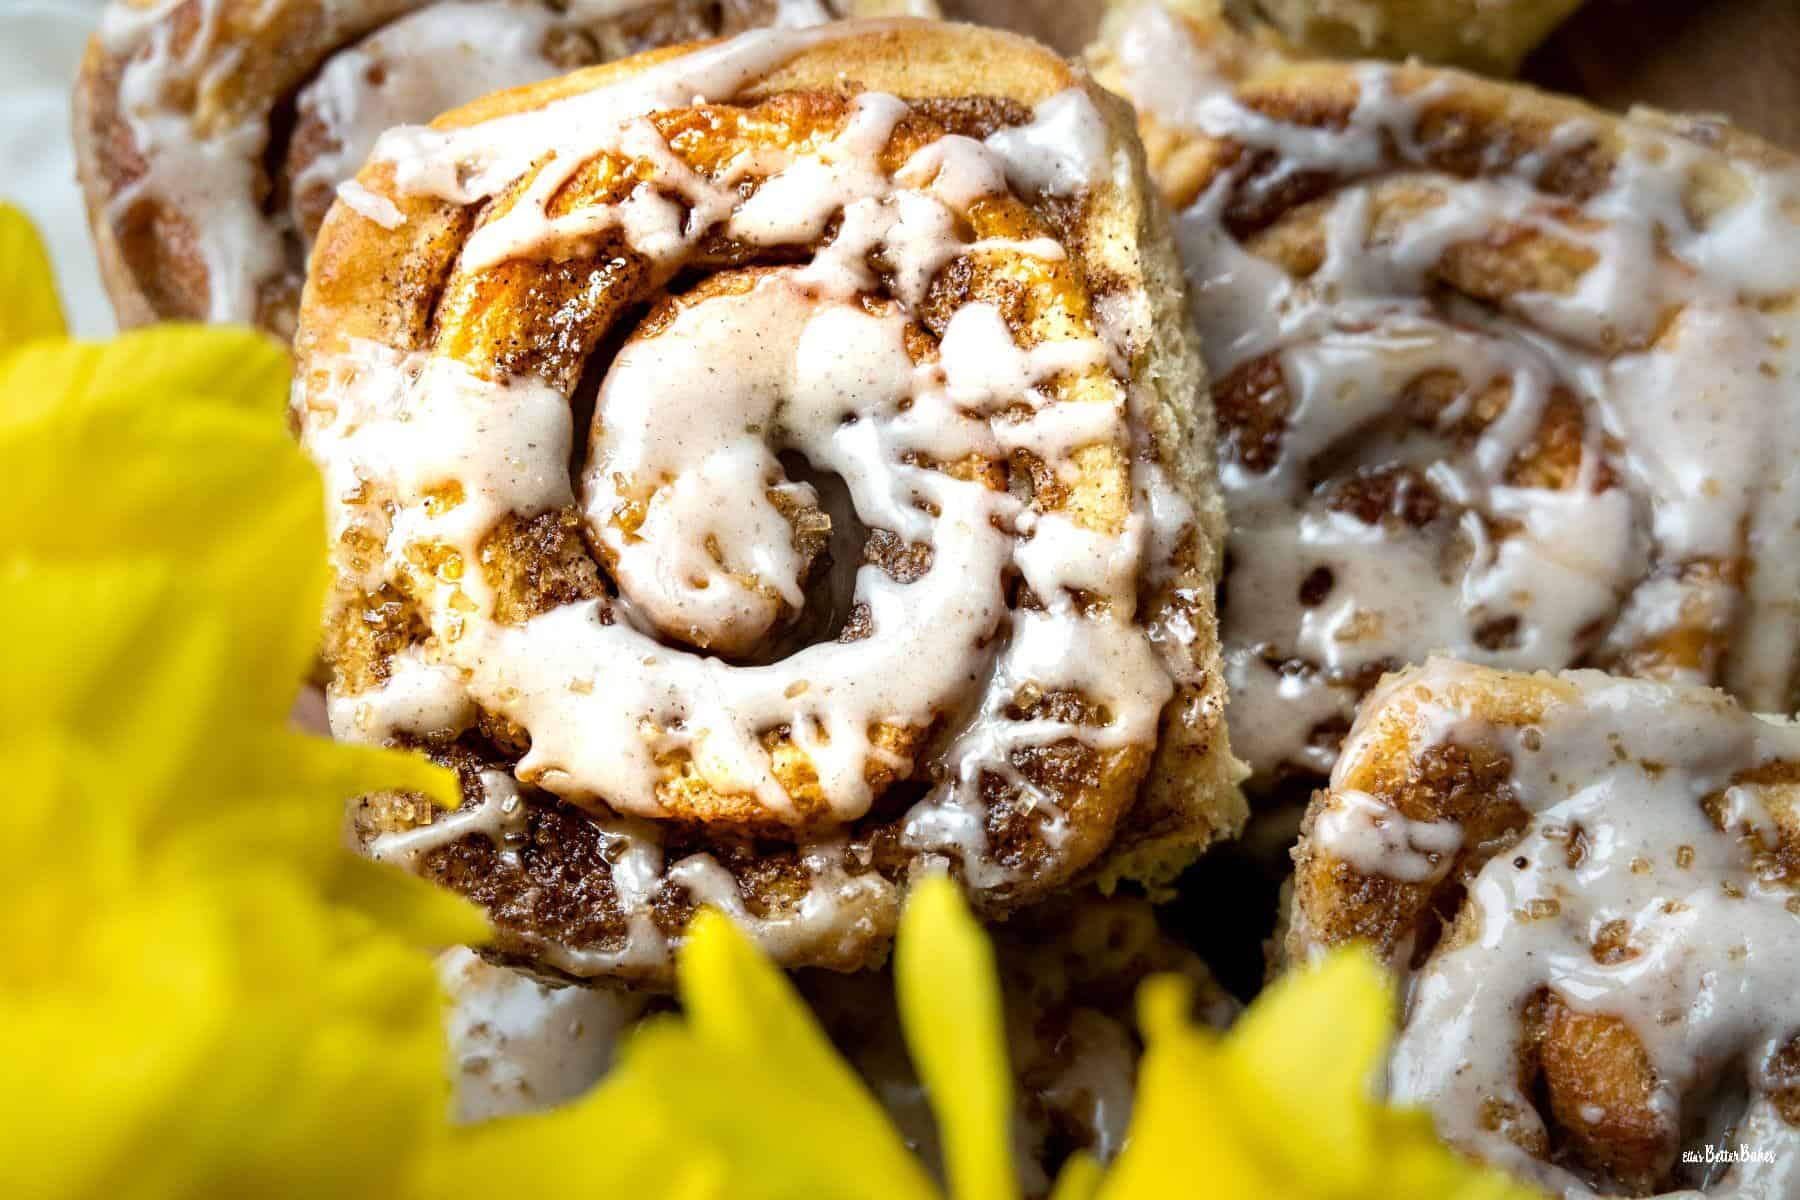
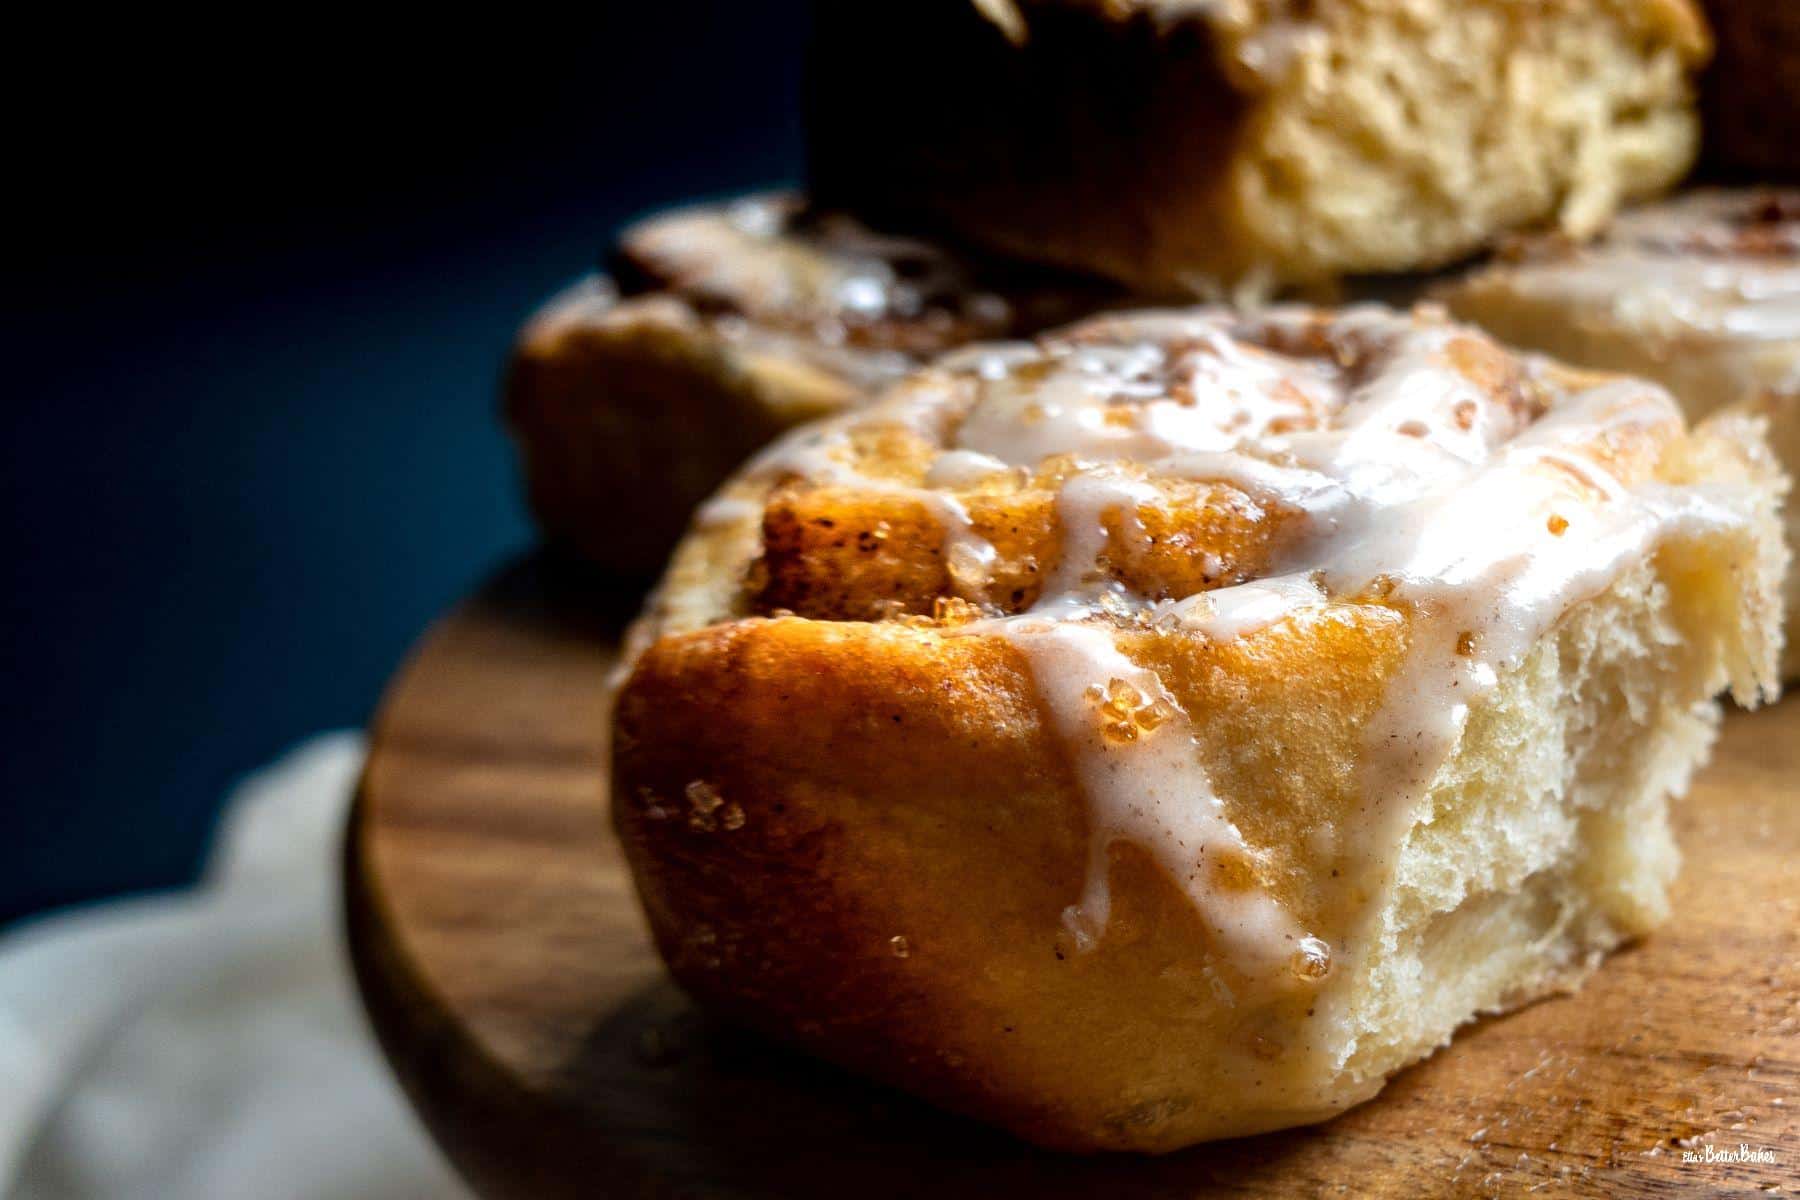
Whilst they cool make your cinnamon icing. Add everything to your mixing bowl and mix on a medium setting until fully combined and smooth. Dip a large spoon into the icing and hold it high about 30cm above the buns and allow it to drizzle over them. Over this then drizzle your maple syrup and over this sprinkle over your demerara sugar. This gives a nice crunch to the topping and a bit of texture.
Then try not to resist eating them all at once! That is still something we are working on in our house though...
Please do post some feedback if you can if you have made these buns. Happy cinnamon bun baking!
📖 Recipe

Cinnamon and maple syrup buns
Here's what you'll need...
- Small saucepan
Ingredients you'll need...
Cinnamon and maple syrup rolls
- 230 ml milk
- 12 cardamom pods
- 14 g fast acting yeast
- 300 g strong white bread flour
- 200 g plain flour (all purpose flour)
- ½ teaspoon salt
- 100 g unsalted butter softened
- 50 g golden caster sugar
- 2 large eggs at room temperature
- 1 egg for egg wash (optional)
Cinnamon and maple syrup filling
- 100 g unsalted butter softened
- 100 g light soft brown sugar
- 40 ml maple syrup
- 2 teaspoon ground cinnamon
Cinnamon and maple syrup icing
- 150 g icing sugar sifted
- 1 tablespoon maple syrup
- 2 tablespoon milk
- ¼ teaspoon ground cinnamon
For topping
- 1 tablespoon maple syrup
- 1 tablespoon demerara sugar (optional)
Here's what we do...
- Gently smash your cardamom pods in a pestle and mortar to release the seeds.
- Add the seeds and your milk to a small saucepan and heat until just before boiling point, so the milk is just nice and hot but not at boiling point.
- Set aside and allow to infuse for 20 minutes.
- Add both flours and your salt to a large bowl and rub in your softened butter, you can do this by hand or in a food processor.
- Stir in your sugar.
- Using a sieve, drain your milk to remove the cardamon seeds.
- Reheat your milk mixture until hand hot and then stir in your yeast.
- Beat together one full egg and one egg yolk.
- Make a well in the centre of the flour and pour in the milk mixture and beaten eggs.
- Mix together in a stand mixer with a dough hook on a medium setting for 2 minutes. Or knead by hand for 8 minutes.
- Grease a large bowl with oil, add your kneaded dough and cover the bowl with a oiled piece of clingfilm.
- Leave in a warm place to prove for 1½-2 hours or until doubled in size.
Adding your cinnamon and maple syrup filling
- Grease your tin and line the base with greaseproof paper.
- Lightly flour your worksurface.
- After your dough has risen remove it from the bowl and gently knead by hand on your floured worksurface several times.
- Roll out your dough to a 12x18 inch rectangle.
- Beat all of your filling ingredients until smooth.
- Spread the filling out onto you rolled out dough, making sure you get right to the edges.
- From the shortest side, gently and tightly roll the dough up.
- Using a sharp knife cut the roll into halves, then quarters, then each quarter into 3 segments (wiping your knife in between each cut so that it doesn't stick). This will give you 12 equal size rolls.
- Add the rolls to the baking tin in 3 rolls of 4 (4 on the longest side), making sure they are equally spaced so they have room to expand whilst they prove.
- Beat your egg and brush onto the top of the rolls.
- Again cover with oiled cling film and leave to prove for 30-45 minutes, until they are all touching.
- Heat your oven to 180°C/160°C Fan/350°F/Gas Mark 4
- Bake in the middle of your oven for 20 minutes, until just golden.
- Leave to cool in the tin.
Cinnamon and maple syrup icing
- Add all of the ingredients to a bowl and beat until fully combined and smooth.
- Drizzle your icing over your cooled cinnamon rolls by holding a dessertspoon full of icing high above the rolls and allowing it to drizzle over.
- Drizzle over your the maple syrup.
- Sprinkle of over your demerara sugar.


Comments
No Comments