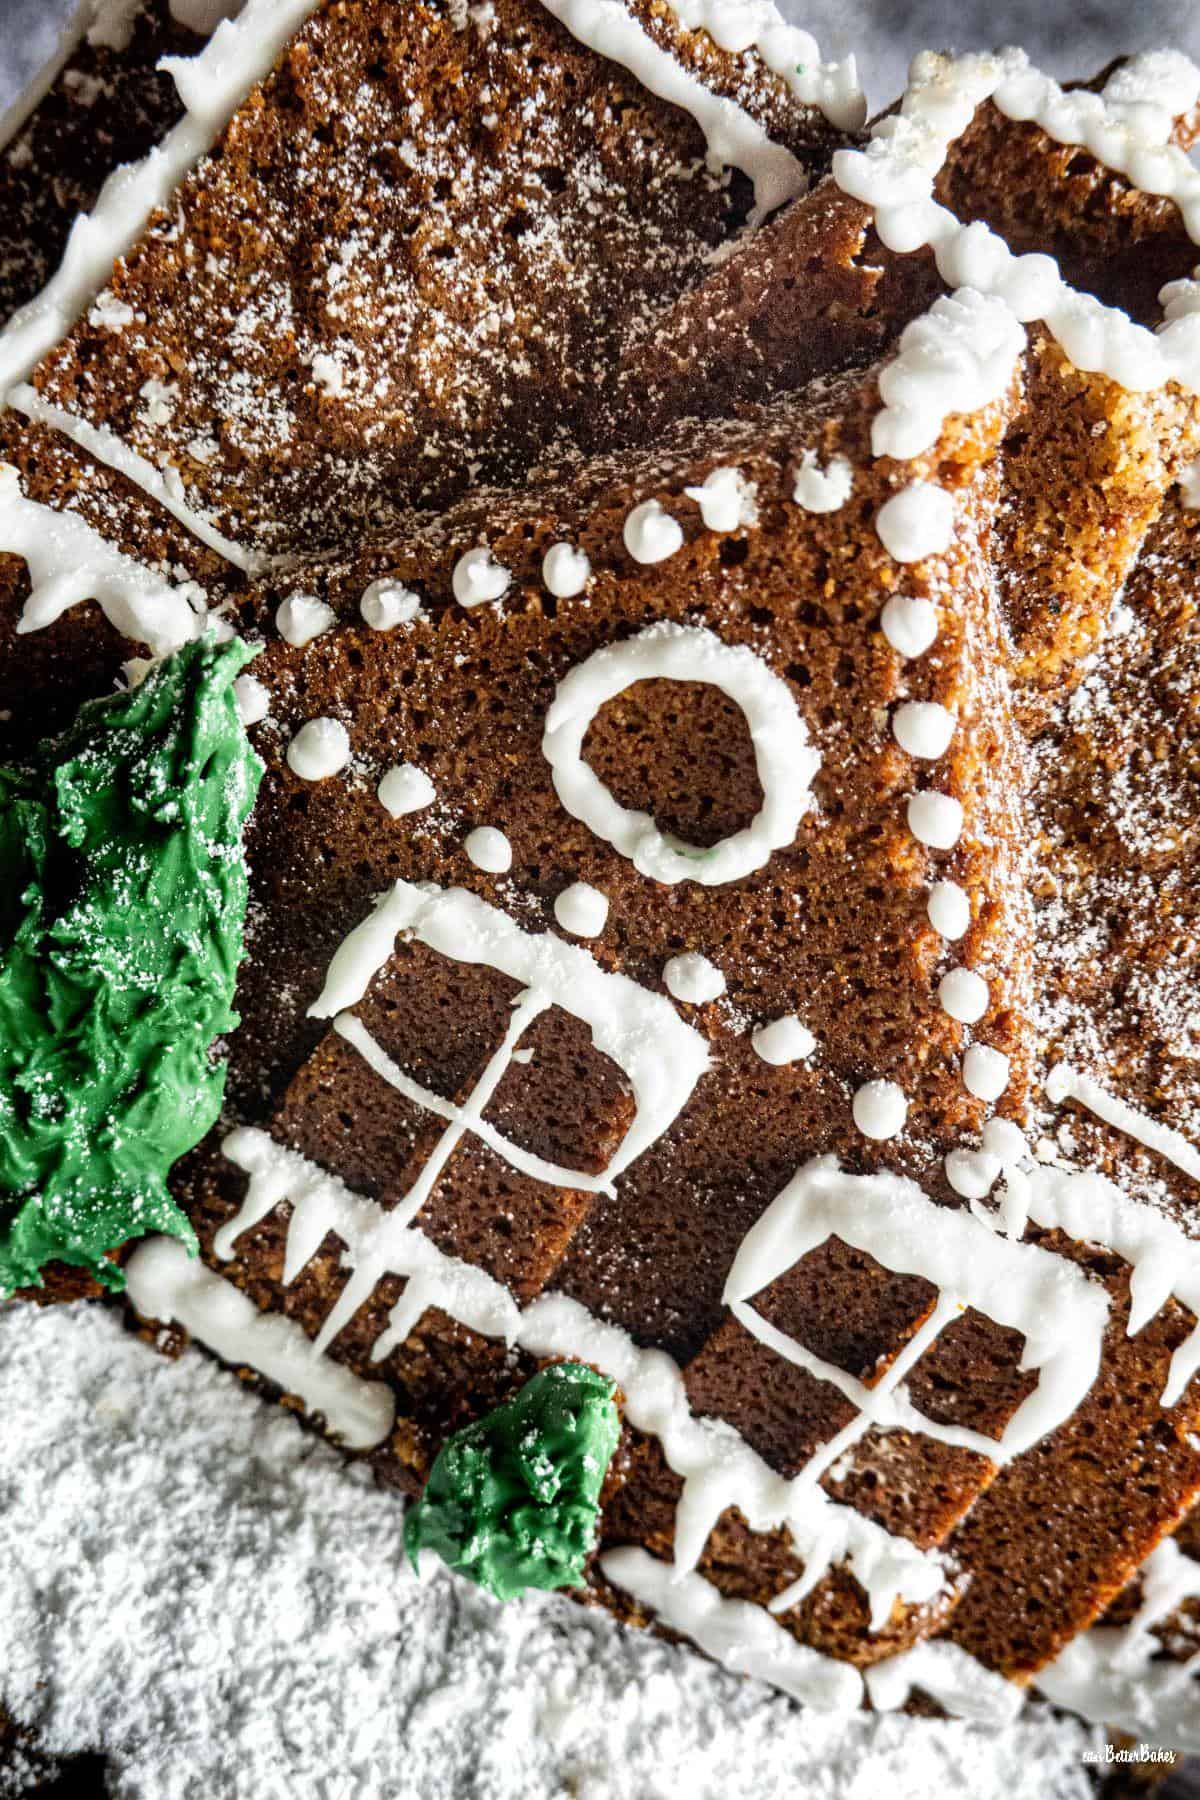
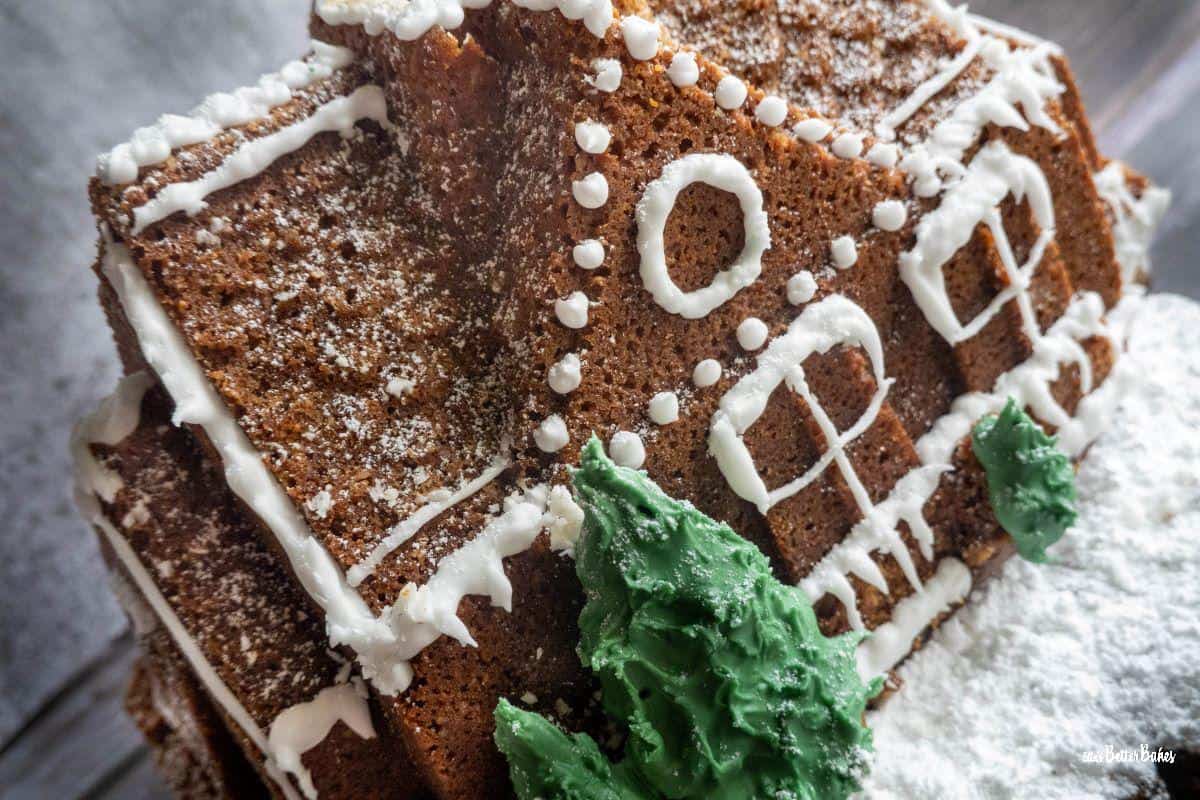
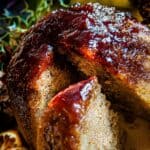
Golden Syrup Cake
A golden syrup cake steeped in rich, caramel golden syrup, with the addition of a hint of citrus. This is a really fun Christmas cake to make and it can be decorated as simply or as elaborately as you fancy 🎄.
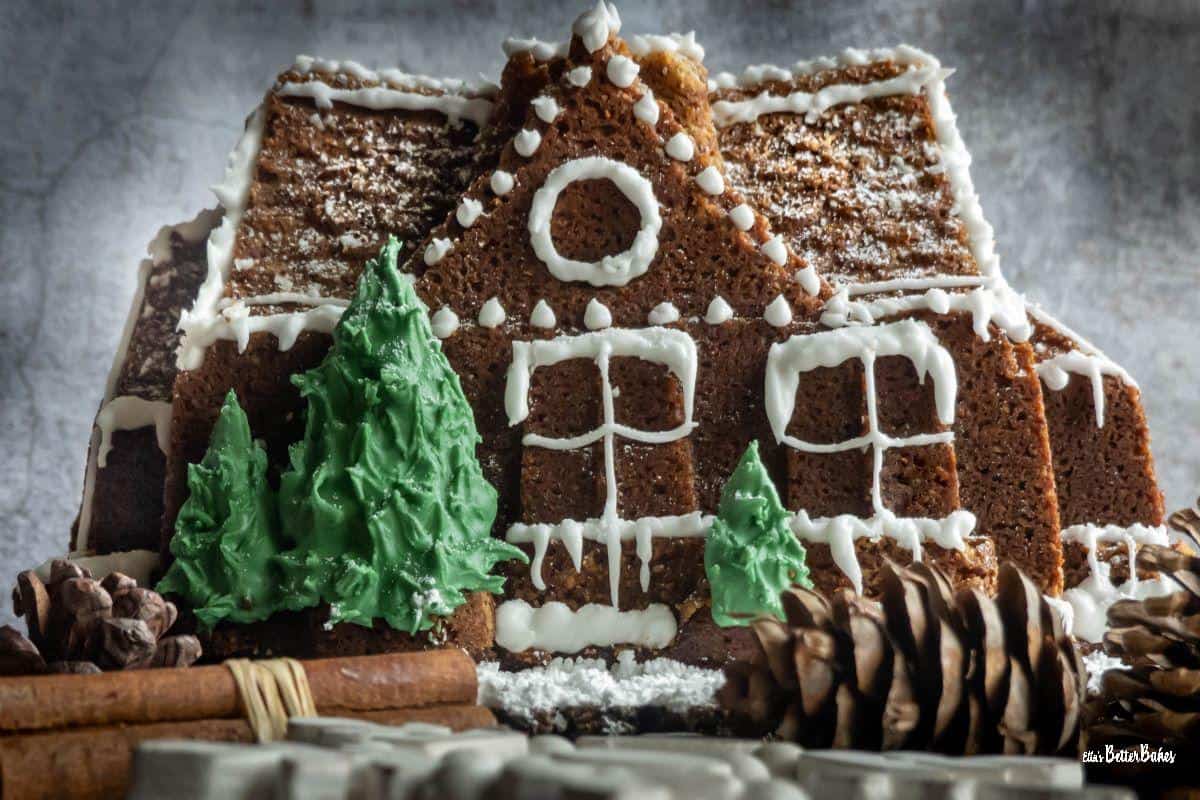
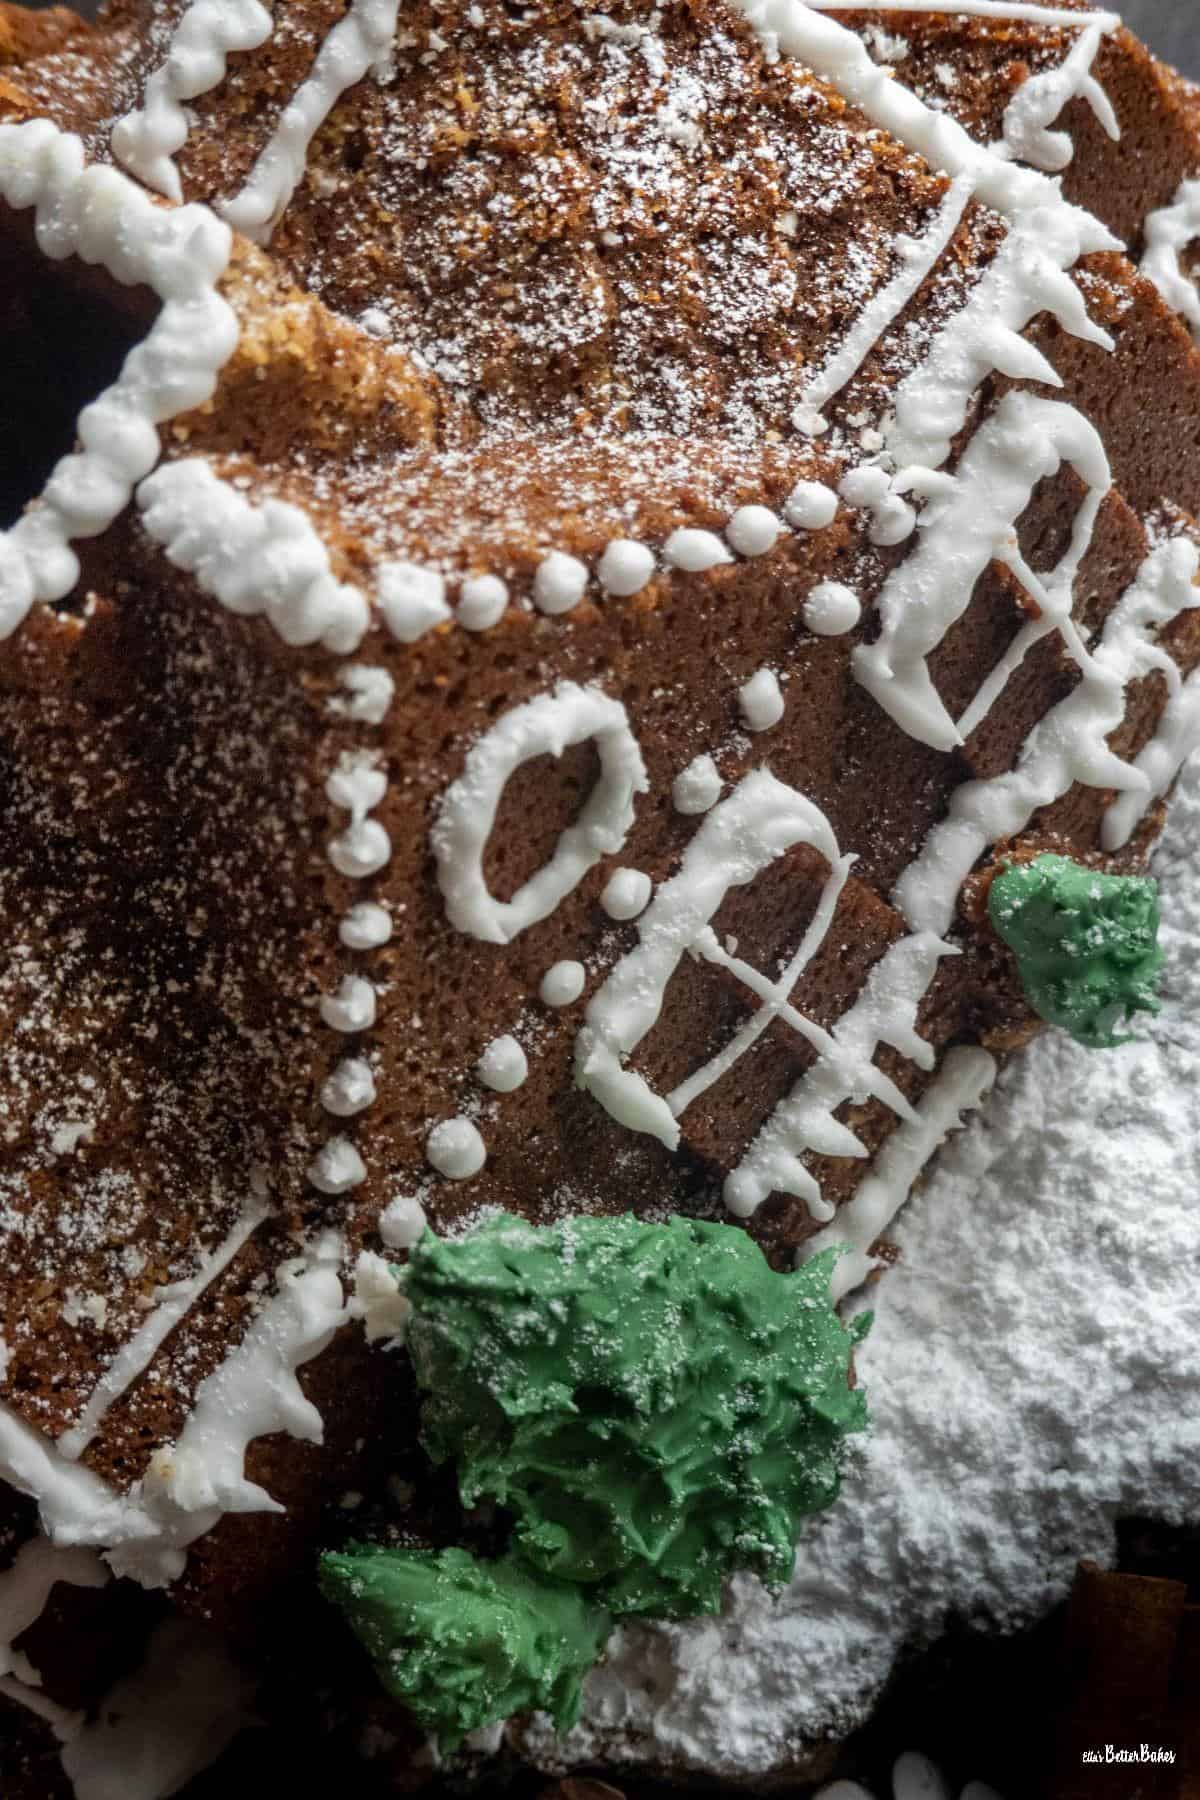
I mean just stop for a moment and look at this Nordic Ware Gingerbread House Tin. It is not just totally adorable?! I had great fun making this Golden Syrup Cake although, I think we can all agree, icing is clearly not my strong point. Hey ho, at least it looks homemade!
Truth be told, however, the first time I used this tin was somewhat disastrous. I hadn't greased and floured it adequately and, whilst the front to the house was perfect, the back was dilapidated with half of it remaining stubbornly attached to the tin. Ramshackle was the effect. The air was somewhat blue in my kitchen.
You can see in "Top Tips" below how I now avoid this scenario!
This cake is a great one to make and decorate with children, it delivers a lovely, soft, dense cake that holds together perfectly in this deep and intricate Bundt tin
I hope you have fun with it 🤶. Happy Christmas Baking lovely people!
Another Christmas Recipe anyone?
Try my Mulled Wine Christmas Pudding
Jump to:
Why Make These Golden Syrup Cake?
Golden syrup sponge pudding flavoured cake ✔️
Supremely soft and dense ✔️
Fun to make with the kids! ✔️
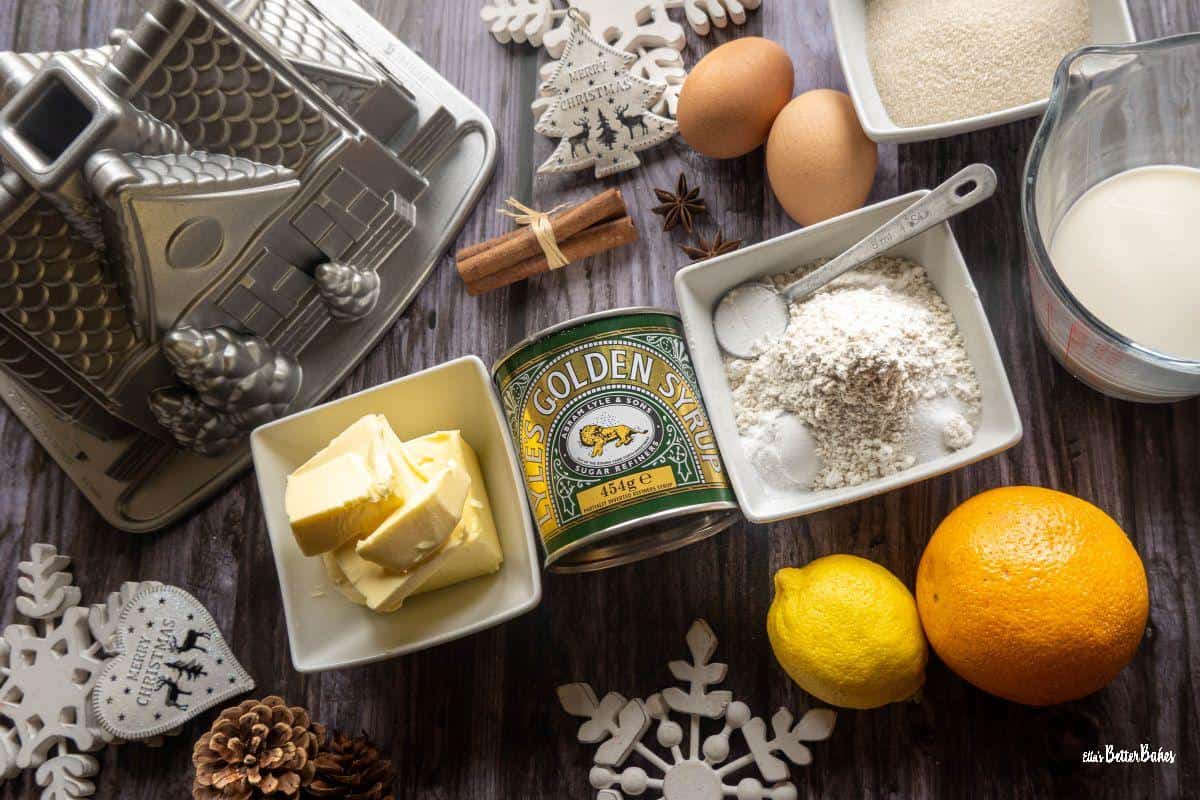
Ingredients and Substitutions
Golden syrup: and lots of it! We want to really taste sweet, caramel golden syrup throughout. I recommend using Tate and Lyle Golden Syrup if you can. You can, however, easily make your own golden syrup. Follow this recipe to find out.
Golden caster (superfine) sugar: golden caster sugar has a slight caramel flavour which matches perfectly with the golden syrup in the cake.
Unsalted butter: we melt the butter because it gives our cake a denser, more solid texture with fewer air bubbles, meaning it holds its shape well.
Self-raising flour and baking powder: or you can use plain (all-purpose) flour plus 3 teaspoons of baking powder. We do need quite a lot of leavening agents in this cake to ensure it rises.
Fine salt: salt is added because it intensifies the flavours within this Golden Syrup Cake.
Cocoa powder: just a little to make the cake a little darker. Yan can omit this if you are happy with a lighter cake.
Eggs: to give our cake structure and flavour.
Milk: adding milk gives the cake a lovely softness, not unlike a muffin texture, which is why we are adding plenty of it.
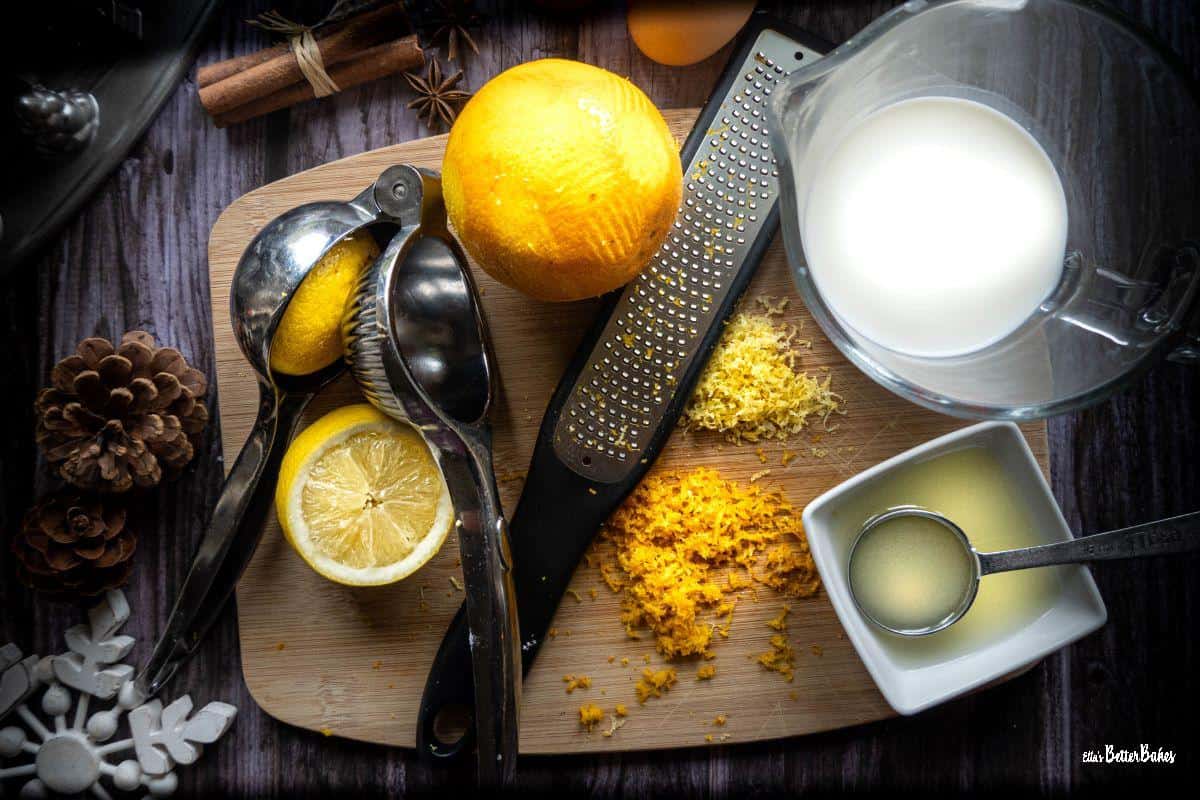
Lemon and orange zest: for a hint of citrus througout.
Icing sugar: to ice your house, either elaborately or simply!
Equipment
- Nordic Ware Gingerbread House Bundt Pan
- Baking tray large enough to stand your tin on whilst baking
- Pastry brush
- Stand mixer or hand mixer
- Mixer bowl or another large mixing bowl
- Measuring Spoons
- Small saucepan
- Wooden spoon
- Fine mesh sieve
- Spatula
Instructions
See end of post RECIPE CARD for precise quantities and instructions.
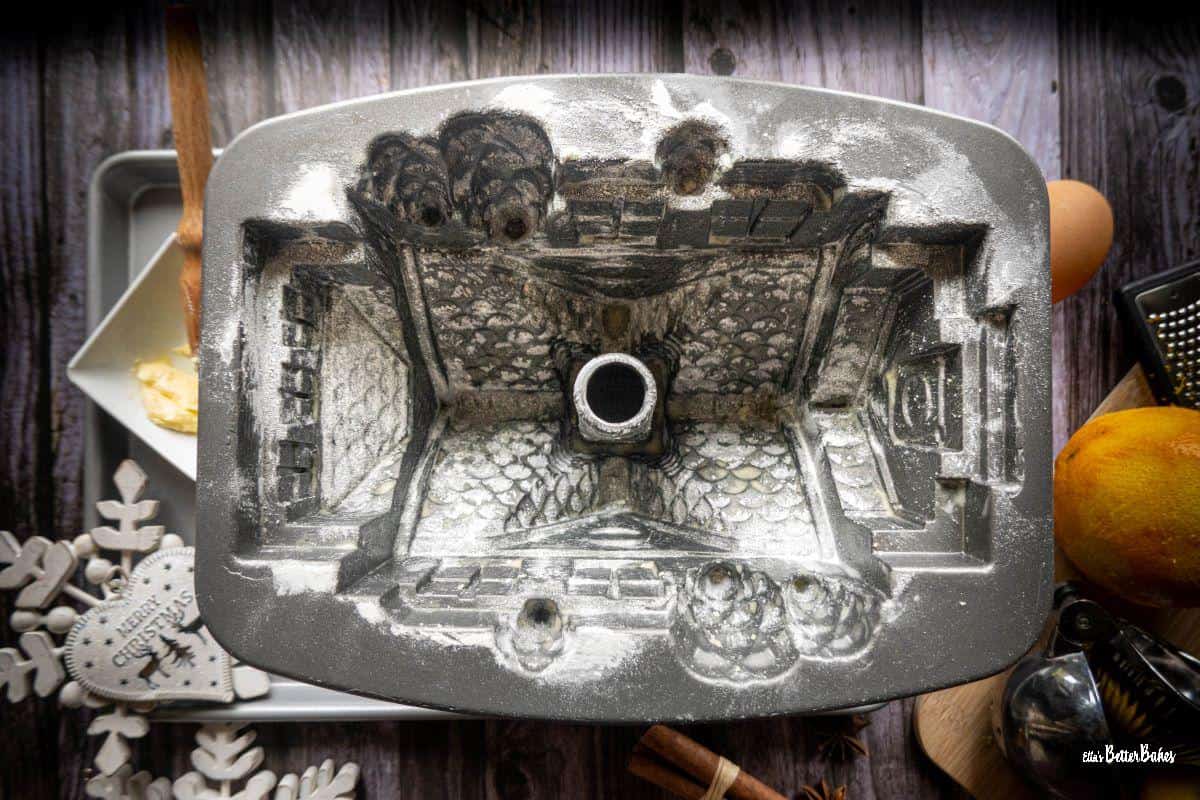
Firstly, grease and flour your tin, to ensure your cake does not stick in and nooks and crannies when you tip it out.

Next, gently melt your butter, sugar and golden syrup together over a low heat and then leave to cool.
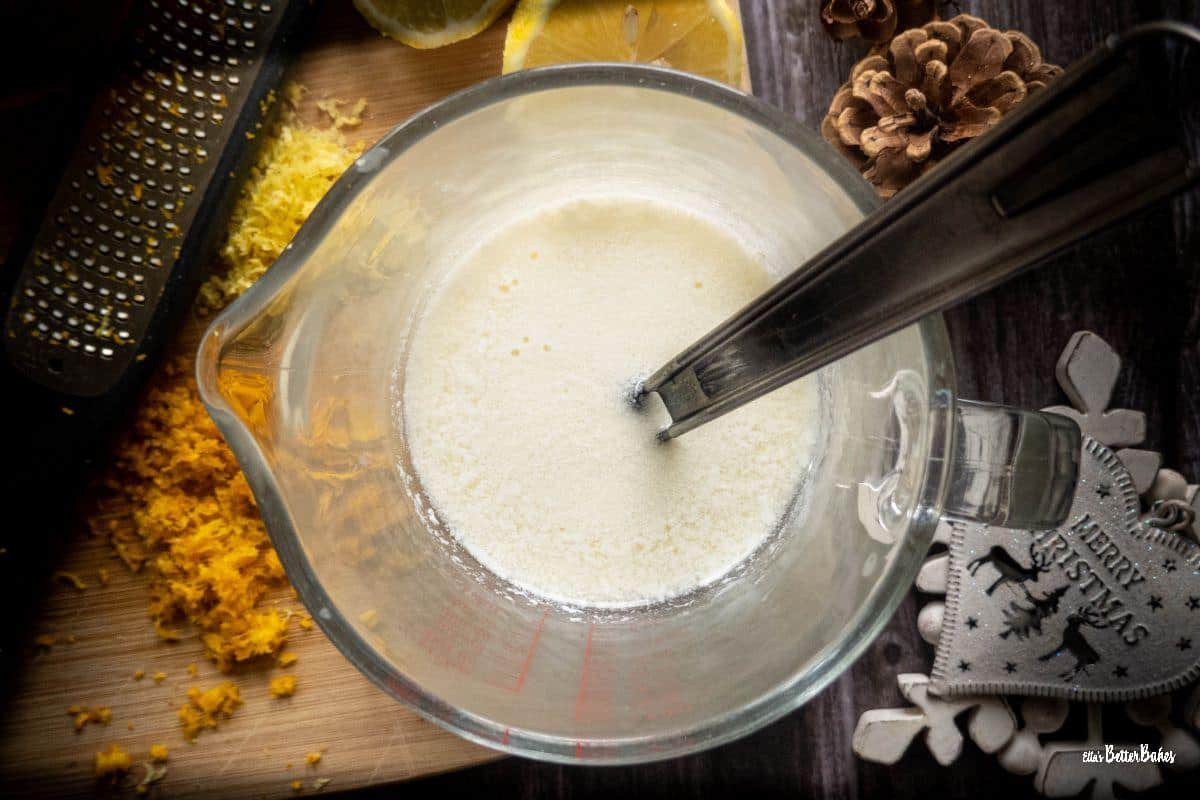
Mix your lemon juice with your milk and set aside to curdle a little. This creates your very own homemade buttermilk and acts as an additional leavening agent for your cake.
Sift your flour, cocoa, baking powder and salt together and set aside.

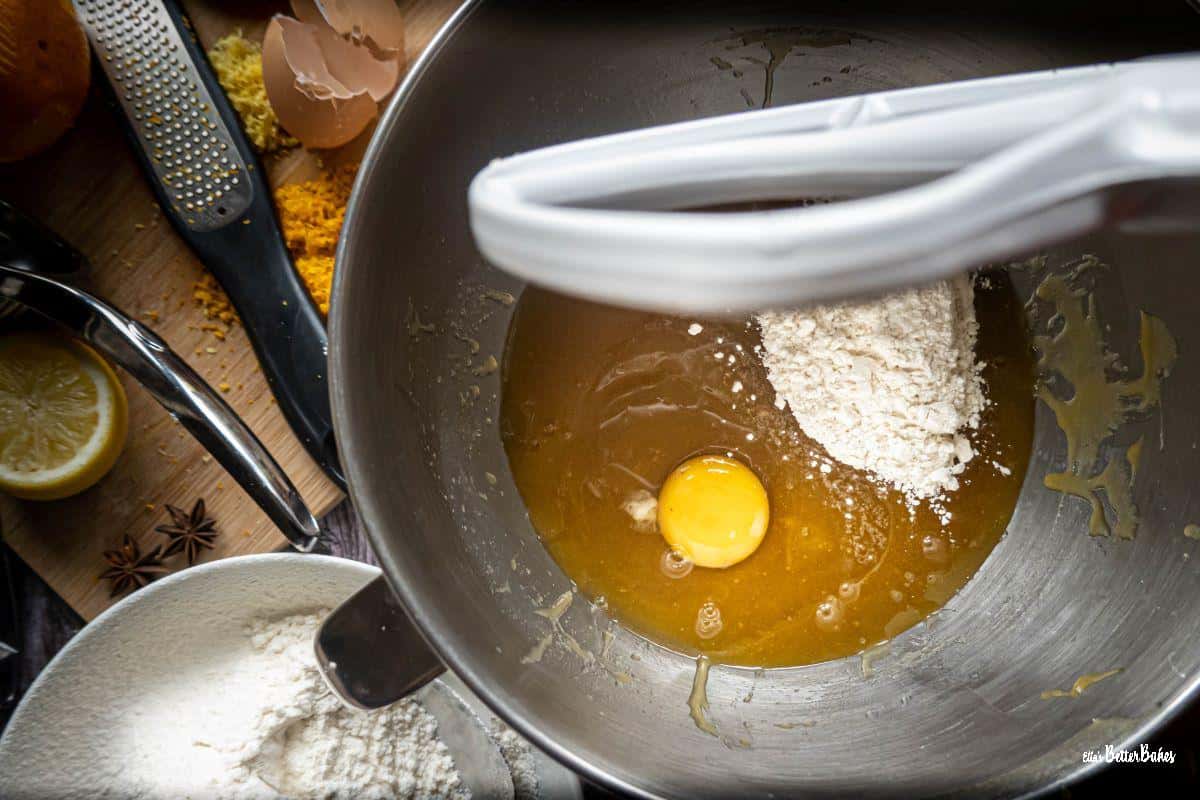
Add an egg a spoonful of the flour mixture to your cooled butter mixture and beat until mixed together, then repeat with the other egg.
Beat in your milk mixture on a low setting.
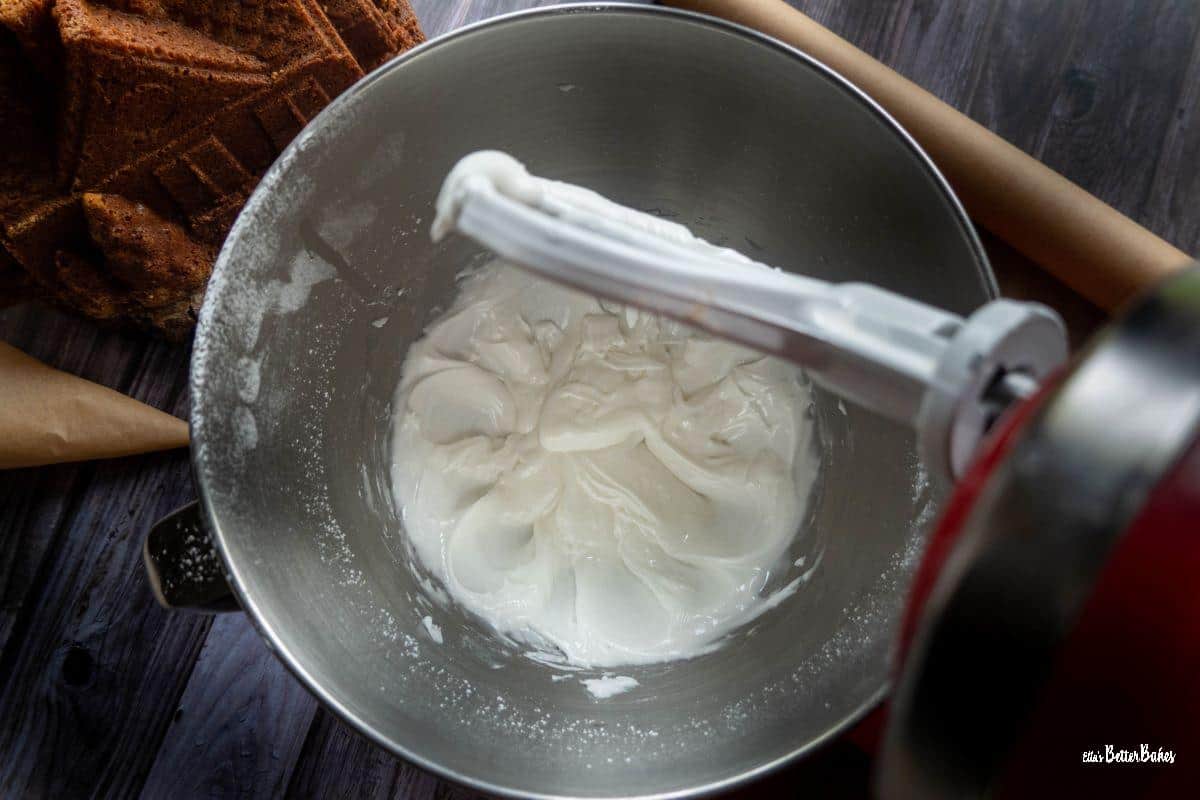
Add the rest of your flour and beat on a low setting until mixed in. Then, give the batter a good beat on medium-high for about 45 seconds to ensure everything is incorporated and to beat in a bit more air.
Pour into your tin, pushing into the cavities at the top of the tin.
Then bake on a baking tray for about an hour to an hour and a quarter until golden and set.
Leave to cool for 15 minutes and then invert onto a cooling rack.
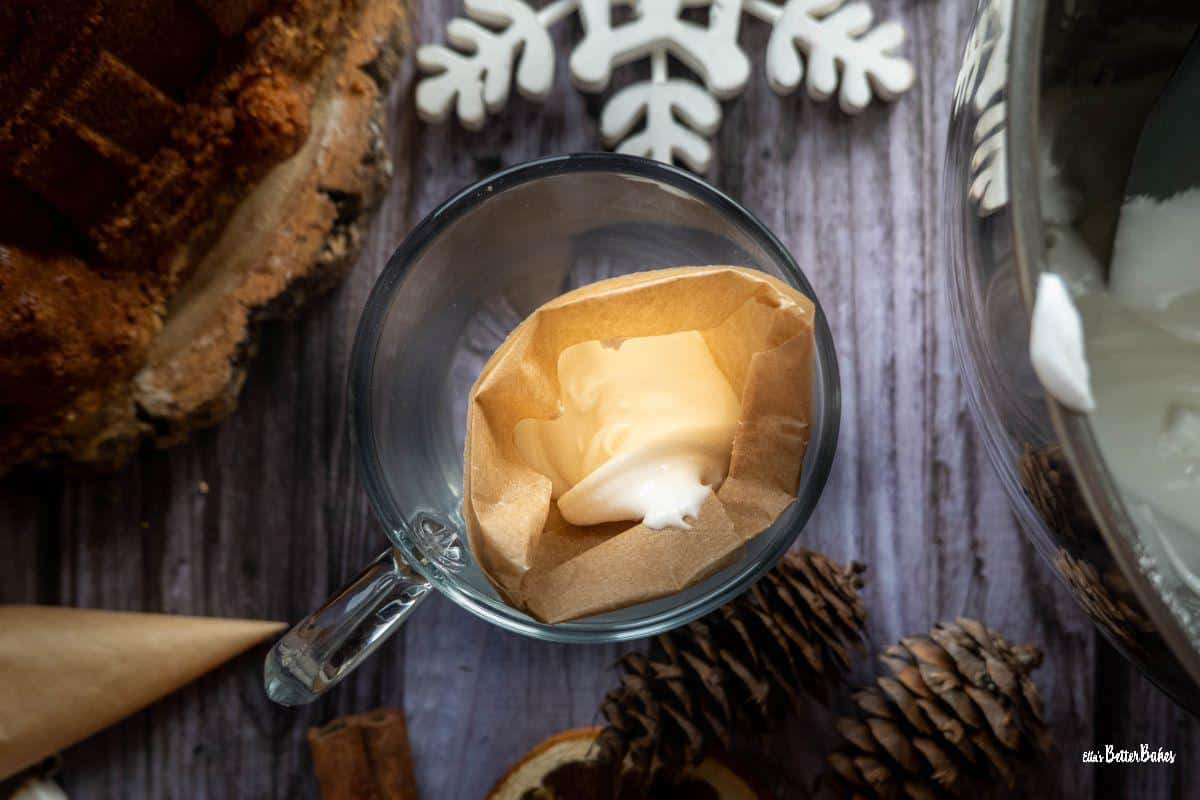
When your cake has cooled milk decorate with royal icing. I will shortly be posting a royal icing recipe and instructions on how to make your own piping bags from parchment paper. But, for now, to make your icing follow this recipe.
Top Tips
Flouring your Bundt pan
I cannot stress enough the importance of carefully greasing and flouring your Nordic Ware Gingerbread House Pan, or indeed any Bundt pan. Take it from me, I've learnt the hard way that there is nothing more disappointing than a ruin, not a house.
These are my tips
- Use a ready-made greasing and flouring spray such as Wilton Cake Release Pan Non-Stick Coating. This does the job in one go and makes life much easier!
OR - Grease you Bundt tin with softened butter by "painting" on the butter using a pastry brush. Then refrigerate your tin for 10 minutes. You will then easily be able to see any areas that have not been buttered so that you can do a repair job.
Then, take a course brown flour or some almond flour and toss it bountifully around the inside of the tin making sure you get it into every nook and cranny. Tip the tin upside down to release any excess. Check your handiwork and if any areas do not posses a coating of flour repeat the process (you may need to add a little more butter to these areas first so that the flour sticks).
The advantage of flouring with a courser brown flour is that it provides a thicker coating on your tin to protect your cake from sticking and help you more easily to locate any areas that have been missed.
Variations
If you want to make this Golden Syrup Cake as a loaf cake instead simply reduce the quantities by half and use a 2lb loaf tin. Line the tin with greaseproof (parchment) paper (as I do in my Jamaican Ginger Cake recipe). Leave an overhang, so that you can hold the edges and easily remove the cake.
When baked, pour over 3 tablespoons of golden syrup as soon as the cake come out of the oven, leave for 10 minutes to cool and then remove to a cooling rack.
Did you try this recipe?
Please leave a ⭐⭐⭐⭐⭐ rating in the Recipe Card below.
Storage
This Golden Syrup Cake keeps for up to 5 days in an airtight container.
You can freeze this cake. Wrap it in cling film (plastic wrap) and freeze, then fully defrost.
FAQ
Golden Syrup is very popular in the UK. It is made from sugar, water and lemon juice. To make golden syrup simply heat sugar and water until the sugar has dissolved. Bring to boiling point and then add lemon juice. Allow the syrup to simmer on a low heat, without stirring, for an hour. It will keep for up to a year if stored in a sterilised jar using sterile utensils.
You can use corn syrup if only a little is called for by the recipe. You can make your own golden syrup or you can substitute it with the same amount of clear honey.
Linked Recipes
Some similar recipes you might like to try:
Chocolate Orange Cake
Lemon and Blackberry Cake
Almond, Blueberry and Limoncello Bundt Cake
Or for an alternative steamed sponge Christmas Pudding recipe, why not give this one a go:
📖 Recipe

Golden Syrup Cake (Christmas version!)
Here's what you'll need...
- Small saucepan
Ingredients you'll need...
Nordic Ware Christmas Cottage Cake
- 2 tablespoon softened butter for greasing in
- 4 tablespoon flour for flouring tin - see Notes below
- 300 g unsalted butter (US = 1¼ Cups plus 2 tbsp)
- 300 g golden caster sugar (US = 1½ Cups)
- 400 g golden syrup
- 300 ml whole milk at room temperature (US = 1¼ Cups)
- 1 tablespoon and 1 teaspoon lemon juice
- 385 g plain flour (all-purpose flour) (US = 2 Cups and 12 tbsp)
- 3 teaspoon baking powder
- 1 tablespoon cocoa powder
- ¼ teaspoon fine salt
- 2 large eggs at room temperature (US = extra large)
- zest of a 2 lemons
- zest of an orange
Here's what we do...
Nordic Ware Christmas Cottage
- Heat your oven to 150°Fan/170°C/325°F/Gas mark 3.
- First of all prepare your tin (see "Top Tips" in Notes below). Take your softened butter and "paint" generously into every crevice, nook and cranny in your tin.
- Then, take your 4 tablespoons of flour and shake into the inside of the tin, lifting and turning the tin as you go to try to ensure all of the insides are coated.
- Then invert your tin onto a baking sheet or similar and tip out the excess flour. Double check every bit of the inside or your tin has been covered and reapply if necessary. This is quite an intricate tin and needs to be liberally coated with butter and sugar to ensure that it comes out in one piece, or you might end up with a ruin rather than a cottage!
- Next, gently melt your butter, sugar and golden syrup together over a low heat. Keep squishing the butter to speed things up a bit. Stir regularly with your wooden spoon to ensure everything melts evenly.
- Once melted, set aside to cool (if too warm it will scramble your eggs when you add them).
- Whilst your mixture cools, add your lemon juice to your milk and mix together, set aside so that it has time to curdle.
- Sift your flour, cocoa, baking powder and salt together and set aside.
- Once your butter mixture is cool, you can add your eggs. Break in the first one and add a dessertspoonful of your flour mixture. Beat on a low setting until fully incorporated and the lumps of flour have disappeared.
- Repeat the above with your second egg.
- Then, pour in all of your milk mixture and beat on a low setting, again until just incorporated.
- Add in the rest of your flour and beat on a low setting until mixed in.
- Then scrape down the side and base of the mixing bowl with your spatula to ensure everything gets mixed together.
- Beat on medium-high for about 45 seconds. The mixture will be quite liquidy so don't worry about that.
- Pour your cake batter into your tin and place it onto your baking sheet then place into your oven. As the tin is quite large you may need to bake your cake quite low in your oven.
- Bake for 1-1¼ hours or until a skewer inserted into the centre of the cake comes out clean.
- Leave to cool in the tin for 10-15 minutes then invert it onto a cooling rack to cool.
- Once cool decorate with royal icing however you choose!
Supporting Notes
Flouring your Bundt pan
I cannot stress enough the importance of carefully greasing and flouring your Nordic Ware Gingerbread House Pan, or indeed any Bundt pan. Take it from me, I've learnt the hard way that there is nothing more disappointing than a ruin not a house.These are my tips
- Use a ready-made greasing and flouring spray such as Wilton Cake Release Pan Non-Stick Coating. This does the job in one go and makes life much easier! OR
- Grease you Bundt tin with softened butter by "painting" on the butter using a pastry brush. Then refrigerate your tin for 10 minutes. When you take it out you should easily be able to see any areas that have not been buttered and then you can do a repair job. Then, take a course brown flour or some almond flour and toss it bountifully around the inside of the tin making sure you get it into every nook and cranny. Tip the tin upside down to release any excess. Check your handiwork and if any areas do not posses a coating of flour repeat the process (you may need to add a little more butter to these areas first so that the flour sticks). The advantage of a flouring with a courser brown flour like this that it provides a thicker coating on your tin and you can also see far easier any areas that have been missed.


Comments
No Comments